Have you ever admired a pristine garden bed and wished you could recreate that look in your own outdoor space? It’s often difficult to unlock the world of color in our garden beds, but now there is help at hand. This guide to painting garden beds will uncover creative ways to transform these once-drab spaces into vibrant havens of horticulture. This guide will also be your key to unlocking the potential of any garden bed – you won’t believe the difference some simple color can have!
Types and Forms of Garden Beds
Garden beds can be divided into two main types: raised beds and in-ground beds. Each type of garden bed has its own unique characteristics that make it suited to different kinds of gardens and climates.
Raised Beds: Raised garden beds are higher than the surrounding soil, which makes them ideal for areas with poor drainage or heavy clay soils. The sides of a raised bed help retain moisture, while also providing support for the plants. They can easily be filled with soil-less potting mixes or amended soils. These beds are usually built out of wood, but can even be constructed from metal or stone in some cases.
In-Ground Beds: In-ground garden beds are planted directly into the ground. This type of bed is best suited for gardens with good drainage and fertile soil. Planting in-ground beds allows plants to establish a strong root system, helping them to draw up nutrients and moisture from the soil. These beds can also be used for container gardening, where plants are grown either in containers or bags of potting mix placed directly into the ground.
Properly preparing your garden beds before planting will help ensure that your plants thrive and produce healthy harvests [1]!How to paint Garden Beds?
Choosing the right paint
Garden beds are exposed to the elements so it is important to choose paint that is suitable for use outdoors. Select a water-based acrylic paint for best results. Choose a color that will complement your garden décor and the surrounding environment.
Preparing the surface
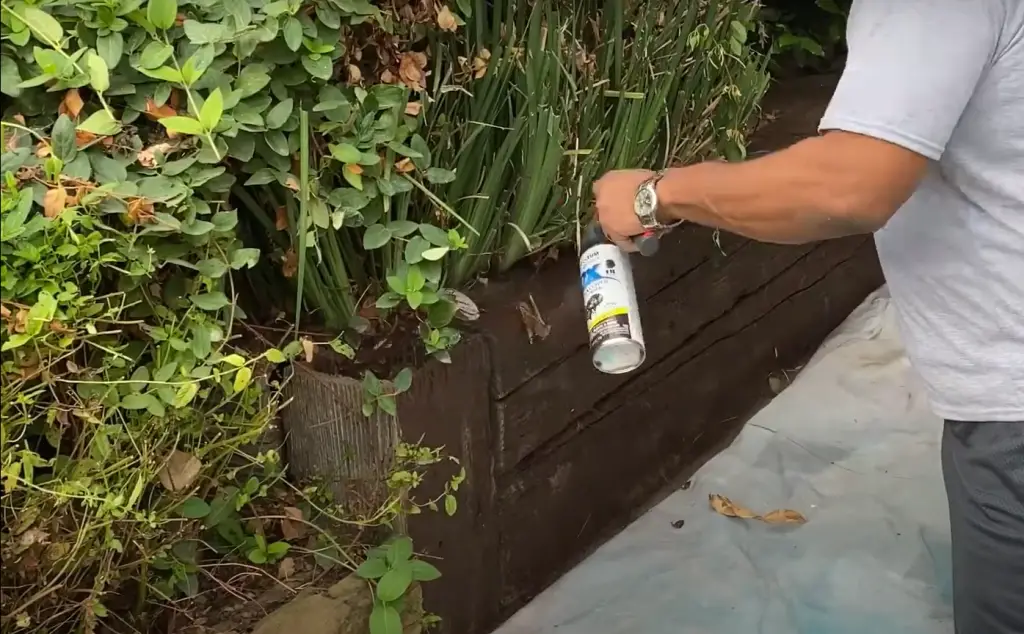
Before you start painting, clean the bed by removing any dirt or debris using a brush or pressure washer and allowing it to dry thoroughly. Check for any imperfections in the wood such as scratches, chips, or cracks, and sand down these areas with fine-grade sandpaper before wiping away any dust particles with a damp cloth.
Painting correct methodologies
Once you have prepared the surface of your garden bed, it’s time to start painting! Begin with a primer or sealer and apply two coats. This will strengthen the wood, protect it from water damage, and improve adhesion. After the primer is dry, use a brush to apply two layers of your chosen paint color. Allow each coat to dry properly before applying the next one.
When you have finished painting, apply a waterproof varnish over the top for extra protection against UV rays and moisture. Make sure to follow all safety instructions when using any solvent-based products such as varnish, as these can be dangerous if not handled correctly.
Finishing touches
Finally, give your garden bed an extra touch by adding some decorative accents such as outdoor lighting or decorations! This will make your garden bed look even more beautiful and inviting.
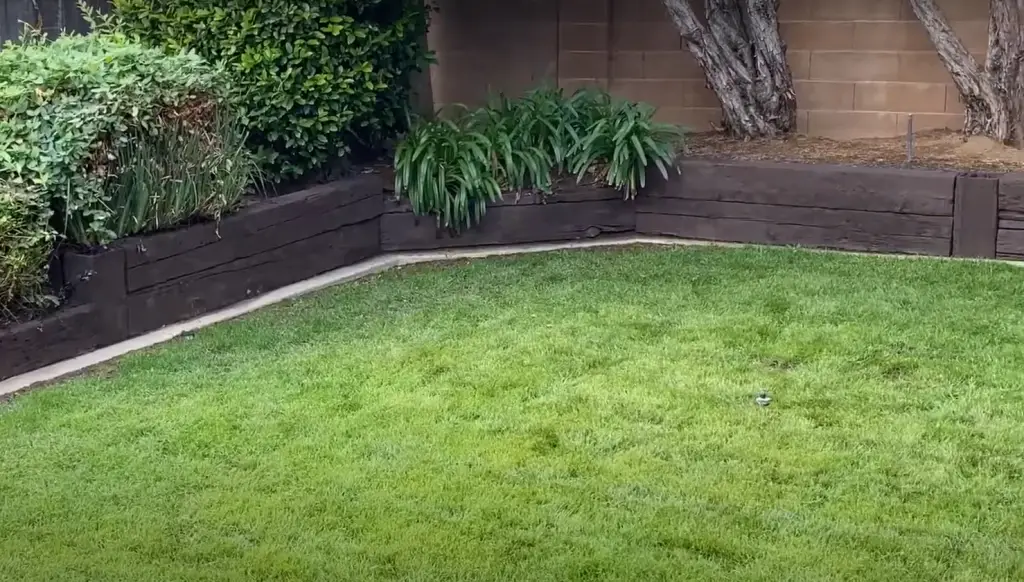
By following these steps, you can easily give your garden bed a new look that will last for years to come.
Products to avoid
Avoid using oil-based paints, as these are not suitable for outdoor use and may cause the wood to rot or warp over time. Also, steer clear of any latex materials that contain PVC as they can release harmful chemicals into the environment. It is best to stick with water-based materials and environmentally friendly products whenever possible [2].
Tips for Painting Garden Beds
Use a non-toxic, water-based paint
When it comes to garden beds, you want to use the safest possible paint. Look for non-toxic water-based paints that won’t harm plants or pollute the environment.
Apply a primer coat first
You should always apply a primer coat to any surface before applying regular paint. This will help ensure that your paint job looks smooth and more uniform in color. It is especially important if you are painting on wood, as the primer will help protect it from moisture and decay.
Use painter’s tape around edges and trim
Painter’s tape can be incredibly useful when it comes to painting garden beds, as this will ensure that any lines or colors stay within their intended areas.
Take the time to cover any trim, edges, and other areas that shouldn’t be painted.
Use a brush or roller specifically designed for outdoor use
Using the right tools is key when it comes to painting garden beds. Look for brushes and rollers specifically designed for outdoor use, as these will help make sure your paint job looks great and lasts even longer.
Clean up thoroughly after painting
Once you’ve finished painting, take the time to clean up thoroughly. This includes wiping down any surfaces that were painted as well as sweeping up any debris from the ground around your garden bed. Proper cleanup will ensure that your bed looks its best for years to come!
Consider Oops Paint for Budget-Friendly Options
If you’re looking for budget-friendly options, consider using leftover paint from other projects, or “Oops Paint” from your local hardware store. This will allow you to get the look you want without breaking the bank!
Decide whether or not to use a protective coat
Depending on the size of your garden bed, you may want to consider applying an extra protective coat of paint. This can help protect against moisture and UV rays, ensuring that your painted garden bed looks great for years to come [3].
Pros and Cons of Painting Raised Garden Beds
Painting raised garden beds can be a great way to add charm and character to your outdoor space. It can also protect from the elements and help keep weeds away.
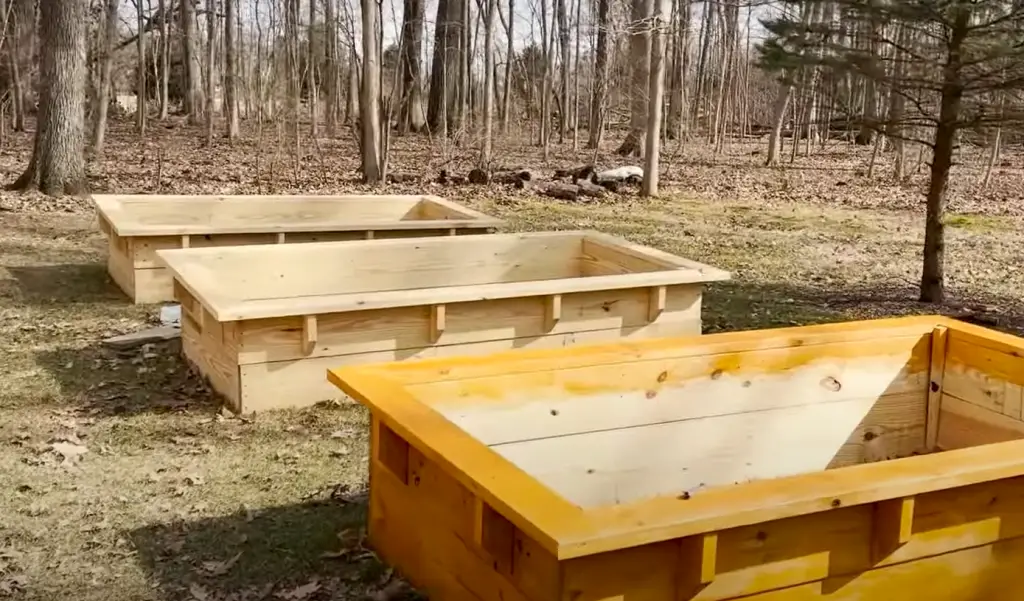
However, there are several pros and cons to consider when deciding if painting is right for you.
Pros:
- Painting raised garden beds can enhance their aesthetic appeal by creating an attractive look that welcomes visitors into your garden.
- Paint provides a layer of protection from pests, mildew, rot, rusting, warping, and more.
- Paint is relatively easy to apply once the bed has been properly prepared and it’s usually inexpensive.
- It is possible to customize paint colors that will match or complement your outdoor space.
Cons:
- Painting raised garden beds can be time-consuming and labor-intensive.
- It is necessary to properly prepare the surface before applying paint, otherwise it may not adhere well or last very long.
- Paint can fade over time when exposed to sunlight or rain, so it needs to be reapplied periodically.
- If you choose the wrong type of paint, it can cause damage to the environment as some paints contain toxins that are bad for plants and animals.
Overall, painting raised garden beds can be a great way to add charm and character to your outdoor space, but there are pros and cons worth considering before taking on this project. Be sure to do your research and choose the right type of paint to ensure your garden bed is properly protected from the elements.
How to build raised garden beds?
Raised garden beds are an easy and attractive way to grow your own vegetables, herbs, and flowers. Building a raised garden bed is a simple project that can be completed in just a few hours.
There are several different materials you can use to build your raised bed. Common options include wood, metal, stone, or brick masonry, concrete blocks, and plastic. Before building your raised garden bed it is important to determine what type of material you will use and the size and shape of your bed.
Once you decide on the best option for your garden bed it’s time to start building! If using boards or other lumber, begin by cutting them into equal lengths depending on how big or small you want the bed to be. To assemble the bed, attach two of the boards together with screws or nails at each corner and add additional screws along the length of each board. Repeat this process until you have constructed a box shape. Generally, raised beds are made from wood that is untreated and unpainted and may need to be pre-drilled before attaching with screws/nails. The last step in building your raised garden bed is to fill it up with soil!
The best type of soil for raised beds is nutrient-rich organic soil like compost or topsoil mixed with aged manure (if desired).
Once filled, you are now ready to plant your favorite vegetables, herbs, and flowers! Raised garden beds provide a great way to grow a variety of plants and flowers attractively. With just a few hours and some basic materials, you can build your own raised bed and begin growing your own produce [4].How to maintain painted raised garden beds?
Maintaining painted raised garden beds is relatively simple and rewarding. Here are some tips:
- Monitor for weeds – Pull them out as soon as you see them to prevent them from becoming a larger problem.
- Water consistently – Make sure the soil in your raised bed stays moist but not soggy by watering it regularly, especially during dry seasons or heat waves.
- Fertilize periodically – Apply fertilizer every few months to provide essential nutrients to your plants and keep them healthy.
- Prune carefully – Trim away dead or damaged branches and leaves to help encourage new growth and make sure there’s enough space for air circulation between the plants.
- Check for pests – Inspect your plants regularly for signs of insect damage or disease and take the necessary steps to get rid of them before they become a major problem.
- Add compost – Composting helps keep soil in top condition by adding organic matter, improving drainage, and providing essential nutrients.
- Re-paint if needed – Touch up any chipped or faded paint on your raised bed every few years to help keep it looking its best. This simple routine should help you maintain your painted raised garden beds for years to come!
FAQ
What kind of paint do you use on a garden bed?
When it comes to painting a garden bed, the best paint to use is exterior-grade acrylic paint. This type of paint will provide the best protection against moisture, wear and tear, and environmental conditions such as UV rays.

For optimal results, make sure to choose a paint that is specifically designed for outdoor use. When applying the paint, be sure to take extra care in properly preparing the surface so that your finished product looks great! Also, remember to always follow instructions on the label of whatever product you are using. A proper application will ensure long-lasting beautiful results.
Is it safe to paint garden beds?
Yes, it is safe to paint garden beds as long as you are using high-quality exterior-grade acrylic paint. If the instructions on the label are followed correctly, there should be no problem with painting your garden bed. However, if you have any allergies or sensitivities to certain chemicals, we recommend that you read the product label carefully before starting your project. Additionally, make sure to take proper safety precautions such as wearing protective goggles and gloves when working with any kind of paint. Taking these steps can help ensure that your painting experience is successful and enjoyable!
Can I paint a planter box?
Yes, you can paint a planter box with exterior-grade acrylic paint. It is important to properly prepare the surface before painting by cleaning and sanding it so that the paint adheres properly. Also, keep in mind that when using any kind of paint, it is important to use protective equipment such as goggles and gloves. Once your planter box is painted, be sure to waterproof it so that it lasts for years without needing additional maintenance or repairs. Following these steps will ensure that your planter box looks great and provides years of enjoyment!
What kind of paint do you use on an outdoor flower bed?
When painting an outdoor flower bed, the best paint to use is exterior-grade acrylic paint. This type of paint will provide the best protection against moisture, wear and tear, and environmental conditions such as UV rays. For optimal results, make sure to choose a paint that is specifically designed for outdoor use. When applying the paint, be sure to take extra care in properly preparing the surface so that your finished product looks great! Also, remember to always follow instructions on the label of whatever product you are using. A proper application will ensure long-lasting beautiful results.
Can I use any kind of paint on my garden furniture?
No, not all types of paints can be used on garden furniture.
Other types of paints may not be suitable for outdoor use and could end up fading or peeling more quickly than expected. It is also important to properly prepare the surface before painting by cleaning and sanding it so that the paint adheres properly. Following these steps will help ensure that your garden furniture looks great and lasts for years!Do I need to waterproof my painted garden bed?
Yes, it is recommended that you waterproof your painted garden bed to protect it from moisture, wear and tear, and environmental conditions such as UV rays.
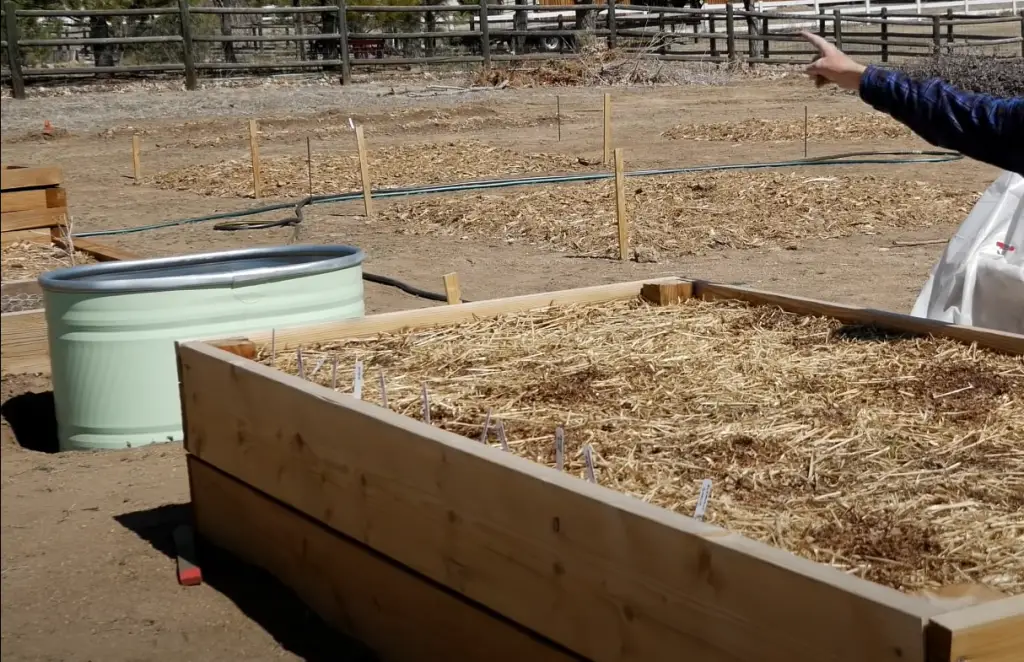
There are many different products available on the market for waterproofing painted surfaces, so be sure to read the instructions on the label before starting your project. Properly waterproofing your garden bed will help ensure that it looks great and provides years of enjoyment! `
How can you paint outdoor garden furniture?
Painting outdoor garden furniture can be done with exterior-grade acrylic paint. It is important to properly prepare the surface before painting by cleaning and sanding it so that the paint adheres properly. Additionally, make sure to take proper safety precautions such as wearing protective goggles and gloves when working with any kind of paint. Once your garden furniture is painted, be sure to waterproof it so that it lasts for years without needing additional maintenance or repairs. Following these steps will ensure that your garden furniture looks great and provides years of enjoyment!
Why do you need to use protective equipment when painting?
It is important to use protective equipment such as goggles and gloves when painting to protect yourself from any potential hazards. Paint can contain potentially harmful chemicals which could cause skin irritation or other health issues if you come into direct contact with it. Additionally, paint fumes can be hazardous to your breathing. Wearing protective gear and taking proper safety precautions will help ensure that your painting experience is successful and enjoyable!
Why is it important to waterproof painted outdoor surfaces?
Waterproofing painted outdoor surfaces is important because it helps protect the paint from moisture, wear and tear, and environmental conditions such as UV rays. Properly waterproofing your project will help ensure that it looks great and provides years of enjoyment! Additionally, it can also help extend the life of the paint and keep it looking vibrant for a longer period. Be sure to read the instructions on whatever product you are using for the proper application so that your painted surface is well protected.
How to choose the right paint for outdoor furniture?
When choosing a paint for outdoor furniture, it is important to select one that is designed for exterior use. Exterior-grade acrylic paints are best because they are designed to stand up to the elements and provide a long-lasting finish. Additionally, make sure to read the instructions on the label of whatever product you are using so that you follow all safety precautions and get the best results. Following these steps will help ensure beautiful results that last!
What are the steps to properly prepare a surface before painting?
Before painting any surface, it is important to thoroughly clean and sand the area. This helps ensure that the paint adheres properly and will provide better long-term results.
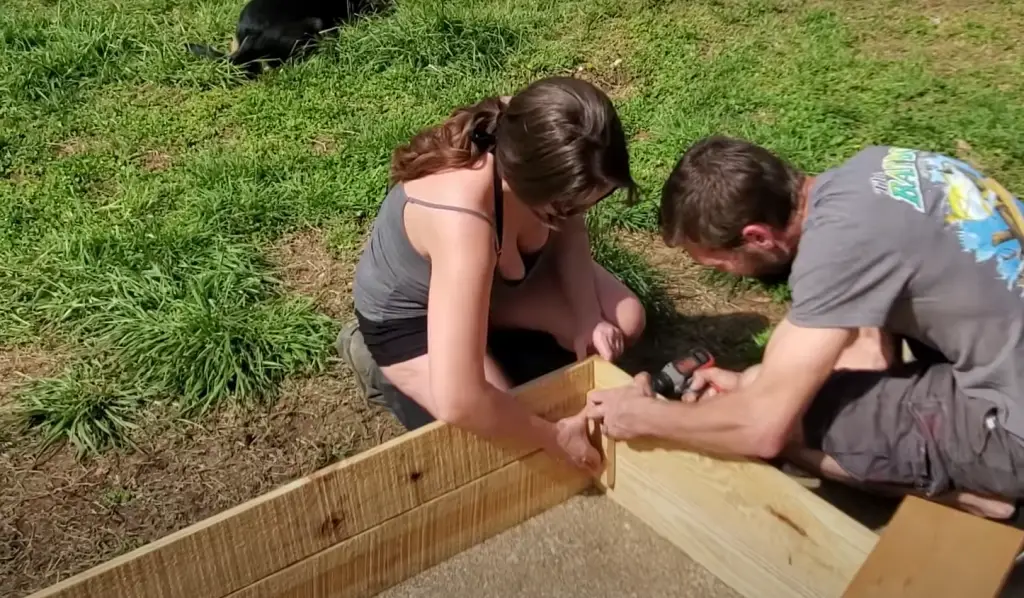
Additionally, it is also important to take proper safety precautions such as wearing protective goggles and gloves when working with any kind of paint. Following these steps will help ensure that your project looks great and provides years of enjoyment!
What is the best way to waterproof painted outdoor surfaces?
The best way to waterproof painted outdoor surfaces is to use a sealant or waterproofing product. These products are designed specifically for this purpose and come in both spray and brush-on forms. Be sure to read the instructions on the label of whatever product you are using so that you know how to properly apply it. Doing so will help ensure that your project looks great and provides years of enjoyment!
What should be done after painting outdoor furniture?
After painting outdoor furniture, it is important to waterproof it so that it lasts for years without needing additional maintenance or repairs. Additionally, you may also want to apply a protective coat of polyurethane or a similar product over your painted surface to further protect it from the elements.
Useful Video: Bailey Built: How to paint a raised Garden Bed
Conclusion
Painting of garden beds is the perfect way to add a splash of color and personality to any garden landscape. It’s an easy, affordable project that can be completed in just a few hours or days, depending on the size of your garden. The result will instantly make your garden stand out from the rest with its unique design and attractive colors. With some creative planning and painting techniques, you can transform even the most ordinary of garden beds into something truly special. So, don’t hesitate — grab some paint brushes, roll up your sleeves, and get creative! You’ll be amazed at what a difference it makes!
References:
- https://www.bobvila.com/articles/best-raised-garden-bed/
- https://www.homesandgardens.com/gardens/can-you-paint-a-raised-garden-bed
- https://crateandbasket.com/tips-for-painting-raised-garden-beds/
- https://www.almanac.com/content/how-build-raised-garden-bed






Leave a Reply
View Comments