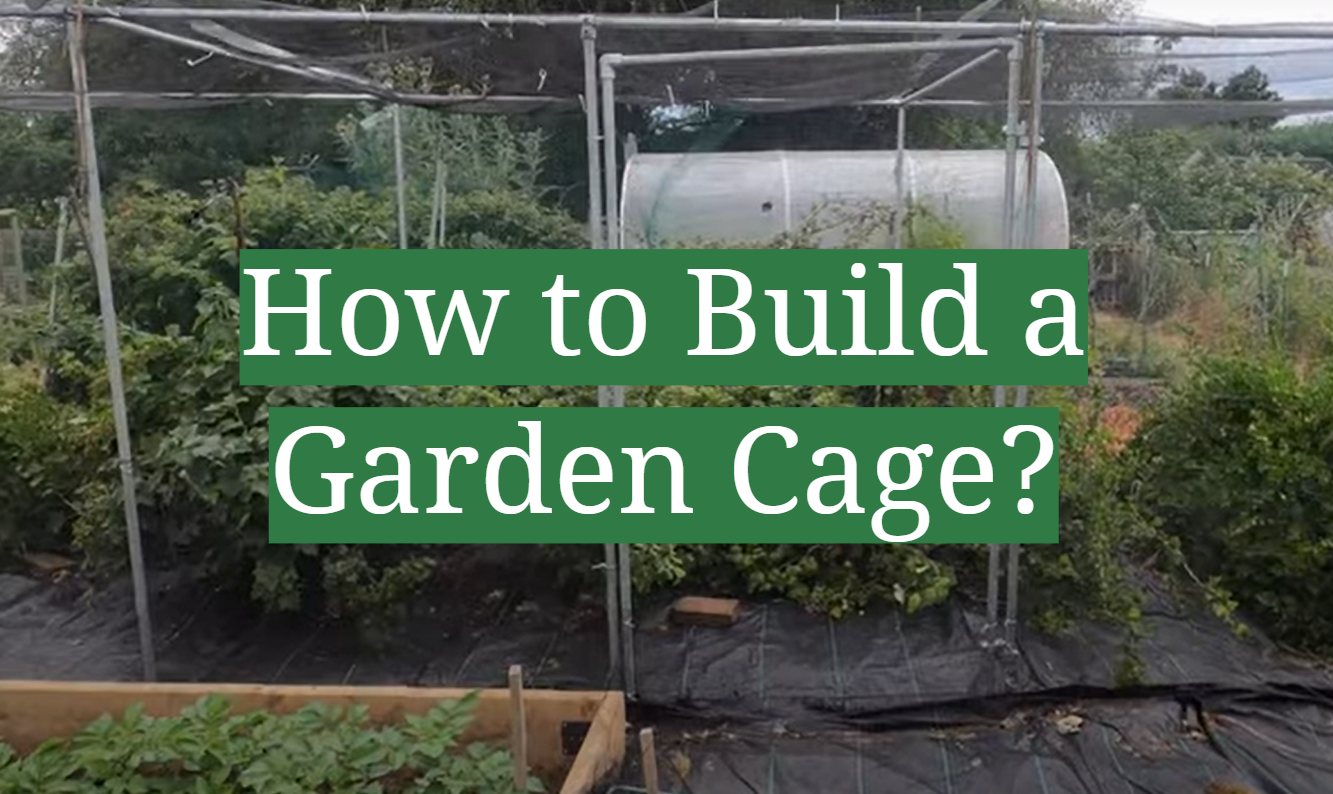
When it comes to keeping your garden pests-free, a garden cage is your best bet. Not only are they easy to build, but they’re also affordable and versatile. In this comprehensive guide, we’ll answer all of your questions about how to build a garden cage, from the materials you’ll need to the construction process itself. So read on for all the information you need to create a pest-free oasis in your own backyard!
Bamboo Tomato Cage
If you’re looking for a sturdy, yet lightweight option, bamboo is the way to go. Not only is it eco-friendly, but it’s also easy to work with.
To build the frame of your cage, start by lashing four of the pieces together at the top with twine or wire. Then, take two more pieces and lash them perpendicular to the first four, creating a square shape. Finally, add the remaining pieces around the perimeter, tying them all together at the top. Make sure that the frame is nice and sturdy before moving on to the next step.
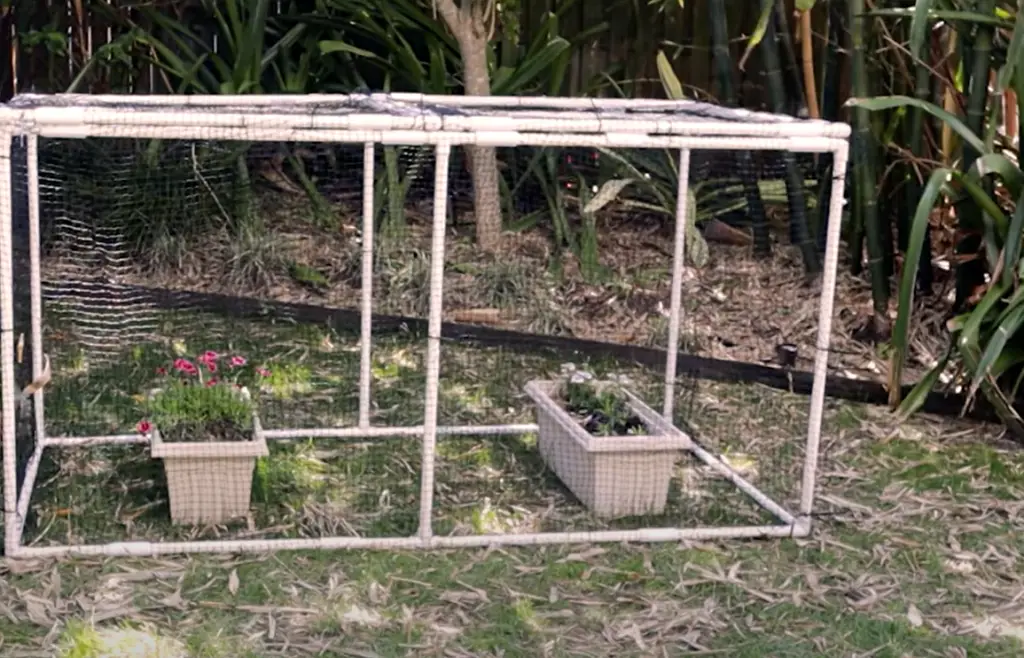
Now it’s time to add the sides of your cage. For this, you’ll need chicken wire or another type of wire mesh. Cut the chicken wire into panels that are approximately four feet wide and six feet tall. Starting at the bottom of the frame, attach the chicken wire panels to the bamboo with staples, making sure to overlap each panel by a few inches. Work your way around the perimeter until the entire cage is enclosed.
The final step is to add a door to your cage. To do this, simply cut an opening in one of the side panels and then attach a piece of chicken wire across it with staples.[1]
Pole Bean Tunnels
Inexpensive and easy to construct, pole bean tunnels are great for small gardens or backyard plots. All you need are some bamboo poles and some string or wire. Drive the bamboo poles into the ground about a foot apart, then string the wire or tie the string between the poles. The height of your tunnel will depend on how tall your beans grow.
Beans love warm weather, so it’s best to wait until all danger of frost has passed before planting. Once the plants have reached about eight inches tall, start training them up the bamboo poles. You can do this by gently winding them around the pole or by tying them loosely with twine. As the plants continue to grow, keep an eye out for any that are getting too heavy and starting to sag. These can be propped up with smaller sticks or pieces of string.
Once the plants have reached the top of the tunnel, you can either let them continue to grow vertically or start training them horizontally along the wire or string. This will help keep the fruits from getting too heavy and pulling the plants down. When the beans are ready to harvest, simply cut off the stems and enjoy![1]
DIY Tomato Cage
Building a tomato cage is a simple project that anyone can do with a little time and effort. This guide will show you how to build a tomato cage that is both strong and durable.
The first step is to gather your materials. You will need:
- a piece of wire mesh (about 24″x24″)
- a roll of chicken wire (about 25′ long)
- wire cutters
- pliers
- a hammer
Once you have all of your materials, you are ready to begin. The first thing you need to do is cut the wire mesh into four equal pieces. Next, take two of the pieces and form them into cylinders. Make sure that the cylinders are big enough to fit around the tomato plants.
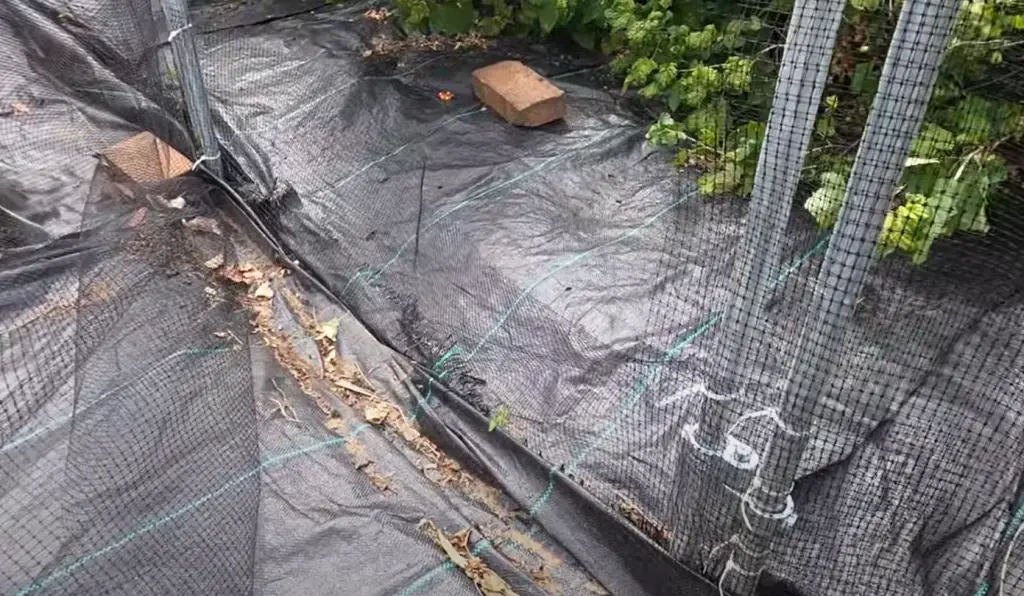
Now, take the chicken wire and wrap it around the cylinders. Make sure that the chicken wire is tight so that the tomatoes will have plenty of support. Once you have wrapped the chicken wire around the cylinders, use the pliers to twist the ends together.
Finally, use the hammer to stake the cages into the ground. Make sure that they are secure so that they don’t fall over when there is wind or a heavy rain.[1]
Garden Trellis and Tomato Cage
Building a tomato cage is easy and only requires a few supplies. You’ll need:
- T-posts (or other type of metal post)
- Wire mesh or chicken wire
- Zip ties or heavy duty wire
- PVC pipe (optional)
First, drive the T-posts into the ground around your garden bed. Make sure they are tall enough to support the height of your plants. Next, attach the wire mesh to the posts using zip ties or heavy duty wire.
Finally, secure the bottom of the cage to the ground with stakes or more T-posts.[1]Garden Arbor Arch
An arbor is a perfect addition to any garden. It’s a beautiful way to add interest and height, and it can be used to support climbing plants. Arbors come in many different styles, so you’re sure to find one that will complement your garden.
The most important thing is to choose the right location for your arbor. It should be placed in an area of your garden that gets plenty of sun and has well-drained soil.Once you’ve selected the perfect spot, you’ll need to gather some supplies. You’ll need posts, beams, brackets, nuts and bolts, wire mesh, and concrete mix. You can find all of these supplies at your local hardware store.
Now you’re ready to start building! The first step is to set the posts in concrete. Be sure to allow for plenty of space between the posts so that your arbor will be sturdy. Once the posts are set, add the beams and brackets. Then, attach the wire mesh to keep climbing plants from damaging your arbor.[1]
Finally, add some climbing plants and enjoy your new garden feature!
Tomato Plant Trellis
If you are looking to add support for your tomato plants, then a tomato plant trellis is a great option. A tomato plant trellis is basically a frame that you can build around your plants to give them support as they grow. You can use any type of material to build a tomato plant trellis, but metal or PVC pipe is usually the best option since it is strong and will last for many years.
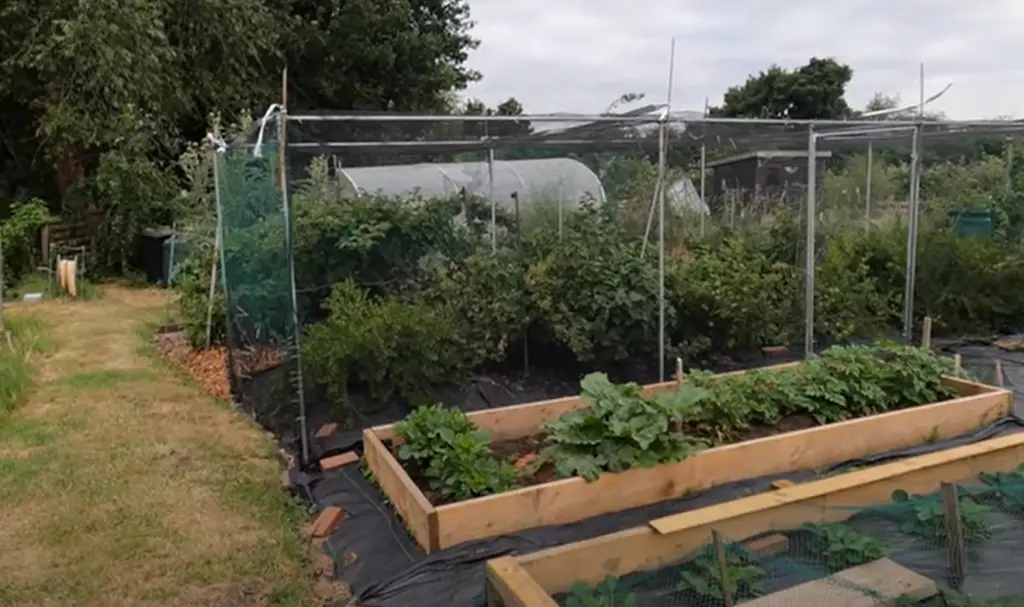
Building a tomato plant trellis is relatively easy and only requires a few materials. First, you will need to gather some metal or PVC pipes. The number of pipes you need will depend on the size of your garden cage. Once you have all of your materials, simply follow these instructions:
First, you will need to create the frame for your tomato plant trellis. To do this, you will need to connect the metal or PVC pipes together using connectors. Once you have created the frame, you can then start attaching the tomato plants to the trellis. You can do this by tying them to the frame with string or wire.
Once all of your plants are attached to the trellis, you can then add some additional support by adding crossbars. Crossbars will help keep the tomato plants from falling over when they get heavy with fruit. You can attach crossbars to the top of the frame using brackets or clamps.[1]
DIY Trellis for Climbing Indoor Potted Plants
If you have a climbing plant that you want to grow indoors, building a simple trellis is an easy way to provide it with the support it needs. You can make a trellis out of just about anything – even recycled materials! – as long as it has horizontal and vertical bars for the plant to climb on. Here’s how to build a basic trellis for your indoor potted plants:
You will need:
- One or more lengths of sturdy wire (depending on the size of your pot and plant)
- Wire cutters
- Pliers (optional)
Instructions:
- Cut the wire into lengths that will fit comfortably inside your pot, with enough excess to curl around the edges. If you’re using more than one length of wire, twist them together at the top to form a single frame.
- Next, make horizontal bars for the plant to climb on by bending the wire into loops or S-shapes. Space these bars evenly along the vertical frame.
- Finally, curl the excess wire around the edge of your pot, tucking it in so that it doesn’t stick out. This will hold your trellis securely in place.[1]
Easy DIY Garden Arbor
If you’re looking for a simple and elegant garden arbor that you can build yourself, look no further! These easy DIY garden arbor plans will show you how to build a beautiful arbor in just a few hours, using only basic tools and materials.
Building a garden arbor is a great way to add some architectural interest to your garden, and it’s also a great project for beginner woodworkers. This step-by-step guide will walk you through the entire process of building an arbor, from start to finish.
First, you’ll need to gather your supplies. For this project, you’ll need:
- Two eight-foot long cedar boards
- One four-foot long cedar board
- Cedar fence pickets
- Galvanized screws
- Construction adhesive
- Paint or stain (optional)
Start by cutting your cedar boards to size. You’ll need two eight-foot long boards for the sides of the arbor, and one four-foot long board for the top. Then, cut your fence pickets into 36 inch pieces. These will be used as the slats on either side of the arbor.
Next, it’s time to assemble the frame. Start by attaching the two eight-foot long boards to each other using galvanized screws and construction adhesive. Then, attach the four-foot long board across the top of the frame. Finally, add your fence pickets to the frame, attaching them with screws.[1]
Vintage Garden Tool Trellis
Do you have a lot of vintage garden tools? Do you want to display them in your garden, but don’t know how? A trellis is the perfect solution!
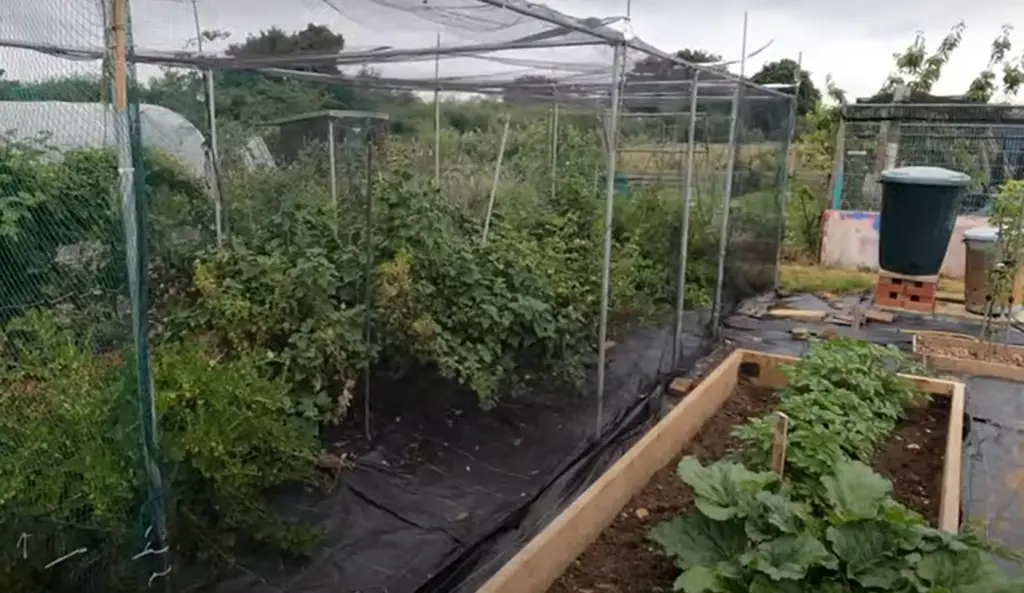
Building a trellis is a great way to add some vertical interest to your garden. Plus, it’s a great way to recycle old garden tools that you may not use anymore. Trellises can be made from all sorts of materials, but using vintage garden tools is a great way to add some character to your garden.
Here’s how to build a vintage garden tool trellis:
- First, gather your supplies. You will need:
- Vintage Garden Tools (shovels, hoes, rakes, etc.)
- T-Posts
- Wire (chicken wire or fencing wire)
- Zip Ties
Next, decide on the location for your trellis. You will want to choose a spot that gets plenty of sun and has good drainage. Once you have chosen a spot, mark out where you want your trellis to go.
Next, start setting your T-posts into the ground. Make sure they are nice and straight by using a level. Once all of your T-posts are in place, it’s time to start attaching the wire. Start at the bottom and work your way up, attaching the wire to each post with zip ties. Make sure the wire is nice and tight so your tools will stay in place.
As you work your way up, start adding your vintage garden tools to the wire. You can arrange them however you like! Once all of your tools are in place, stand back and admire your handiwork.[1]
FAQ
How do you make a PVC garden cage?
PVC is a great material for gardening cages because it is lightweight and easy to work with. To build a PVC garden cage, you will need:
- PVC pipes
- PVC connectors
- A drill
- Screws
- Wire mesh or chicken wire
First, measure the area where you want to build your cage. Cut the PVC pipes to size using a saw. Then, use the connectors to join the pieces of pipe together. Drill holes in the pipe and screw the wire mesh or chicken wire onto it to create the sides of your cage. Finally, put up a top by attaching more PVC pipes or by draping chicken wire over the frame and securing it with zip ties.
How do you enclose a garden?
If you’re looking to keep animals out of your garden, one option is to build a cage around it. This can be a simple wire fence or a more elaborate structure made of wood and chicken wire. Garden cages can also be used to protect plants from harsh weather conditions or pests.
How do you make a squirrel proof garden?
If you live in an area with a lot of squirrels, you may have considered building a garden cage. Garden cages can help protect your plants from damage caused by these furry critters. But how do you build a garden cage?
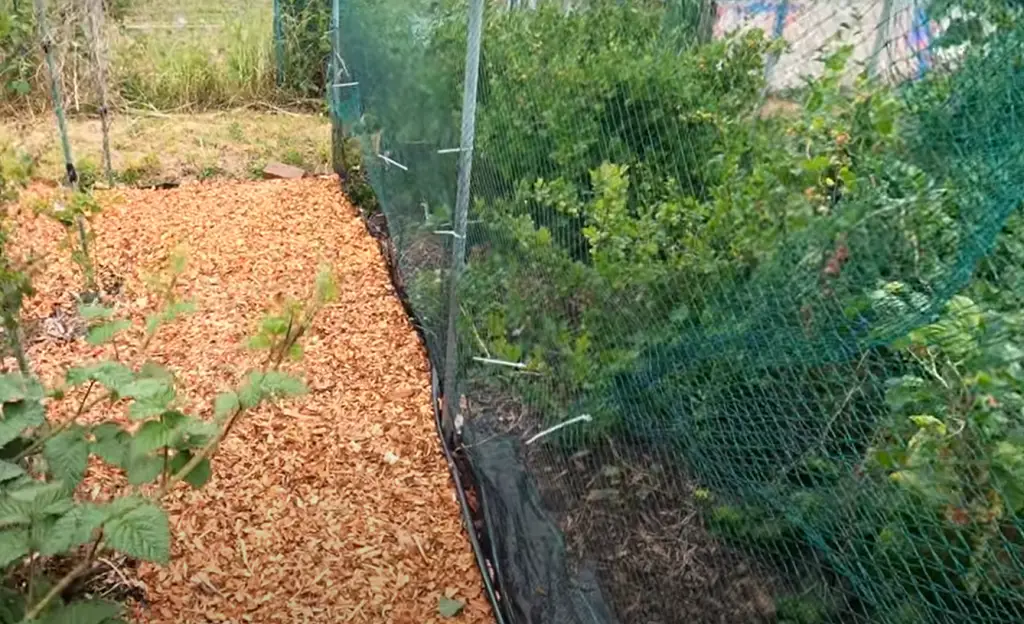
First, let’s start with the basics. A garden cage is simply a wire enclosure that surrounds your plants. The wire mesh should be small enough to keep out squirrels and other small animals, but large enough to allow sunlight and water to reach your plants. You can purchase pre-made cages at many home improvement stores, or you can make your own using hardware cloth or chicken wire.
Do coffee grounds deter squirrels?
One common question people have is whether coffee grounds deter squirrels. The answer is yes! Squirrels are not fans of the smell of coffee, so putting coffee grounds around your plants can help keep them away. Just make sure to use fresh grounds, as old ones won’t work as well.
Will aluminum foil deter squirrels?
Yes, you can use aluminum foil to deter squirrels. Simply line the inside of your garden cage with foil, shiny side up. The squirrels will be discouraged from entering because they don’t like the way the foil feels on their paws. Additionally, the foil will reflect light and make it difficult for them to see inside the cage.
How do you enclose a garden with chicken wire?
Enclosing a garden with chicken wire is a great way to keep out pests and animals. Chicken wire is relatively inexpensive and easy to work with. When enclosing a garden with chicken wire, be sure to bury the chicken wire at least six inches underground and attach it to wooden posts or metal fencing that is at least four feet tall. This will ensure that animals cannot dig under or jump over the fence.
Useful Video: EP25 – Making a Brassica cage from scratch
Conclusion
Building a garden cage is not as difficult as it may seem. With a little planning and the right materials, you can easily build a cage that will protect your plants from pests and animals. Following these simple steps will ensure that your garden cage is sturdy and long-lasting.
If you have any questions or comments, please feel free to leave them below. I would love to hear from you!
Thank you for reading! I hope this article was helpful in teaching you how to build a garden cage. Until next time, happy gardening!
References:
- https://www.thespruce.com/plant-cages-5094528



Leave a Reply
View Comments