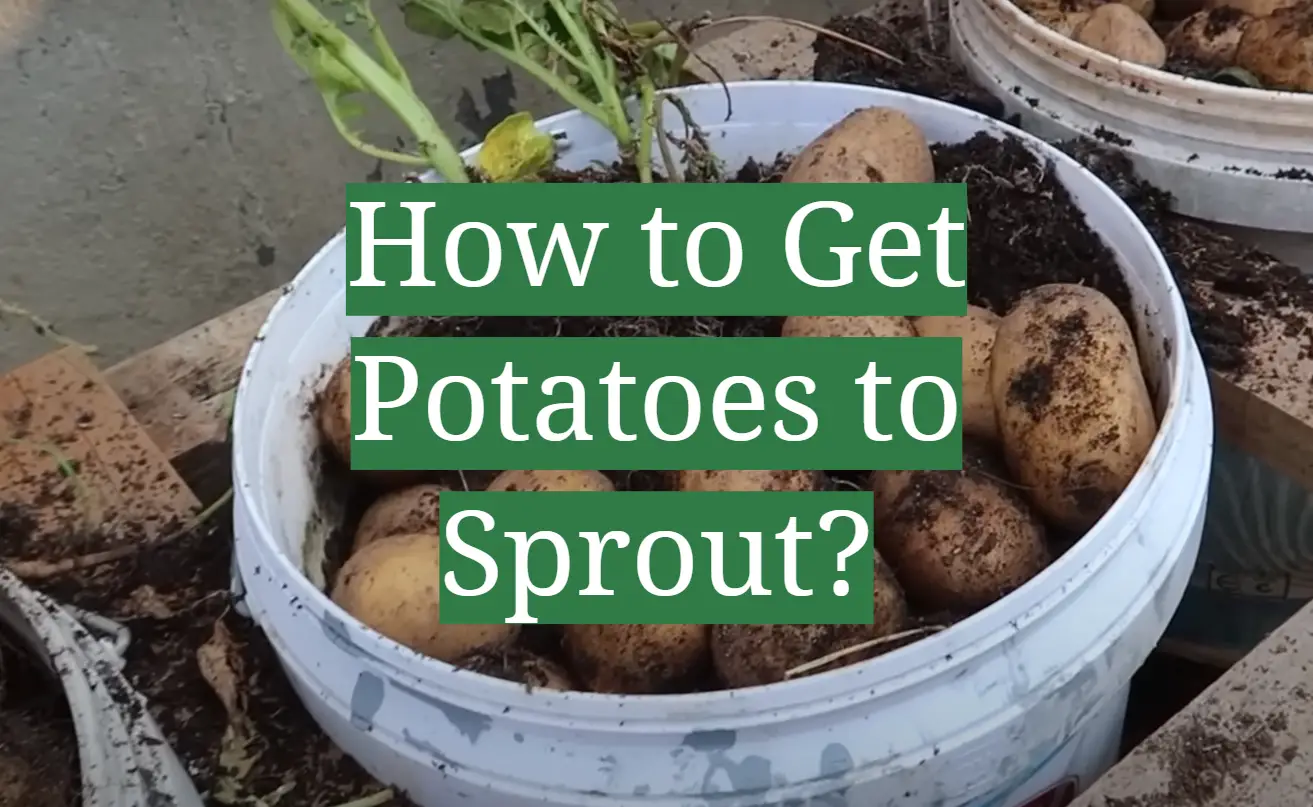
Do you want to learn how to sprout potatoes but don’t know where to start? It doesn’t have to be a difficult process – with the right instructions and knowledge, sprouting potatoes can be an easy and rewarding experience. In this blog post, we’ll discuss everything you need to know about how to get potatoes ready for planting by learning all of the steps involved in successfully sprouting them! From selecting high-quality potato varieties, preparing soil and containers for planting, correctly spacing seeds, and proper maintenance techniques – we’ll cover it all so that you can enjoy homegrown potato harvests in no time. So let’s get started and learn how to get those delicious spuds ready for your garden!
Why Do Potatoes Sprout
For gardeners and potato enthusiasts alike, the sprouting of potatoes can be seen as a sign of success. But why do potatoes sprout in the first place?
The answer lies in the potato’s natural survival instincts. When conditions are right, potatoes will start to sprout in order to reproduce and ensure the survival of their species. [1] The potato’s sprouts are really just a combination of roots and shoots, which allow the potatoes to find water and sunlight in order to survive.
How Long Does It Take For Potatoes To Sprout
It takes anywhere from 10 days to three weeks for potatoes to sprout. The exact amount of time depends on the type of potato and the temperature and humidity of the environment.
Under ideal conditions, potatoes can sprout as soon as 5-6 days; however, temperatures lower than 40°F (4°C) can significantly slow down or stop the process altogether. Cooler temperatures — such as those found in a refrigerator — inhibit sprouting so storing potatoes at this temperature is not recommended. [3]
Storing potatoes in a warm, dry place (50-60°F/10-15°C) also helps to speed up the sprouting process. Humidity levels should be kept between 60%-90%.
The potato’s age can also play a factor in how quickly it will sprout. Potatoes that are older and more mature tend to take longer than younger potatoes. The length of time it takes for potatoes to sprout is due to the starch inside them turning into sugar which then triggers the growth of shoots and roots. In addition, potatoes that have been treated with chemicals or waxes may take longer to germinate as these substances can inhibit sprouting activity.
How to Get Potatoes to Sprout: An Introduction and Explanation
Sprouting potatoes is a great way to get the most out of your potato crop. By sprouting potatoes, you are increasing their chances for successful germination and growth in the garden or in containers. Plus, it’s an easy and rewarding process that doesn’t require much effort on your part.
In order to get potatoes to sprout, there are a few key steps to follow:
Plan Ahead of Time
The very first thing you need to do is plan ahead. When planning for potato sprouting, you’ll want to consider the following:
- Type of Potato – Different varieties of potatoes will require different amounts of time in order to sprout. Make sure you choose a variety that fits your needs.
- Climate – The temperature and humidity of your environment will affect the speed at which potatoes will sprout. Choose a location with the right climate for successful sprouting.
- Container – Potatoes can be planted in containers or directly into soil. You’ll need to decide which option works best for you and then choose an appropriate container size or soil type accordingly.
- Timing – You’ll also need to determine when is the best time to plant your potatoes. Doing so will ensure that you get the most out of your crop.
By planning ahead, you can ensure that your efforts to sprout potatoes are successful. With a bit of knowledge and preparation, you’ll be well on your way to enjoying a bountiful harvest.
Pick the Right Types of Potatoes
Not all potatoes are created equal. Before you start sprouting, you’ll want to make sure you choose the potato variety that best suits your needs. Some potatoes are better for baking, boiling, frying or roasting while others are best suited for sprouting. Common potato varieties for planting and sprouting include Russets, Yukon Golds, White Rose, Red Pontiacs and Fingerling Potatoes. [4] Take a look at the characteristics of each type of potato before you choose which one to grow:
- Russet Potatoes – these are large, long-oval shaped potatoes with light brown skin and white flesh. They are great for baking, mashing and frying but they don’t do well in wet soil conditions.
- Yukon Gold Potatoes – these medium-sized roundish potatoes have yellow skins and yellow waxy flesh that is excellent for boiling, roasting, grilling and mashing. They are better suited for wet soil conditions.
- Red Potatoes – these medium-sized potatoes have smooth, red skin and moist white flesh that makes them perfect for boiling, baking and roasting. They can tolerate a variety of soil types but are best grown in well draining, slightly acidic soils.
- Fingerling Potatoes – these small, finger-shaped potatoes have thin, golden skin and yellowish flesh. They are great for boiling, baking and roasting and thrive in a variety of soil types.
Once you’ve selected the right type of potato, it’s time to move onto the next step.
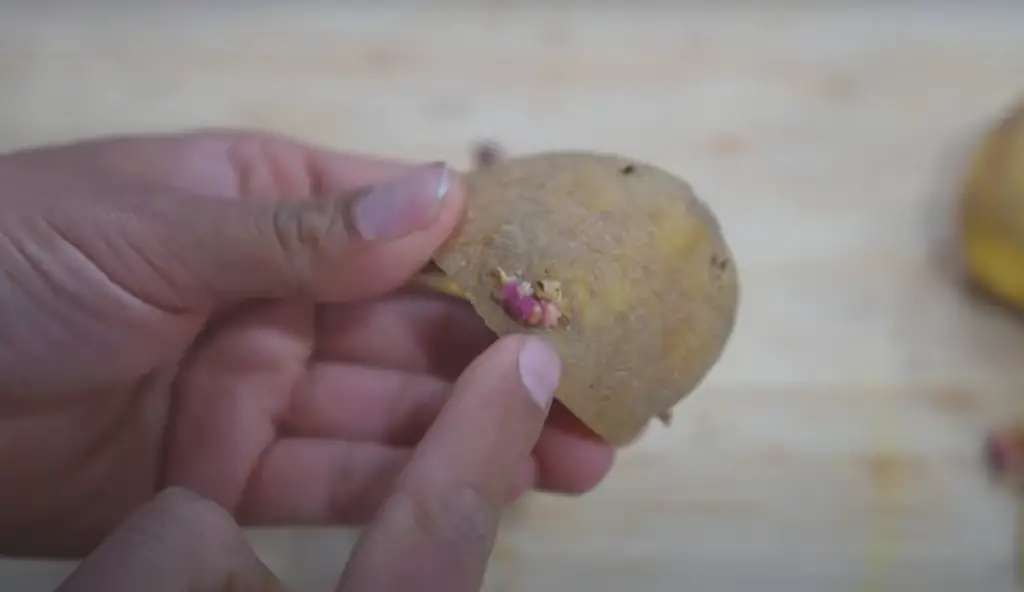
How to Prepare Potatoes for Sprouting
Before you begin the actual sprouting process, there are a few steps to follow in order to prepare your potatoes for planting:
- Clean and Peel – Start by scrubbing off any dirt from the outside of the potato. Then, peel away any skin that may be present. If possible, try to leave some of the eyes on the potato as they help with germination.
- Soak – After cleaning and peeling, place your potatoes in a container filled with water and allow them to soak overnight. This helps to soften the potatoes for planting and speeds up germination.
- Cut – After soaking, take your potatoes out of the container and cut them into smaller pieces. Make sure each piece has at least one eye in order for it to sprout. You can cut them into cubes, slices, or wedges.
- Dry – Once the potatoes are cut into smaller pieces, dry them off with a clean cloth or paper towel before planting. This prevents any bacteria or fungi from entering the potato pieces as they are being planted.
Now, your potatoes are ready for sprouting!
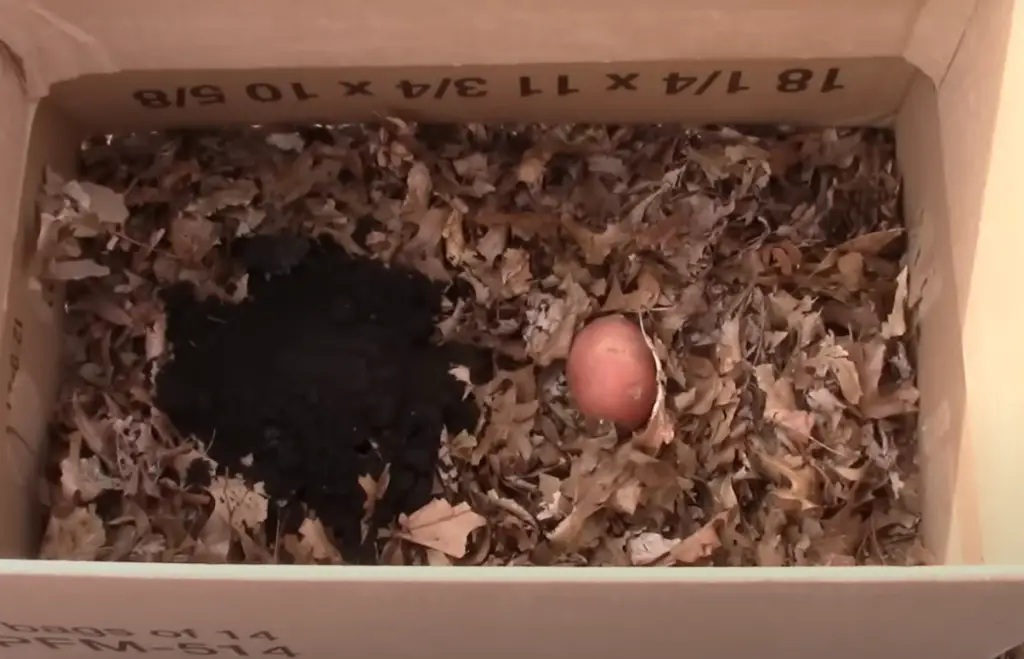
Provide the Right Environmental Conditions
Before planting potatoes, one should ensure that the right environmental conditions are present for the potatoes to sprout. The ideal environment for a potato tuber to sprout is warm and moist.
- Temperature: A temperature of between 45-60°F (7-15°C) is ideal for potato tubers to begin sprouting. When temperatures fall below 40°F (4°C), growth will slow down or stop altogether. If the temperature rises above 70°F (21°C) it can weaken the emerging shoots and cause them to be more prone to disease if planted in the garden later on.
- Light: Potatoes need bright indirect light when sprouting. You can place the potatoes in a sunny windowsill or in an area with good natural light. Be sure that the potatoes are not exposed to direct sunlight, which can cause them to overheat.
- Moisture: Potatoes need to be kept moist while they are sprouting. Use a spray bottle filled with lukewarm water and mist your potatoes once a day or as needed to keep them moist but not soggy.
- Air Flow: It is important that the potatoes have adequate air circulation while sprouting. If the room temperatures are warm enough, you can set up a small fan to circulate the air around the potato tubers and help reduce any condensation that may form.
Once the potatoes have sprouted, you can move them to a more suitable location if needed. Be sure to check the environment periodically and make adjustments as necessary in order to keep your potato tubers healthy and ready for planting!
How To Speed Up Potato Sprouting
If you want to speed up the potato sprouting process, there are a few things you can do.
- Increase Temperature – You can increase the temperature of your environment by using a heater or placing the potatoes in an area that gets more sunlight. Make sure not to exceed 70°F (21°C).
- Add Water – Increase the amount of water you give to your potatoes by misting them twice daily or as needed with lukewarm water. This will help keep them moist and encourage faster germination.
- Place Near Other Plants – Place your potatoes near other plants that emit ethylene gas, such as ripening bananas or apples, which can speed up sprouting as well.
- Use a Potato Sprouting Bag – You can purchase potato sprouting bags which can help to keep your potatoes warm and moist while encouraging faster germination.
By following these tips, you’ll be able to speed up the sprouting process and get your potatoes ready for planting in no time!
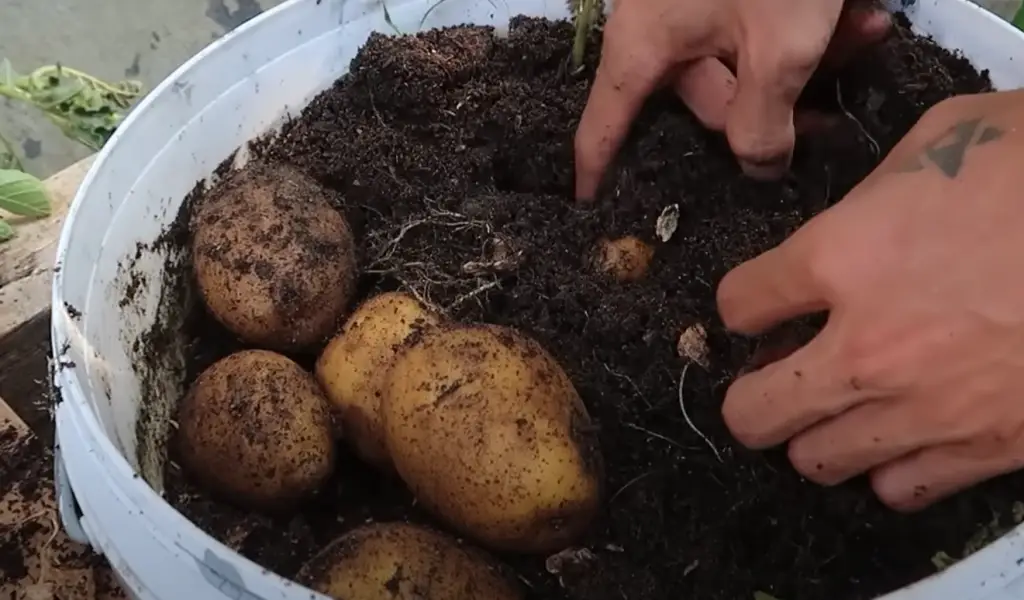
Planting Sprouted Potato
Once your potato tubers have sprouted, you can begin planting them in the garden or container.
It’s best to plant them as soon as possible after they have sprouted so that the emerging shoots don’t become too long and weak.
When Can You Plant Sprouted Potatoes?
The best time to plant sprouted potatoes varies based on your climate and soil temperature. In most areas, you can begin planting potatoes in early spring as soon as the ground has thawed and temperatures reach 50°F (10°C). [5] If the soil is still too cold or wet, wait until it begins to warm up.
Additionally, if you wait too long and the potato shoots are already several inches long, they may be more susceptible to disease and pests.Where to Plant Sprouted Potatoes?
When choosing a planting location for your sprouted potatoes, look for an area that gets full sun and has well-draining soil. Clay or sandy loam soil with plenty of organic matter is ideal. If you’re planting in containers, keep in mind that potatoes need at least 10 gallons of potting mix per plant. [6]
How to Water Potatoes
Once you have planted your potato tubers, they need to be watered regularly in order for them to grow and thrive. Thus, this is how to water potatoes correctly.
Water Requirements For Newly Transplanted Potatoes
It’s important to keep newly planted potatoes well-watered, especially in the first few weeks after transplanting. Generally, two or three inches of water per week is sufficient. [7] However, this may vary depending on your climate and soil type. Sandy soils may need more frequent watering, while clay soils can retain moisture better. If you’re not sure how much water your potatoes need, check the soil around the plants with a hand trowel and water if it feels dry. Alternatively, use an irrigation system for easy and consistent watering.
Water Requirements For Potatoes in the Growing Phase
Once the potatoes reach the growing or bulking stage, they require less frequent watering. Aim for two inches of water every week and adjust based on weather conditions. If your area has hot, dry summers, you may need to water more often than once a week. Conversely, if it’s raining consistently, you can back off on supplemental watering.
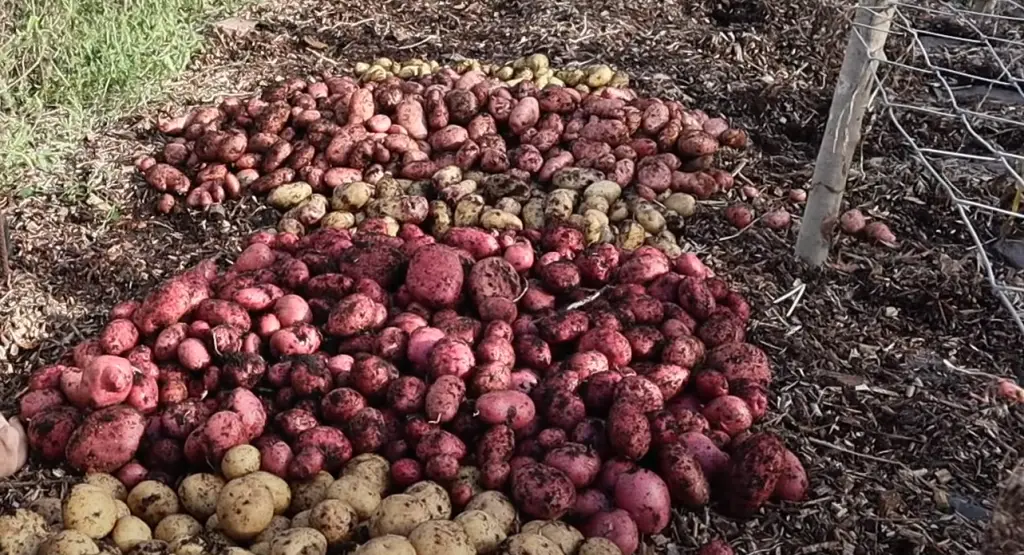
How to Harvest Potatoes
Harvesting potatoes is an exciting and rewarding experience. Knowing when to harvest your potatoes is essential for a successful crop, as harvesting too early or late can lead to lower yields and poor-quality tubers.
Harvesting Potatoes For Personal Consumption
When harvesting potatoes for personal consumption, there is no need to wait until your potatoes reach the peak of their maturity.
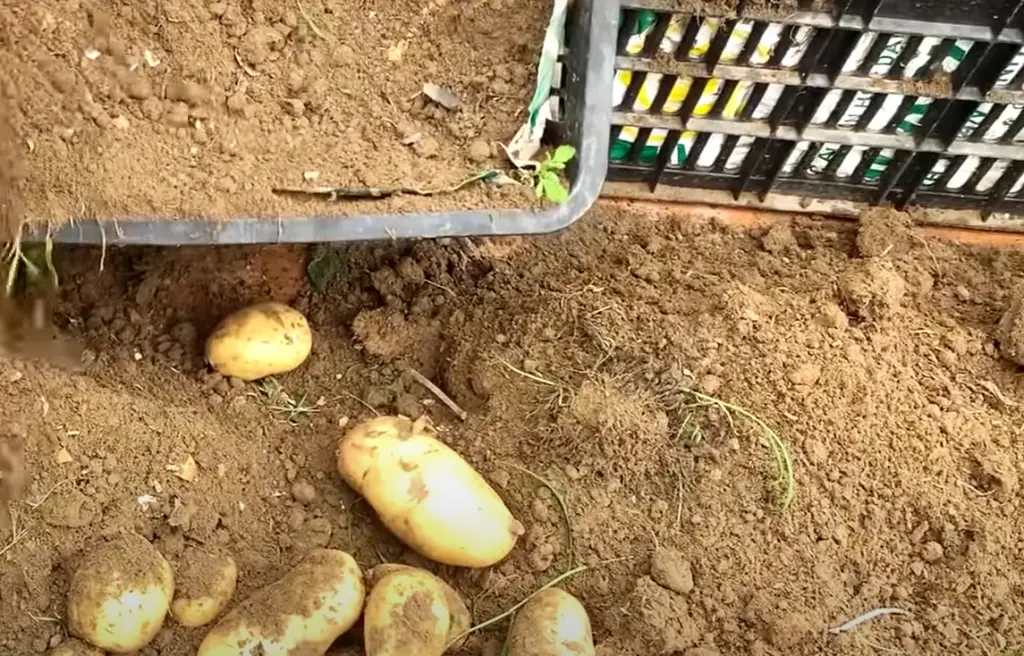
Depending on the variety, potatoes can be harvested between 65 and 110 days after being planted. For best results, it’s recommended that you harvest potatoes in the morning when the soil is still cool and damp. Begin by gently pulling back some of the plant’s foliage and taking a look at a few potato tubers growing near the surface. If they look plump and full, then it’s time to harvest! Once you’ve identified which plants are ready for harvesting, use a garden fork or spade to loosen up the surrounding soil and carefully dig around each tuber. Gently lift out each one and then remove any excess soil.
Harvesting Potatoes For Overwintering Storage
If you’re planning on storing potatoes over the winter, then it’s important to wait until the vines have died back and become completely dry before harvesting. This usually happens sometime between mid-September and late October, depending on your climate. When ready, dig down 8 – 10 inches around each tuber using a garden fork or spade. Loosen up any clumps of soil by hand and carefully lift out each potato with your hands or a shovel. After harvesting, sort through the tubers for any damaged specimens and discard them. Place the remaining potatoes in a cool, dark place until ready for use. Harvesting potatoes can be an enjoyable experience that will yield delicious rewards! With careful timing and attention to detail, you’ll be sure to harvest a successful crop.
How to Store Potatoes: The Curing & Storing Process
After harvesting potatoes, it’s important to complete the curing and storing process in order for your tubers to remain fresh and retain their quality. Potatoes need to be cured in a temperature between 45°F – 60°F and at a humidity of 90% for two weeks. During this time, moisture from the field is removed through evaporation and some starches are converted into sugars. This helps give potatoes their characteristic flavor. After curing, store your potatoes in a room that is dark, dry (humidity should be 70%), cool (ideally 40-50°F) and well ventilated. Store in open containers such as wicker or mesh bags to allow air circulation. Keep an eye out for any moldy or rotten potatoes and discard them immediately.
With proper care, potatoes can last up to a year in storage!
FAQ
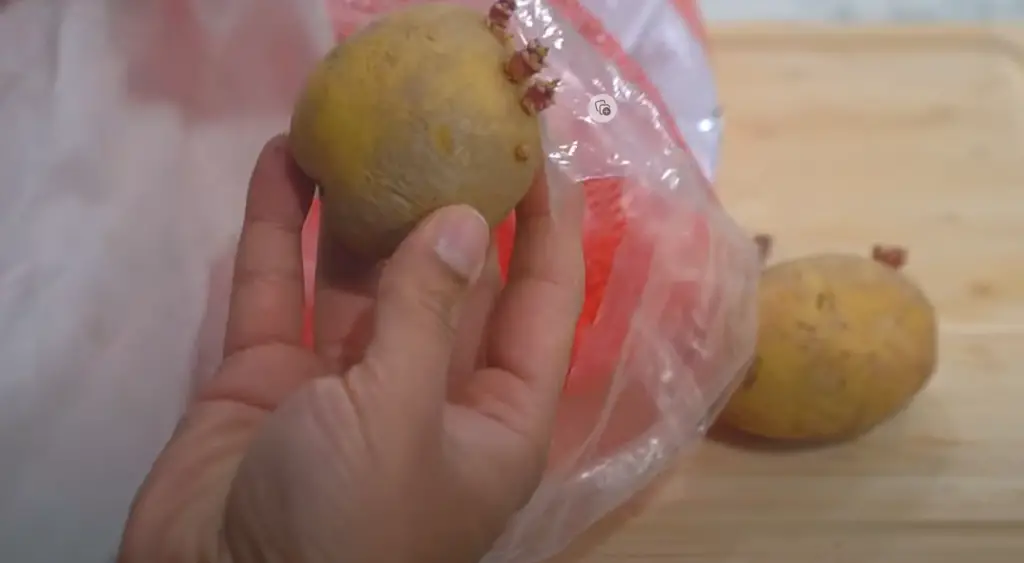
Can You Use Potatoes That Have Started To Sprout?
Yes, sprouted potatoes are safe to eat as long as they are still firm and the sprouts are fairly short (no more than a couple of inches). However, it’s best to plant them as soon as possible after they have sprouted so that the emerging shoots don’t become too long and weak. If you decide to cook them, just cut off any soft spots or eyes before cooking. It’s also important to note that older potatoes may be higher in toxins such as solanine, so it’s best to avoid eating very old spuds.
Is It Ok To Eat Sprouted Potatoes?
Yes, sprouted potatoes are safe to eat as long as they have been stored correctly and don’t show any signs of mold or rot. However, the sprouts may be bitter in taste so it’s best to remove them before cooking.
Do Potatoes Sprout in Light or Dark?
Potatoes typically sprout in the dark. Store your potatoes in a cool, dark place to prevent them from sprouting prematurely. Keep an eye out for any signs of rot or mold and discard them immediately. ##Can You Replant Potatoes That Have Sprouted?Yes, you can replant potatoes that have started to
Do Onions Make Potatoes Sprout Faster?
Onions don’t actually make potatoes sprout faster; however, they do help to keep potatoes fresher for longer by preventing the growth of mold and rot. Place a few onions in the same storage container as your potatoes or wrap them together in paper or cloth. This will help absorb any excess moisture and keep your potatoes from spoiling quickly.
Should I Break the Sprouts Off Potatoes Before Planting?
Yes, it’s a good idea to break off any sprouts on potatoes before planting. This will help ensure that the potato plants have the best chance of growing successfully and producing a healthy crop.
How Deep Do You Plant Sprouted Potatoes?
Sprouted potatoes should be planted about 4 inches deep in well-drained soil.
Plant each tuber with the sprouts pointing upwards and cover lightly with soil. Water thoroughly after planting and keep the soil moist until the plants begin to emerge.How Far Apart Do You Plant Sprouted Potatoes?
Most varieties of potatoes should be planted about 12 – 15 inches apart. However, if you are planting smaller varieties such as fingerlings or creamer potatoes, then they can be planted closer together at around 8 – 10 inches apart. This will help increase your yields and allow the plants to receive adequate sunlight and air circulation for healthier growth.
How Long Do Potato Plants Take to Grow?
Most varieties of potatoes will take around 70 – 120 days to reach maturity. During this time, the plants should be kept well-mulched and watered regularly in order for them to produce a healthy crop. Once the vines have died back and become dry, then it’s time to harvest your potatoes! With careful timing and attention to detail, you’ll be sure to harvest a successful crop.
Useful Video: HOW TO GET POTATOES TO SPROUT EYES – preparation for planting.
Conclusions
Sprouting potatoes is a great way to add fresh and healthy potatoes to your garden without having to purchase seed potatoes from the store. The rewards are countless with the distinct sense of accomplishment and pride knowing that you did it all yourself! Don’t be intimidated by this process – once you have learned the steps involved, sprouting potatoes can be easy and enjoyable. From selecting high-quality potato varieties, ensuring the soil is fertile, properly spacing seeds, and providing maintenance work – if you follow our instructions closely, we guarantee that you will have a plentiful harvest awaiting when harvest time rolls around. So grab your tools, replace any worn equipment if necessary, and get ready for an unforgettably rewarding gardening experience!
References:
- https://greenupside.com/why-do-potatoes-sprout-3-reasons-ways-to-prevent-it/
- https://www.gov.mb.ca/inr/pdf/pubs/mafri-potatoe.pdf
- https://food52.com/blog/14613-the-best-way-to-store-potatoes#:~:text=The%20key%20is%20to%20store,%2C%20or%20pre%2Dmaturely%20sprouting.
- https://www.broadrippleindy.org/2014/11/12/educated-eating-basic-types-of-potatoes/
- https://www.mightymrs.com/how-to-plant-a-sprouted-potato/
- https://fromscratchfarmstead.com/planting-potatoes-with-long-sprouts/
- https://www.growerexperts.com/how-often-to-water-potatoes/