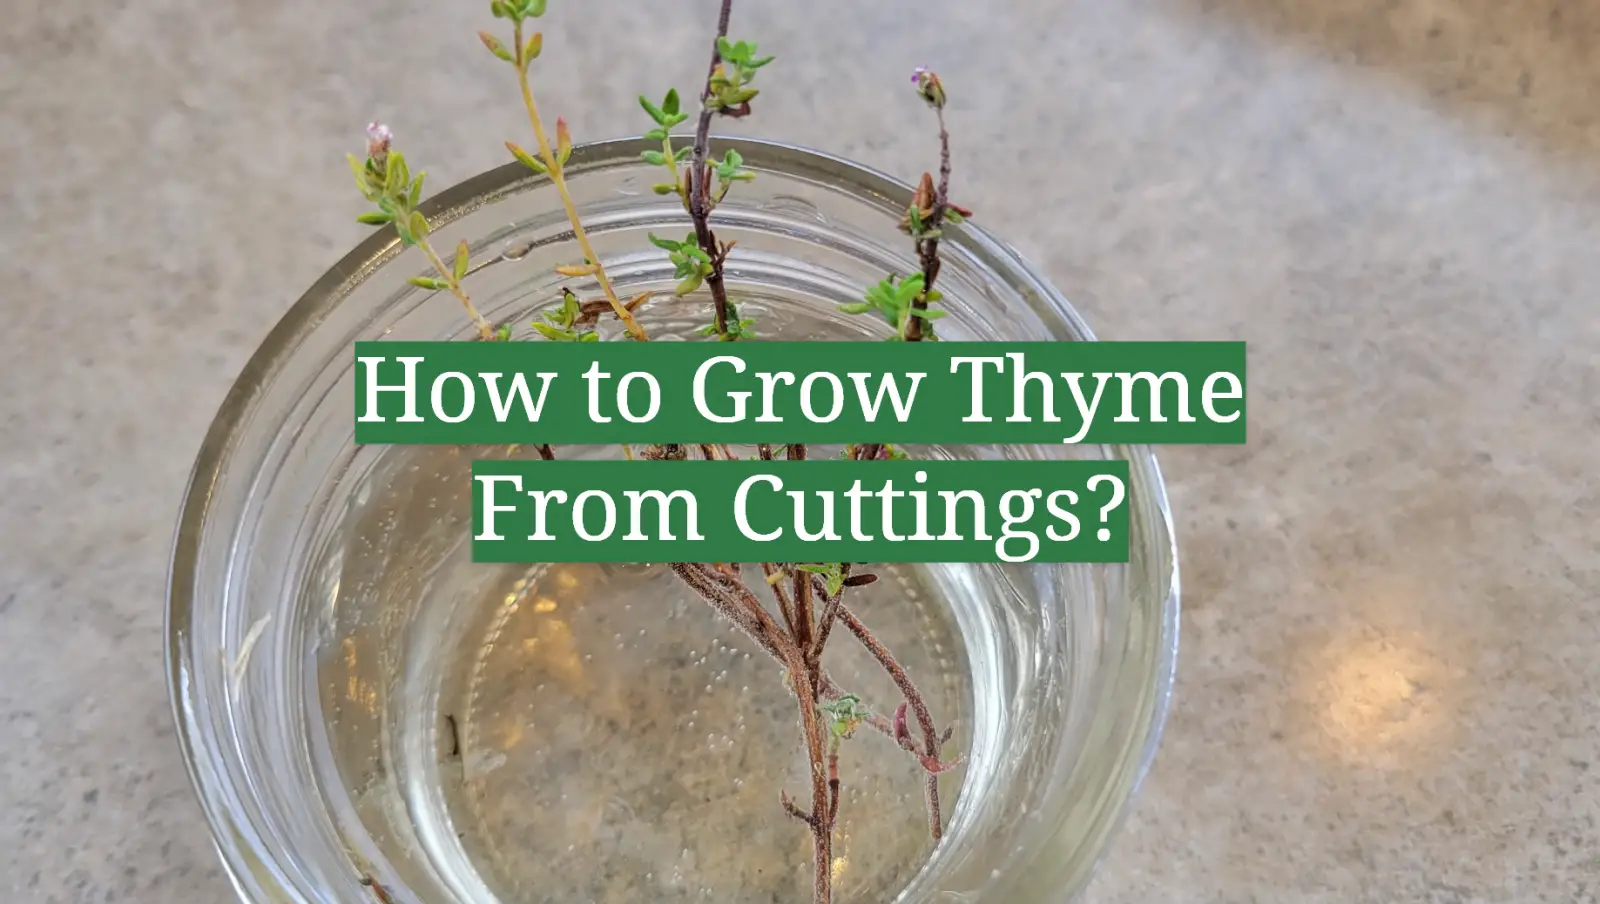
Do you want to have long-lasting fresh herbs in your home? Growing thyme from cuttings is an easy and rewarding way that you can do just that. By propagating thyme from individual stem or leaf cuttings, you can quickly fill up a garden with plenty of aromatic plants for harvesting! In this blog post, we’ll delve into the art of growing thyme from cuttings: how to source the materials, where to plant them, what kind of soil they need, how often to water and more. Plus you’ll find tips about diseases and pest management so that your new crop will thrive over time. Ready? Let’s get started!
What is thyme?
Thyme, scientifically known as Thymus vulgaris, is a perennial herb known for its culinary, medicinal, and ornamental uses. The plant is native to the Mediterranean region and boasts a rich history dating back to ancient times. [1] Thyme’s distinctive aroma and flavor profile make it a popular ingredient in a multitude of global cuisines. In the culinary world, thyme pairs wonderfully with a wide range of dishes, imparting a subtle earthy flavor that enhances the overall taste.
Medicinally, Thyme is valued for its anti-inflammatory, anti-fungal, and antibacterial properties. The herb is a rich source of vitamins A and C and is packed with fiber, iron, manganese, copper, and calcium. It also serves as a low-maintenance and attractive addition to any garden with its petite, gray-green leaves, and delicate, pinkish-white flowers.
Will thyme cuttings root in water?
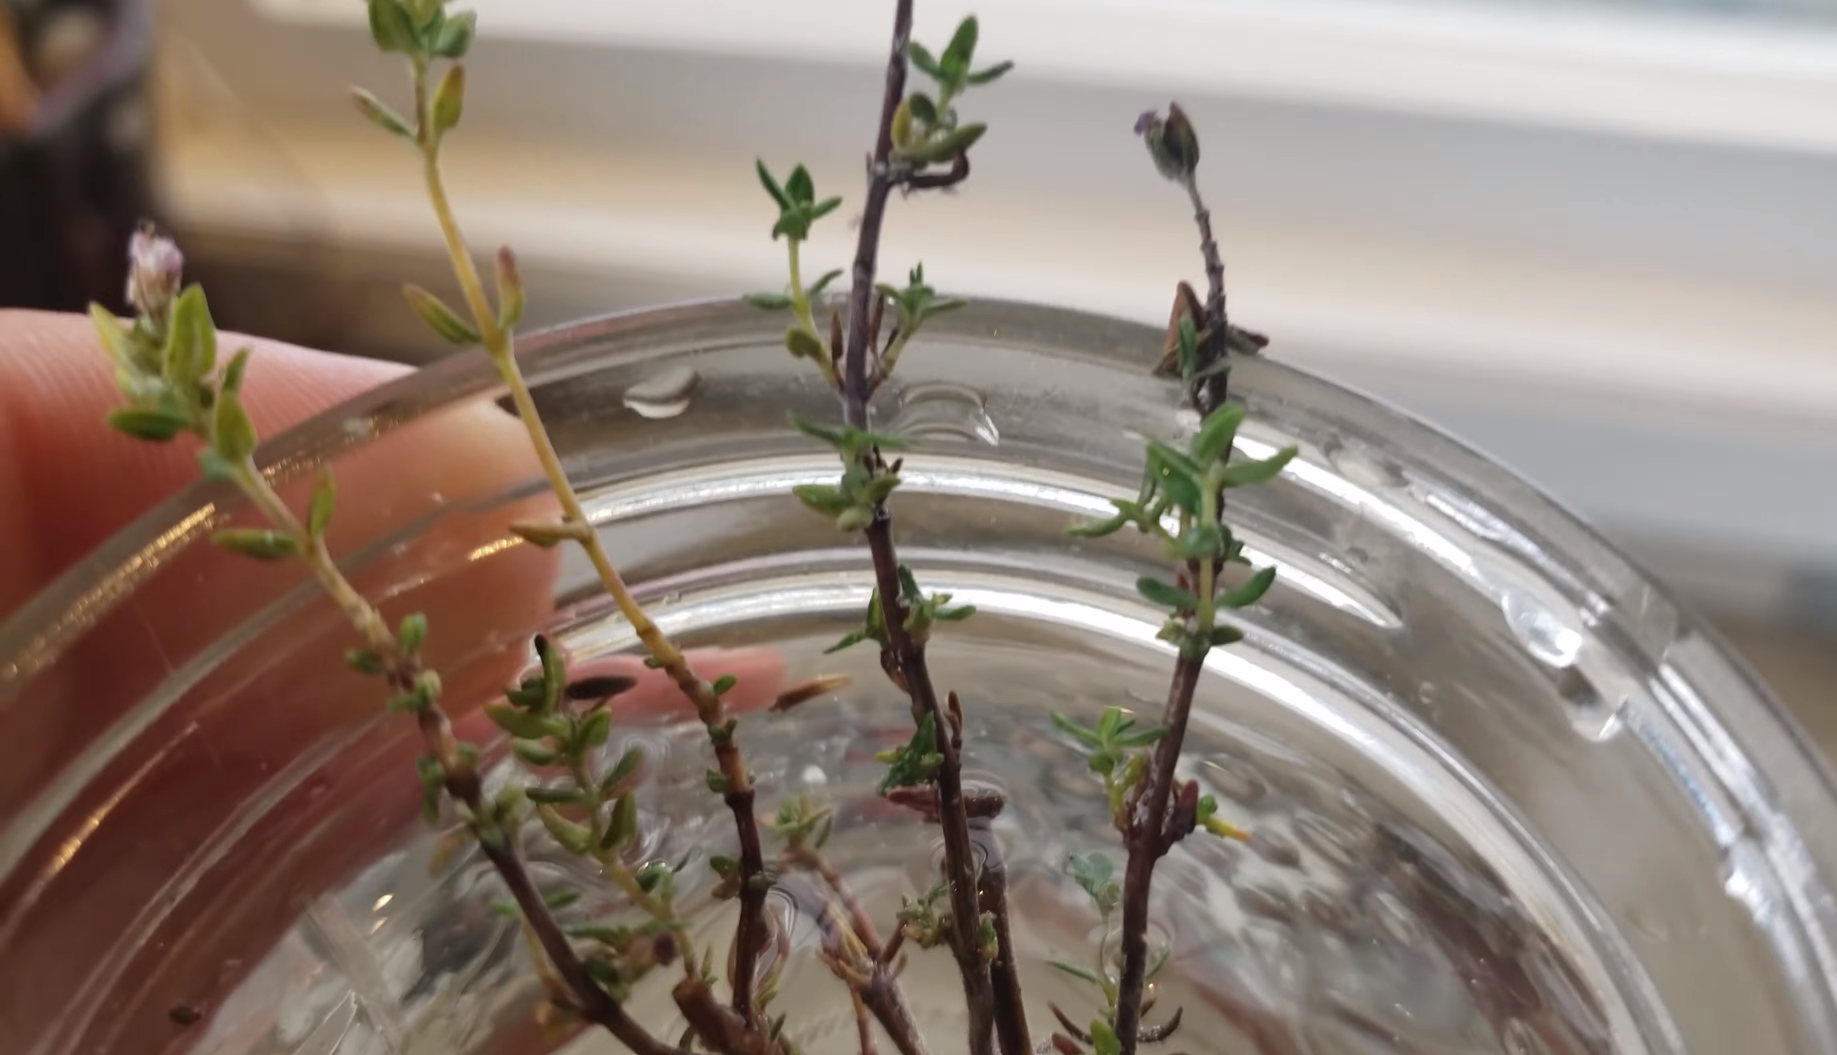
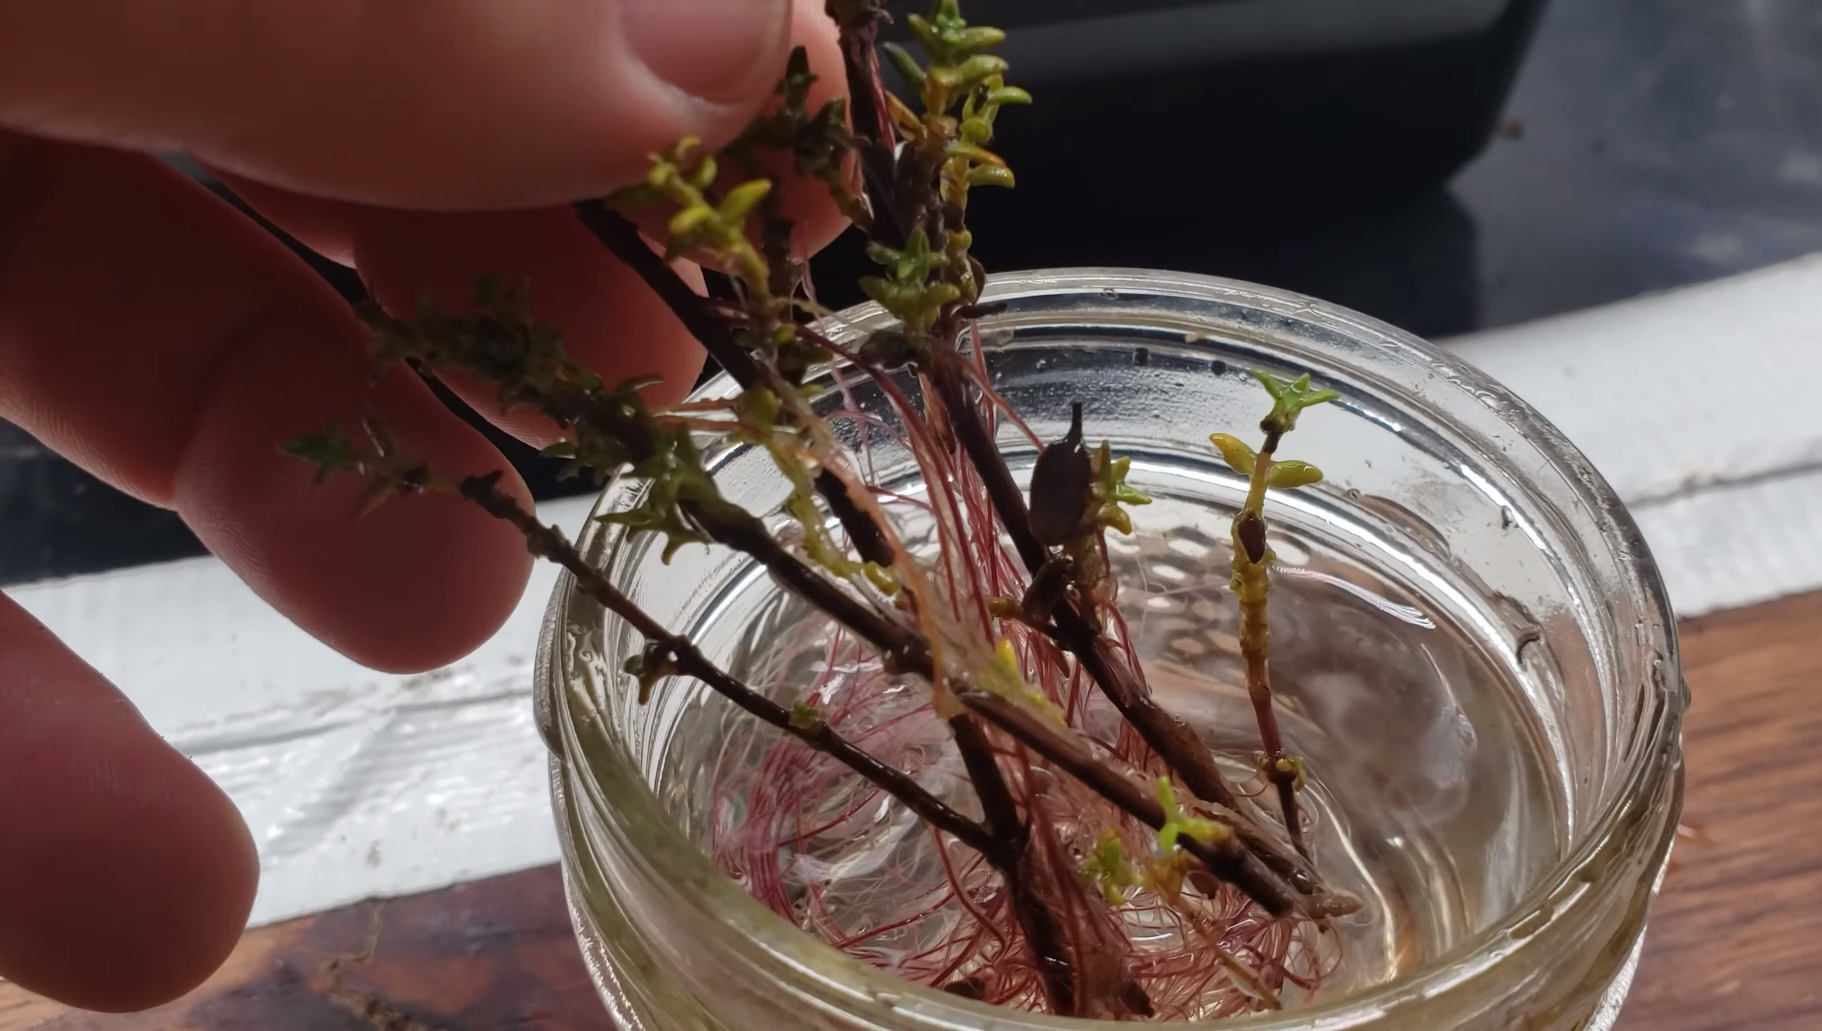
Yes, thyme cuttings can indeed root in water. This method is particularly useful for those who may not immediately have access to the requisite soil or are beginners in the process of plant propagation. To propagate thyme using water, start by selecting a robust, new-growth cutting from an established thyme plant. Trim the leaves from the lower half of the stem and insert the cutting into a glass or jar filled with water. The glass should be placed in a warm, well-lit area, but not in direct sunlight. After a couple of weeks, tiny roots will start to emerge from the stem.
Once the roots are firmly established, typically measuring around 1-2 inches in length, you can transfer the cutting to a pot containing well-draining soil. Do note that while this method is generally successful, it may not work 100% of the time. Sometimes, despite best efforts, the cutting may not develop roots and instead rot in the water. By demonstrating patience, persistence, and a touch of good fortune, you will make significant progress in cultivating your own thyme plants from cuttings.
Step-by-Step Guide to Growing Thyme from Cuttings
Growing your own thyme plants from cuttings can provide a rewarding and enriching journey. Whether you are a seasoned gardener or a novice, these instructions will help you cultivate your own thriving thyme plant with relative ease and simplicity.
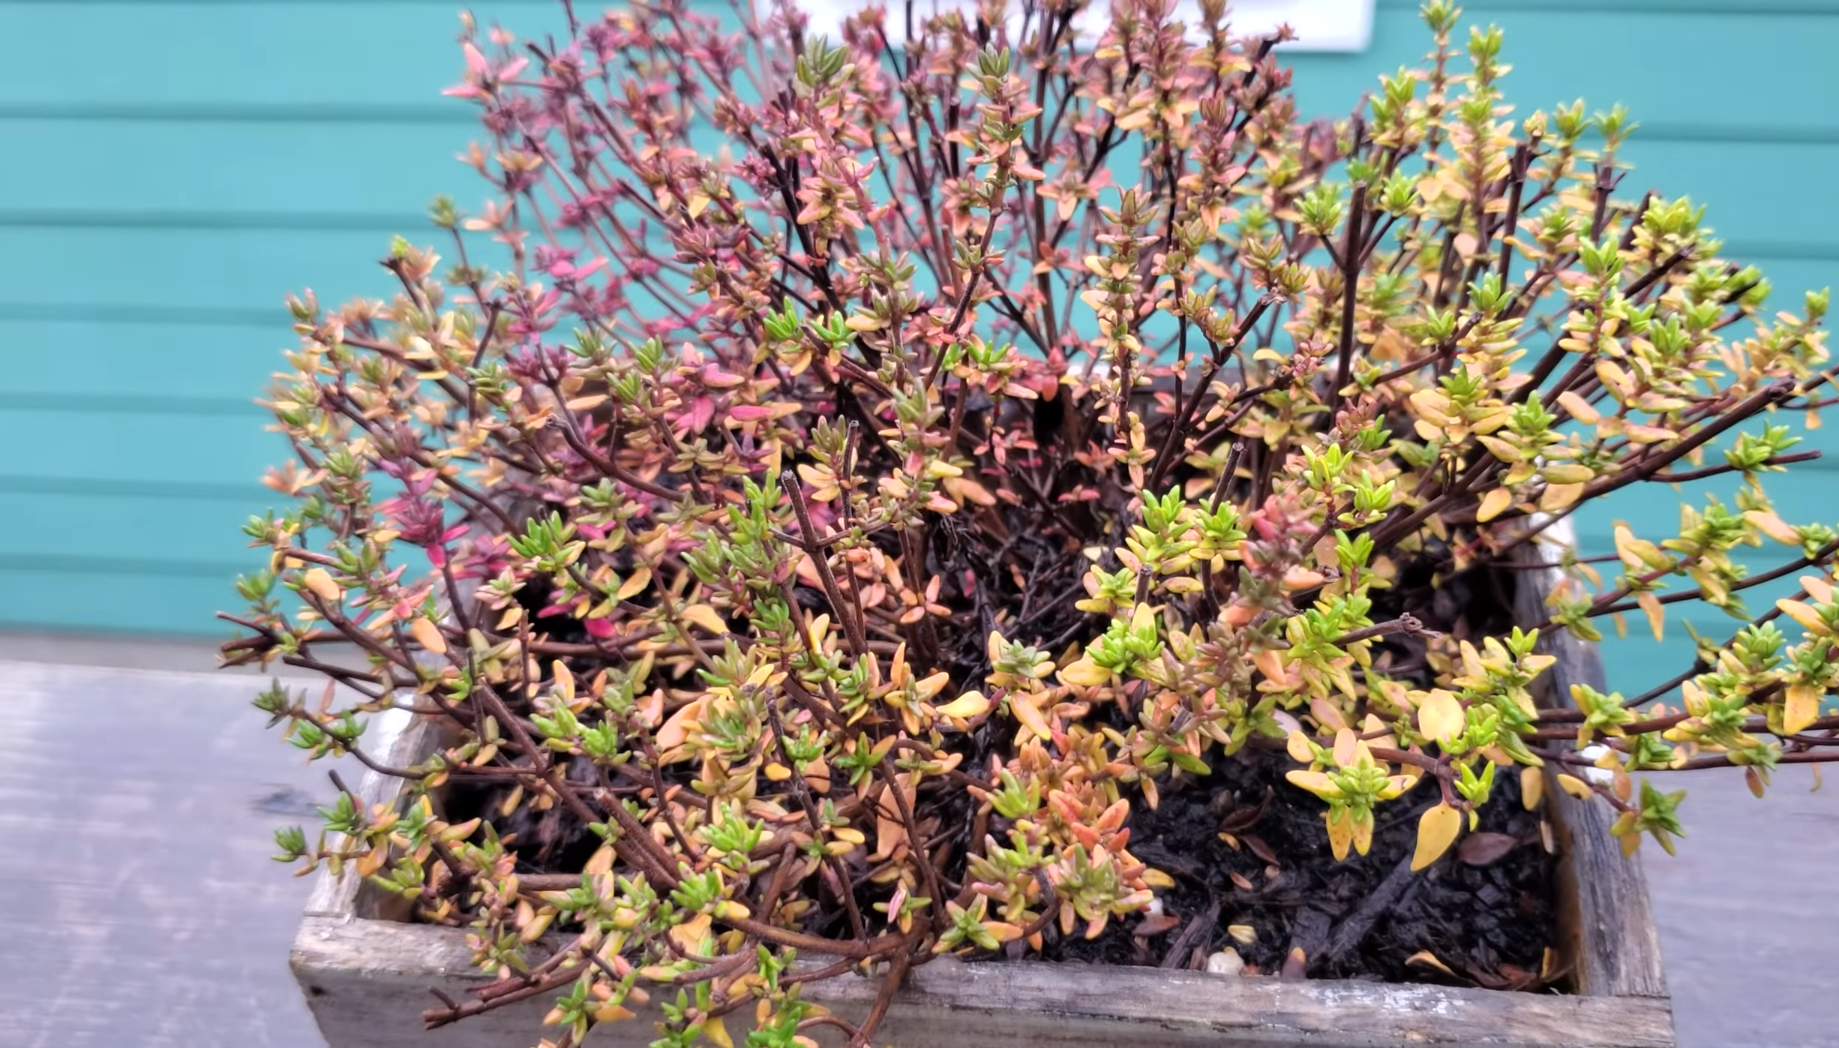
Select Healthy Parent Plant
The initial stage of successful plant propagation involves meticulously choosing a robust parent plant. Look for a thyme plant that exhibits vigorous growth, bright green leaves, and no visible signs of disease or pest infestation. Preferably, this should be a mature plant that has been established for at least a year. A healthier parent plant increases the likelihood of successful root development in the cuttings and eventual growth into full-fledged plants. It’s worth taking the time to ensure you’ve selected the best possible candidate for this process.
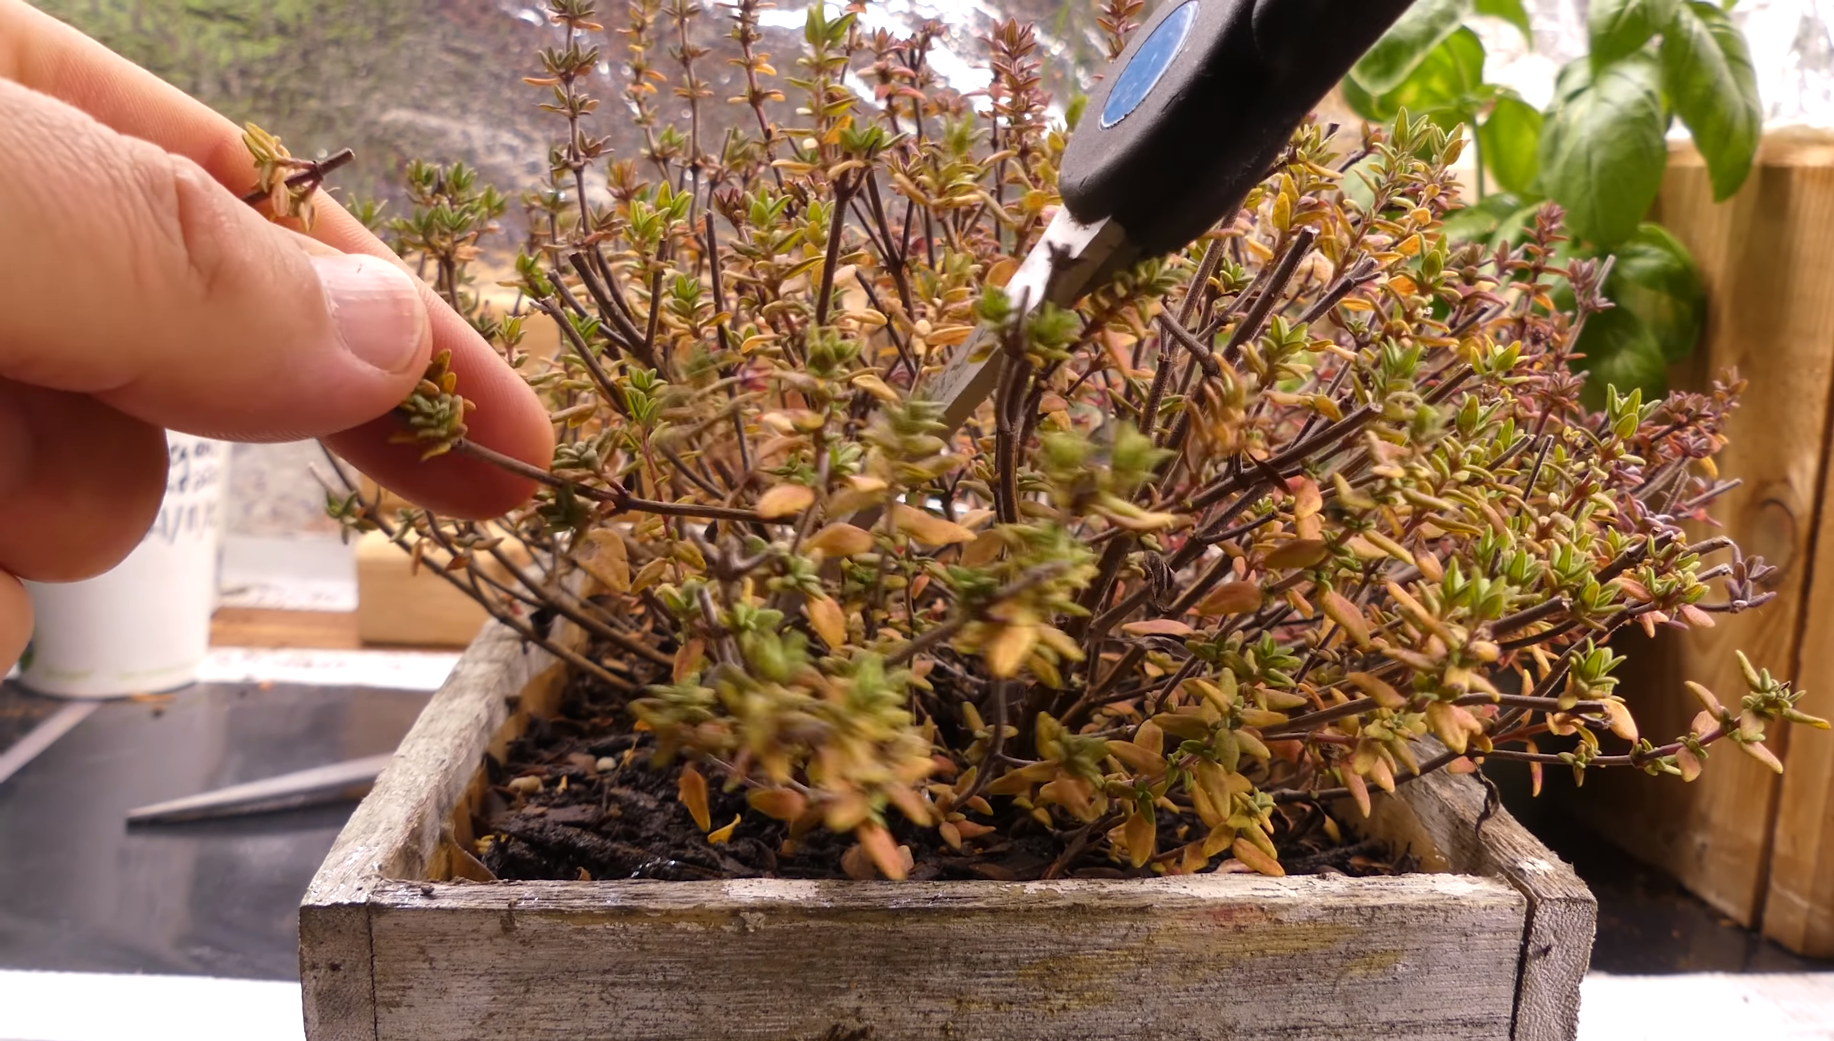
Prepare Cuttings
Rooting is the next crucial stage in the propagation process. Place cuttings in a jar of water, ensuring that the cut ends are submerged but the leaves remain above the water level. Another option is to place the cuttings directly into a container with soil that drains well, ensuring that the soil is kept damp but not overly soaked. Over the next couple of weeks, the cuttings should start to develop roots. During this time, keep the cuttings in a warm place with good light but out of direct sunlight, which could cause them to dry out. Be patient, as this process can take a few weeks.
Remove Lower Leaves
Before you move on to planting the cuttings, it’s crucial to remove the lower leaves. This step is important because the leaves, if submerged, can rot and potentially affect the health of the cutting as a whole.
Begin by identifying the lower one-third of the cutting and gently pick off any leaves in this area. Be careful not to damage the stem in the process. It is this leaf-free section of the cutting that is going to be planted and where the root growth will occur. By eliminating the foliage, you not only prevent potential decay but also stimulate the cutting to prioritize the growth of its roots.

Optional: Apply Rooting Hormone
Applying a rooting hormone to the cutting can expedite root development, although it’s not a necessary step. Rooting hormones are available in various forms such as powder, gel, or liquid. If you decide to utilize these substances, simply immerse the severed end of your plant cutting into the hormone prior to planting. Ensure that the area where you removed the leaves is well-covered. The hormone stimulates root growth at the cutting’s base, which can lead to a stronger and healthier plant. Remember, this step is entirely optional, and many cuttings will root successfully without the use of additional hormones.
Plant Cuttings
Now that the cuttings are prepared, it’s time to move on to planting. Begin by preparing a pot or container with a rooting medium that facilitates proper drainage. A recommended option is a blend of peat moss and perlite in equal proportions. You could also use a commercial seed starting mix. Ensure that the pot is equipped with drainage holes to avoid excess water accumulation.
Create a planting hole in the medium with a pencil or your finger about 1-2 inches deep. This will help to preserve the rooting hormone on the cutting if you’ve chosen to apply it. Next, carefully place the cutting into the hole, ensuring that the area where you removed the leaves is below the soil level. Gently firm the soil around the cutting.
Put the pot in a location that receives bright, indirect light. Sunlight can cause the cutting to dry out, while too little light can slow down root development. Maintain consistent temperature and humidity levels to encourage root growth. To maintain humidity, you have the option of using either a clear plastic bag or a plastic dome to cover the pot. However, remember to open it periodically for proper air circulation and to prevent the growth of fungi.
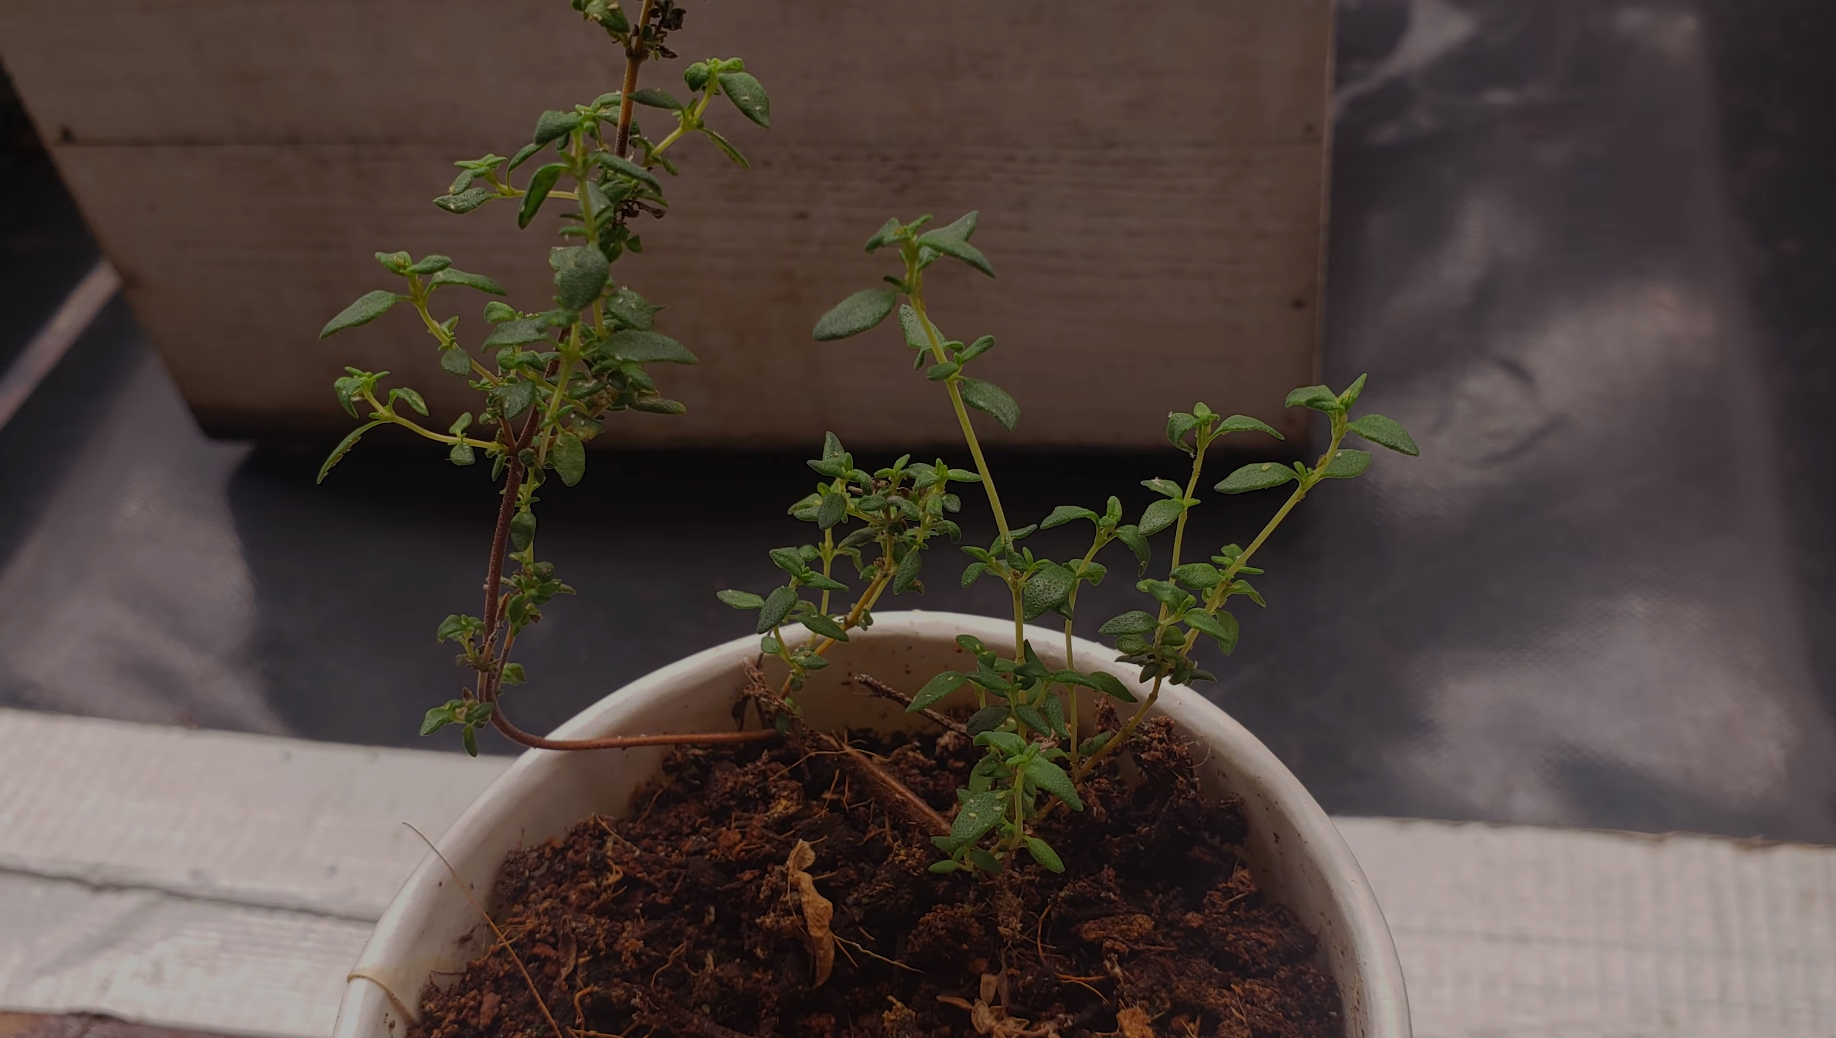
After a couple of weeks, examine the cutting for signs of root growth. A simple method involves gently pulling the cutting, and if there is resistance, it suggests that roots have started to develop. When the cutting has established a robust root system and begins producing fresh growth, it is time to transfer it to a bigger pot using standard potting soil.
Remember, patience is key when propagating from cuttings. The process can take several weeks, but the reward of watching a new plant grow from a cutting is well worth the wait!
Mist and Cover
Once the cutting has taken root, it’s important to maintain a stable environment. Misting the soil with water is a great way to keep it consistently moist. You can also place the pot in a humid area, such as near a sink or near an outdoor fountain. Moreover, you have the option to use plastic wrap to cover the pot or create a DIY mini greenhouse. Simply place the pot in a shallow dish and cover it with a transparent plastic dome. This will help keep moisture in and maintain consistent temperature levels, allowing your plant to flourish!
Finally, once the roots have fully developed and new growth is visibly sprouting from the cutting, it’s time to move it into a larger pot with regular potting soil. Make sure to handle with care when transferring to avoid disturbing the roots, and be diligent in monitoring it in the upcoming weeks. With a little extra care, your newly propagated Thyme should bring you many years of fresh herbs!
Provide Indirect Light
Indirect light is sunlight that has been diffused or scattered in some way before reaching the plant. This can either be sunlight that is filtered through a semi-transparent object (like a curtain or a shade) or light that is reflected off a surface like a wall or ceiling. To provide indirect light, place your plant in a location where it’s exposed to bright, but indirect sunlight – perhaps near a north or south-facing window, where it will receive plenty of light but not be in the direct path of the sun’s rays.
Indirect light is crucial for plants as it promotes healthy growth without the risk of sunburn or overheating that direct sunlight can cause. It’s particularly important for young plants like your newly propagated Thyme, as their tender new growth can be easily damaged by too-intense light. By providing indirect light, you’re ensuring that your plant gets the light it needs for photosynthesis, while protecting it from potential harm.
Monitor and Water
Monitoring and watering your plant are essential steps in maintaining its overall health. Here’s how to do it:
First, monitor your plant by checking its leaves and soil daily. If the leaves are wilting or turning yellow, it could be a sign of overwatering. Similarly, if the leaves are brown and brittle, it may be a sign of underwatering or too much sun.
Second, make sure the soil is dry before watering. You can check this by inserting your finger approximately one inch into the soil. If it’s dry, it’s time to water your plant. When watering, ensure you’re not just wetting the surface but watering deeply enough for the water to reach the roots.
Lastly, to prevent water from accumulating in the pot, which may lead to root rot, it is always recommended to use a container with drainage holes. Your Thyme will thrive with correct watering and daily monitoring.
Root Development
Root development is a crucial stage in the lifecycle of your Thyme plant. This process begins soon after propagation, with tiny roots starting to emerge from the base of the stem. To promote root growth, it is crucial to keep the soil adequately moist without causing waterlogging. A strong and healthy root system is vital for the overall well-being and development of the plant, as it enables absorption of water and essential nutrients from the soil.
If the roots are healthy, you’ll see your Thyme plant flourishing and growing at a steady pace. In case of any root-related issues – such as root rot or stunted root growth – the plant’s health may deteriorate, underscoring the importance of proper care and monitoring during the root development phase.
Transplanting
Transplanting is the process of moving your Thyme plant from its initial pot or container to a new, larger one to accommodate its growing root system. This step is often necessary as the plant matures and outgrows its initial space.
For successful transplantation, delicately extract the plant from its existing container while taking care not to harm the root system. Prepare a new pot with appropriate soil, creating a hole in the middle that is adequately sized to accommodate the root ball. Place your Thyme plant into the hole and gently fill it with soil, ensuring the plant is firm in its new pot. After transplanting, water and place the pot in a location that fits the Thyme’s light requirements. Remember, the plant might experience a little shock after being moved, so it might take a while for it to adapt to its new environment and start growing vigorously again.
How long does thyme take to grow from cuttings?
This process typically takes around two to six weeks for the roots to establish. [2] Although the pace of growth can vary depending on the conditions in which the plant is kept, it usually begins to develop noticeable foliage within two months. It’s important to ensure that the plant receives adequate sunlight and water during this period to promote healthy growth. Regular monitoring and care during this phase can lead to a flourishing Thyme plant that offers fresh leaves for many seasons.

Caring for Rooted Thyme Plants
Once your Thyme plants have established roots, they require minimal maintenance. Here are some tips and strategies to ensure they flourish:
- Regular Watering: Water your Thyme plants regularly, but ensure not to overwater them. They prefer slightly dry soil, so wait until the topsoil is dry to touch before watering again. Overwatering can lead to root rot which will harm the plant.
- Sunlight: Thyme plants need a good amount of sunlight, so make sure they are placed in a location where they receive around 6 hours of sunlight daily.
- Pruning: Regular pruning promotes fuller growth. Encourage lateral growth by gently pinching off the tips of the stems.
- Fertilizing: Thyme plants generally don’t require heavy feeding. However, a light application of a balanced organic fertilizer in the beginning of the growing season can enhance growth.
- Pest Control: Thyme plants have a natural resistance to many pests. However, if you notice any pest issues, organic pesticides or neem oil can be used to control them.
Kindly keep in mind that Thyme is a resilient herb that flourishes in adverse environments. It’s always better to slightly neglect it rather than give it too much attention. With these simple care tips, your Thyme plants should thrive and provide you with fresh, fragrant leaves for your culinary endeavors.
Frequently Asked Questions
Do thym like the full sun?
Yes, Thyme thrives best in full sun – it typically requires at least six hours of direct sunlight daily. When the plant receives adequate sun exposure, it can produce more of the essential oils that give it its distinct fragrance and flavor. Thyme is a Mediterranean plant, which means it’s adapted to bright, sunny climates and well-drained soil. However, it’s important to note that while thyme prefers full sun, it can also tolerate partial shade. In fact, in very hot climates, a bit of afternoon shade can prevent the plant from drying out. If you’re growing thyme indoors, place it by a south-facing window for the most light. Overall, while thyme is a hardy and versatile herb, for the most vigorous growth and best flavor, providing plenty of sunlight is key.
Does thyme like wet soil?
No, Thyme does not like wet soil. Instead, it prefers a well-drained soil which is typical of its native Mediterranean habitat. Overwatering or leaving Thyme in waterlogged soil can lead to root rot, a disease that can be fatal for the plant. Thyme has adapted to thrive in relatively dry, rocky, or sandy soils, and it’s particularly resistant to drought. If you’re planting Thyme in a pot, ensure that the pot has adequate drainage holes to prevent water from accumulating at the bottom. The soil should be allowed to dry out between watering sessions, keeping in mind that it’s better to be underwater than overwater this hardy herb. If you live in a region with high rainfall, consider growing Thyme in raised beds or containers to improve drainage. Finally, remember that while Thyme is a robust plant, it requires a balance in its growing conditions – it needs water to thrive, but too much can be detrimental.
How often should thyme be watered?
Thyme should be watered regularly but sparingly. As a guideline, watering once a week should be sufficient under normal circumstances. In hot, dry conditions, you may need to increase this to twice a week. However, always check the soil before watering – if it’s still damp from the previous watering, wait until it’s dry before you water again. It’s essential to avoid overwatering thyme, as this can lead to root rot. The goal is to keep the soil somewhat dry, mimicking the conditions of thyme’s native Mediterranean habitat. Remember, it’s generally better to underwater this plant than to overwater it.
How long does it take to root thyme in water?
Thyme typically takes between two to four weeks to root when propagated in water. To do this, remove the lower leaves from a fresh thyme cutting, then place the stem in a jar of water. Be sure to change the water every few days to prevent bacterial growth. Place the jar in a warm, bright location, but out of direct sunlight. After roots have formed, it’s recommended to pot the thyme in soil for the best growth. Remember to avoid overwatering once the thyme is potted.
How can I make thyme grow faster?
To accelerate the growth of thyme, there are several steps you can take. First, ensure the plant is in a location where it receives a good amount of sunlight, as thyme thrives in full sun. Second, maintain a consistent and appropriate watering routine, allowing the soil to dry out between waterings. Third, consider the use of a slow-release, low-nitrogen fertilizer, applying it in the spring to support new growth. Lastly, regular pruning not only helps to maintain the plant’s shape but also encourages bushier growth. Remember, each variety of thyme may have slightly different requirements, so it’s always best to refer to specific care instructions for your particular species.
Useful Video: Grow Unlimited Thyme From Cuttings
Conclusion
By taking the time to understand the proper cutting techniques, soil preferences and environmental needs for thyme, you can have success in growing your own thriving thyme patch! Growing thyme from cuttings takes patience and dedication, but seeing the herb’s beautiful purple blooms and savory scent is so rewarding. You’ll save money and time as you will no longer have to buy thyme at the grocery store, plus any extra-cuttings could be shared with family and friends. To get an amazing thyme harvest, invest in a few tools like sharp scissors or secateurs, rooting hormone options such as powder or gel form, well-draining soil mix for starting your cuttings, and consider adding a heating mat to ensure an optimal warmth environment for growth. Now that you know how to grow thyme from cuttings, you’ll soon be happily reaping the rewards of your hard work and all its culinary wonders!
References:
- https://www.sciencedirect.com/topics/agricultural-and-biological-sciences/thymus-vulgaris
- https://garden-basics.com/growing-thyme-from-cuttings/