What are the advantages of constructing garden netting frames?
One advantage of constructing garden netting frames is that they can be used to support a variety of climbing plants. This includes vegetables, fruits, and flowers.
Additionally, it also protects the plant from predators and pests.
Another benefit of garden netting frames is that they can be made from recycled materials. For example, old chicken wire or fencing can be repurposed into a frame. This is a great way to save money and reduce waste.
If you’re interested in learning how to make a garden netting frame, read on for a step-by-step guide.[1]
What you’ll need:
- Tape measure
- PVC pipes (you can get these at your local hardware store)
- PVC connectors
- Garden netting
- Zip ties
First, you’ll need to measure the area where you want your garden netting frame to go. Once you have those measurements, head to your local hardware store and purchase enough PVC pipes and connectors to build a frame that will fit in that space.
Once you have all of your materials, it’s time to put the frame together. [2]
Assembling your garden netting
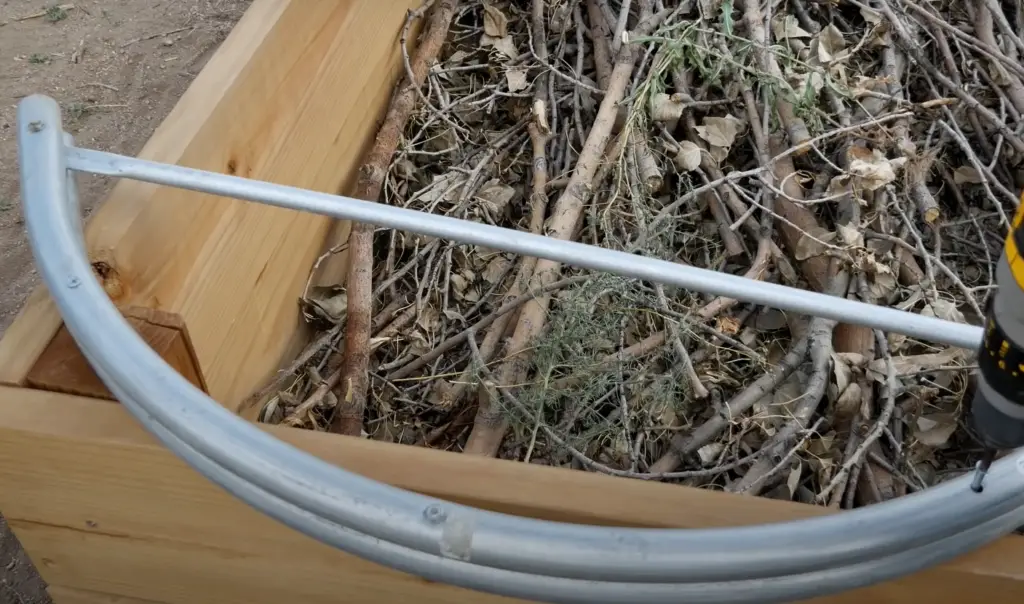
Step 1: Fasten the Metal Saddles to the Legs
Using the screws provided, fasten the metal saddles to the inside of each leg at the desired height. Make sure that the screw heads are flush with the surface of the legs so that they don’t snag the netting material. [3]
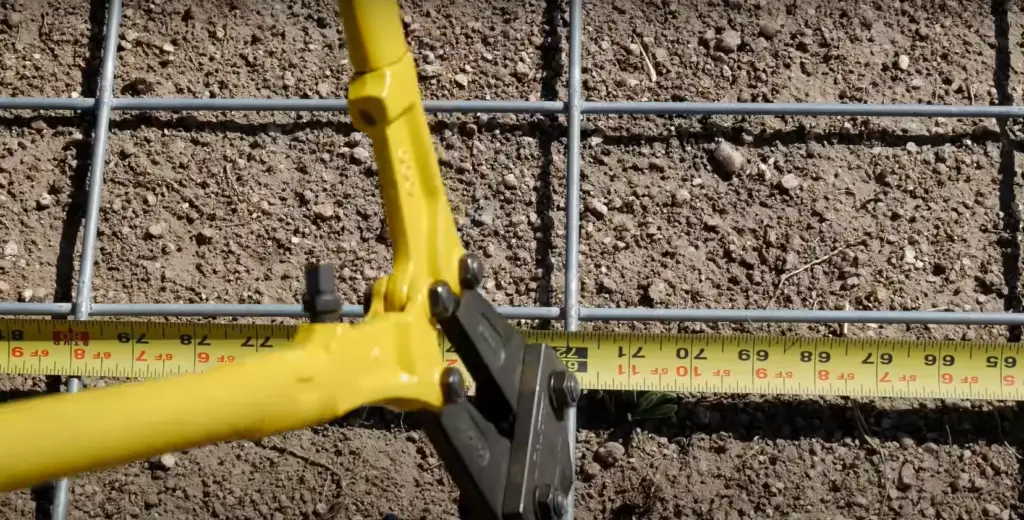
Step 2: Measure &Amp; Cut Your Pipe Wires
Once you have your supplies, it’s time to measure and cut your pipe wires.
Use a hacksaw or pipe cutter to make clean, straight cuts. If you’re using a hacksaw, be sure to wear gloves and eye protection.
Next, use a wire brush or sandpaper to remove any sharp edges from the cut ends of the pipes. This will help prevent injury later on. Once all of your pieces are cut and smoothed, it’s time to move on to Step Three.
Step 3: Assemble Your Pipes
Now that you have all of your pipes cut to size, it’s time to start assembling your frame. To do this, you’ll need to use four elbow joints and four T-joints. First, take two of your elbow joints and attach them to two adjacent sides of one of your T-joints. Next, do the same with the remaining elbow joints and T-joints. Once all four joints are attached, you should have a rectangle shape.
Step 4: Noose Netting Over the Patch
Next, you’ll need to noose the netting over the patch. This is best done with two people, as one person can hold the netting while the other secures it in place.
Step 5: Secure the Grid With Small Screws
It’s time to secure the grid to the frame. This will be done with small screws and washers.
Begin at one corner of the frame and work your way around, screwing the grid to the frame at each intersection. Use as many or as few screws as you feel comfortable with – just make sure that the grid is secure. [4]
Step 6: Hang Your Netting
Now it’s time to hang your netting. Start by draping it over one side of the frame and then pulling it taut to the other side. You may need to trim off a bit of excess netting, but better too much than too little. Once you have the netting in place, use clothespins or similar clips to secure it to the frame.
And that’s it! Your garden netting frame is now complete and ready to use. Enjoy!
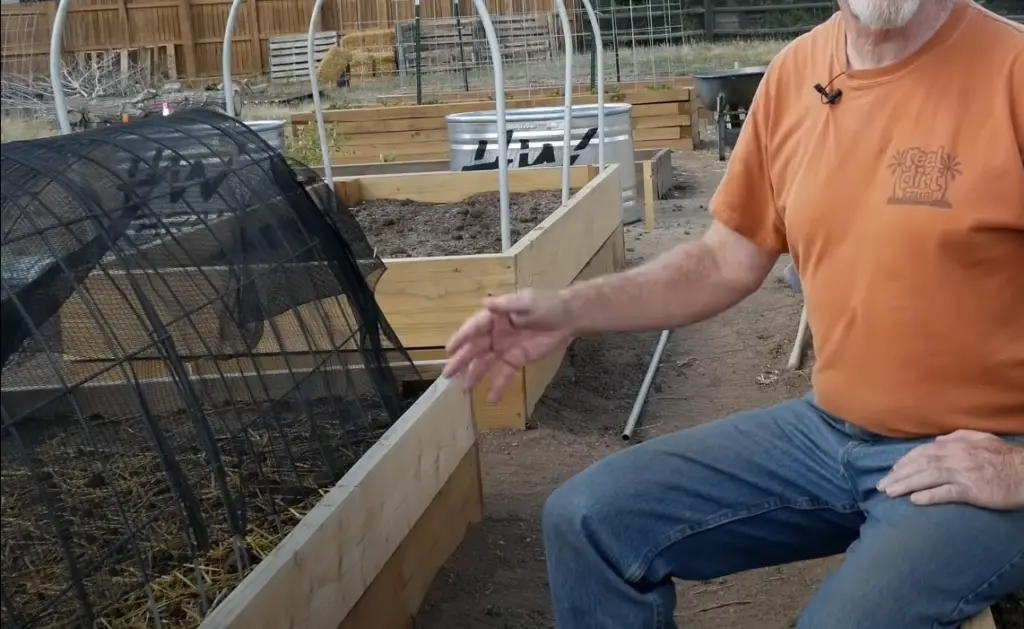
Step 7: Using Your Garden Netting Frame
Now that your garden netting frame is complete, you’re probably wondering how to best put it to use. Here are a few ideas:
- Use it as a simple insect barrier – just drape your netting over the top of your plants and secure it in place. This will keep pesky bugs from getting to your plants while still allowing sunlight and water through.
- Get creative and use it as a makeshift trellis. Train climbing plants like beans or tomatoes up one side of the frame and let them spill over the top for a beautiful and bountiful harvest.
- Use it as a shading device. If your plants are getting too much sun, drape the netting over them to create some shade. This is especially helpful in hot summer months.
So there you have it – everything you need to know about how to make a garden netting frame. Happy gardening! [5]
Comparison of Different Materials for a Garden Netting Frame
A garden netting frame is an essential tool for protecting your plants from pests and other outdoor elements. When it comes to building a netting frame, the choice of material is critical to its functionality and durability. This table compares different materials commonly used for a garden netting frame, based on various indicators.
| Material | Price | Strength | Flexibility | UV Resistance | Overall Rating |
|---|---|---|---|---|---|
| Plastic PVC Pipes | $ | ★★★☆☆ | ★★☆☆☆ | ★★☆☆☆ | ★★★☆☆ |
| Metal Pipes | $$ | ★★★★☆ | ★★★☆☆ | ★★★★★ | ★★★★☆ |
| Bamboo Sticks | $ | ★★☆☆☆ | ★★★★☆ | ★★★☆☆ | ★★★☆☆ |
| PVC Coated Wire | $$$ | ★★★☆☆ | ★★★★☆ | ★★★★★ | ★★★★☆ |
| Nylon Rope | $ | ★★☆☆☆ | ★★★★☆ | ★★★☆☆ | ★★★☆☆ |
This table compares five different materials commonly used for building a garden netting frame: plastic PVC pipes, metal pipes, bamboo sticks, PVC coated wire, and nylon rope. The table includes the following indicators: price, strength, flexibility, UV resistance, and an overall rating.
The price is rated based on a scale of $ (lowest) to $$$ (highest). The strength and flexibility ratings are based on a five-star scale, with five stars indicating the highest strength or flexibility. The UV resistance rating is also based on a five-star scale, with five stars indicating the highest resistance to UV rays. Finally, the overall rating is an average of the other ratings and is also based on a five-star scale.
Based on this comparison, metal pipes seem to be the best option for a garden netting frame due to their high strength, flexibility, and UV resistance. While they are more expensive than some other options, their overall rating of four stars makes them a worthwhile investment for protecting your plants.
FAQ
What is the best way to make a net for a garden bed?
There are a few ways to make garden netting frames, but one of the most popular and effective methods is to use PVC pipes. PVC pipes are relatively cheap and easy to work with, making them a great option for those looking to create a netting frame on a budget.
What’s the best way to build a wooden garden frame?
Building a wooden garden frame is a relatively simple task that can be completed in a few hours. The most important thing to keep in mind when building a garden frame is to make sure that the frame is sturdy and will not collapse under the weight of the netting or plants.
Here are the steps you’ll need to follow to build your own garden netting frame:
- Start by measuring the area where you want to build your frame. You’ll need four pieces of wood that are all the same length, so it’s important to get accurate measurements.
- Next, cut your pieces of wood to size. If you’re using a saw, be sure to wear protective gloves and eye gear.
- Once your pieces are cut, it’s time to assemble the frame. Begin by nailing or screwing two pieces of wood together at right angles. Repeat this step with the remaining two pieces of wood.
- Now that all four sides are connected, you’ll need to add support in the middle of the frame. Cut the fourth piece of wood to size and nail or screw it into place between the other four pieces.
- Finally, cover your frame with garden netting or chicken wire. Use staples, nails, or clips to secure the fabric in place.
Building a garden netting frame is a great way to protect your plants from pests and animals. Follow these simple steps and you’ll have your own frame in no time!
What is the most cost-effective method of building raised beds?
This is a difficult question to answer as it depends on many factors such as the cost of materials, labor, and time. However, one method that can be used to create raised beds cheaply and easily is by using garden netting frames. Garden netting frames are simple structures made from metal or plastic poles which are then covered with garden netting. They are relatively easy to construct and can be made very cheaply if you use recycled materials.
What kind of wood should you use for raised beds?
There are a few things to consider when choosing wood for your raised garden beds. One is the type of wood. Cedar and redwood are naturally rot-resistant, making them ideal choices for outdoor use. Pressure-treated lumber is also a good option, though it should be noted that the chemicals used in the treatment process can leach into the soil. If you’re looking for an eco-friendly option, bamboo is a great choice. It’s strong and durable, yet lightweight, making it easy to work with.
Another thing to consider is the size of the lumber. Boards that are two inches thick or more will last longer than thinner boards. This is especially important if you live in an area with harsh weather conditions. Finally, make sure to choose lumber that is free of knots and other imperfections. These can weaken the boards and cause them to break more easily.
Is it possible to construct a garden box from pressure-treated wood?
This is a question that we get asked often, and the answer is yes! You can absolutely make a garden bed out of pressure-treated lumber. In fact, it’s one of the most popular materials to use for raised beds.
Pressure-treated wood is rot-resistant, which means it will last for years with little to no maintenance. It’s also relatively inexpensive, making it a great option for budget-minded gardeners.
What are the materials you’ll need to make PVC snap clamps?
- PVC pipe
- PVC primer
- PVC cement
- Teflon tape
- Screws
- Washers
- Nuts
- Hose clamps (optional)
First, you’ll need to measure and cut your PVC pipe into four lengths of equal size. Next, use the PVC primer and cement to attach two pipes together at a 90-degree angle. Make sure that the cement is fully cured before moving on. Repeat this step for the remaining two pieces of PVC pipe.
Once you have all four pieces of PVC pipe assembled, it’s time to start attaching the snap clamps. First, wrap a piece of Teflon tape around each end of the pipe. This will help to create a watertight seal. Next, take a screw and washer and attach them to the end of the snap clamp.
Now, holding the frame up against one of the PVC pipes, start threading the screw into the pipe. Once it’s tight, do not overtighten as this can strip the threads or break the PVC pipe. Finally, secure each clamp with a nut.
If you’re worried about the clamps coming loose over time, you can always add an extra layer of security by adding hose clamps around each connection point. That’s it!
What are the best materials to use for a garden netting frame?
The best materials to use for a garden netting frame are those that will last a long time and won’t rust. Galvanized steel or aluminum are both good choices. You’ll also want to make sure the frame is sturdy enough to hold up the netting. For instance, you don’t want to use flimsy materials that will bend or break easily.
Another consideration is the size of the frame. Make sure it’s large enough to fit over your garden bed, and leave enough room around the edges so you can secure the netting properly. You don’t want gaps where pests can slip through.
Finally, think about how you’ll attach the netting to the frame. Some frames come with hooks or loops that make it easy to add and remove the netting. Others have velcro straps or ties that hold everything in place. Choose whatever method works best for you and will be easiest to use on a regular basis.
Is it complicated to make a garden netting frame?
No, it’s actually quite simple. All you need is some basic carpentry skills and a few tools. You’ll also need some netting, of course. Thus, to make a garden netting frame, follow these steps:
First, cut four pieces of wood to the desired size. Make sure they’re all the same length.
Next, use a drill to create pilot holes in each piece of wood. This will make it easier to screw the pieces together later.
Then, get your netting and drape it over the frame you just created. Make sure there’s enough slack so that the netting doesn’t pull too tight when you secure it.
Finally, use screws or nails to fasten the netting in place. That’s it! You’ve now made your very own garden netting frame.
What are the benefits of using a garden netting frame?
A garden netting frame can be a great way to keep your plants safe from pests and diseases. It can also help you to control the amount of light and water that your plants receive.
Then, you can choose the type of netting that you want to use. There are many different types of netting available, so you should be able to find something that will work well for your garden.
Next, you will need to determine the size of the frame that you need. You can do this by measuring the area that you want to cover with the netting. Once you have the measurements, you can then cut the pieces of wood that you will need to create the frame.
After you have cut the pieces of wood, you will then need to assemble them into a frame. You can do this by using nails or screws. Once the frame is assembled, you can then attach the netting to it.
How many poles should be used to make a garden frame?
The number of poles needed to make a garden frame will depend on the size of the frame. For a small frame, you will need four poles. For a medium frame, you will need six poles. And for a large frame, you will need eight poles.
To make a garden netting frame, firstly, select the site for your garden. It is important to choose a site that gets plenty of sunlight and has good drainage. Once you have selected the site, mark out the perimeter of the garden with string or stakes.
Next, dig holes for the posts at each corner of the garden. The holes should be about 30cm deep. If you are using wooden posts, soak them in water overnight before putting them in the holes. This will help to prevent them from rot.
After the posts have been installed, stretch a length of garden netting across the top of the frame and secure it to the posts with staples or clips. Be sure to choose a garden netting that is made from UV-stabilized material so that it will withstand sun exposure.
How high off the ground should the poles be placed for a garden frame?
This will depend on the vegetables or fruits you are growing. For example, if you are growing peas, then you will want the netting to be about two feet off the ground so the peas can climb up the netting. But, if you are growing tomatoes, then you will want the netting to be about four feet off the ground.
Can any type of plants be grown in a garden frame?
Yes, any type of plant can be grown in a garden frame as long as the netting is the appropriate size. The most common plants that are grown in frames are vegetables, herbs, and fruits.
You should also take into account the weight of the product that will be hanging on the frame when deciding on a netting size. If you plan to grow bigger plants, then it is best to use a sturdier frame made out of metal or wood.
How do you attach PVC pipe to netting?
You will need to use zip ties or purchase clips that are designed to attach netting to PVC pipe. Make sure that the netting is taut so that it does not sag in the middle. Otherwise, your plants will not get the support they need and the netting could tear.
If you live in an area with high winds, you may want to consider using metal pipes instead of PVC. Metal is much more durable and will hold up better in windy conditions. You can still use zip ties or clips to attach the netting to the metal pipes.
Another option is to build a wooden frame and then staple the netting to the wood. This is a more permanent solution, but it will be more expensive.
Whichever method you choose, make sure that the netting is taut and secure. Otherwise, your plants will not get the support they need and the netting could tear.
How do you secure a PVC tarp?
To secure a PVC tarp, you will need to use either rope or bungee cords. First, determine where you want the tarp to be secured. Next, measure the length of rope or cord needed. Cut the rope or cord to size, and then tie it securely around the PVC pipe. Finally, knot the rope or cord so that it is tight and will not come loose. Repeat this process for each corner of the tarp.
How do you install nets over raised beds?
If you want to keep your netting in place for extended periods, it’s best to install it on a frame. You can make a simple frame out of PVC pipes and zip ties. First, cut your PVC pipes into lengths that will fit around the perimeter of your raised bed. Next, use zip ties to attach the pipes together at the corners. Finally, stretch your netting over the frame and secure it with more zip ties.
With a little bit of effort, you can easily keep your garden free of pests!
Useful Video: How to Make Hoops for Raised Beds (4 Ways)
Conclusion
In conclusion, making a garden netting frame is a great way to keep your plants safe from pests and animals. By following the steps outlined in this article, you can easily make your own frame that will last for years. With a little bit of effort, you can have a beautiful and functional garden netting frame that will protect your plants and help them thrive.
If you enjoyed this article, please share it with your friends or on social media. And if you have any questions or comments, please leave them below.
Thanks for reading!
References:
- https://www.gardening-naturally.com/blog/choosing-garden-netting-for-fruit-vegetables.html
- https://www.mysimplysimple.com/my-simply-simple/diy-vegetable-garden-cage
- https://www.connieandluna.com/blog/2020/4/3-ways-to-build-diy-netting-for-your-veggie-patch
- https://www.starkbros.com/growing-guide/article/pest-control-using-garden-netting
- https://www.harrodhorticultural.com/top-10-garden-netting-tips-pgid1860.html