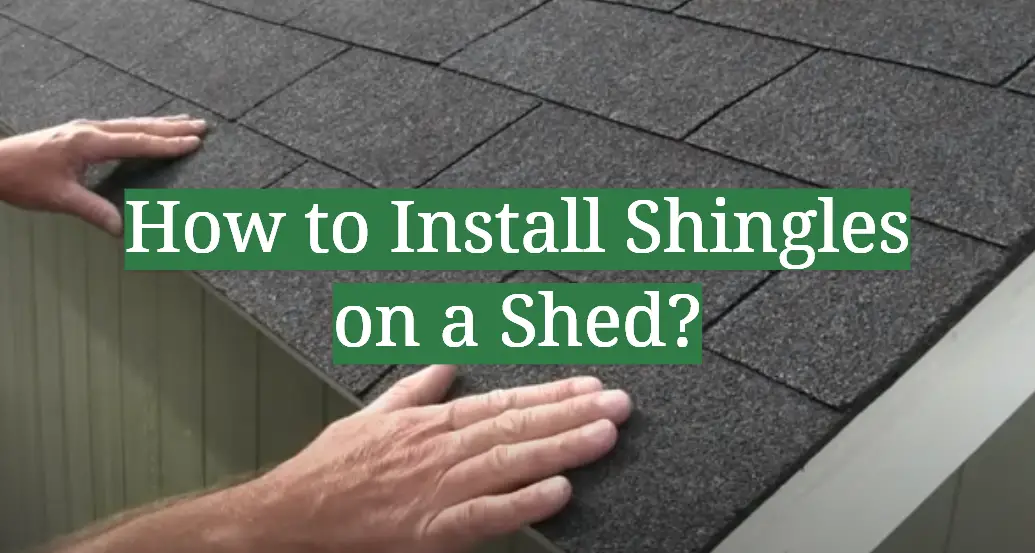
If you’re looking to give your shed a facelift, then installing some new shingles can be the perfect way to go. Not only will it instantly transform the look of your shed, but adding shingles can also help protect against the elements. Installing shingles on a shed may seem like an overwhelming task at first glance – however, it can be achieved quite easily with just two or three basic tools and supplies. In this blog post, we’ll discuss step-by-step how to install shiny brand new shingles onto any type of shed for maximum protection and aesthetic appeal. Let’s get started!
When to Install Shingles on a Shed?
When installing shingles on a shed, timing is an important factor. Ideally, you should install the shingles when the weather is dry, so the roof can bond properly to the shed. Make sure your outdoor temperature is above 40°F and there are no rain or snow showers in the forecast. Additionally, avoid installing shingles during extremely windy days as it can cause them to be blown off prematurely.
Make sure you have a ladder, safety goggles, gloves, hammer, nails, and any other necessary tools and materials before starting the installation process. Then double check that your wood or metal support structure is level and secure before proceeding with installation of the shingles.
For best results, it is also recommended that you use a high-quality adhesive to further bond the shingles to the shed. [1]
Things to Consider Before Installing Shingles on a Shed
Before installing shingles on your shed, there are a few important things to consider.
First and foremost, you should make sure that the shed is in good condition before installing the shingles. If any of the wood has rotted, or if the frame is warped, it is best to repair these issues before attempting to install shingles. This will ensure that your installation job lasts as long as possible.
Finally, make sure you have all the necessary tools before you start. A hammer, a measuring tape, safety goggles and gloves should all be part of your toolkit. Having these items on hand will ensure that you have everything you need to complete the job safely and efficiently.
By taking your time to consider these factors before beginning your project, you can rest assured that the shingles will be installed correctly and last for many years to come.
How to Install Shingles on a Shed?
Check Your Roof Felt
Before you begin installing shingles, check the felt beneath them to make sure it is in good condition. If the felt is old or damaged, replace it before starting your project.
Secure Nails and Cover With Felt
Use galvanized nails to secure the felt to the roof of the shed. Hammer nails at least 2 inches apart along all edges and seams. Make sure that each nail penetrates through both layers of felt. Overlap two pieces of felt as needed up the sides of the shed. Cover all exposed areas with a layer of tar paper and use galvanized nails or staples to hold it down. [2]
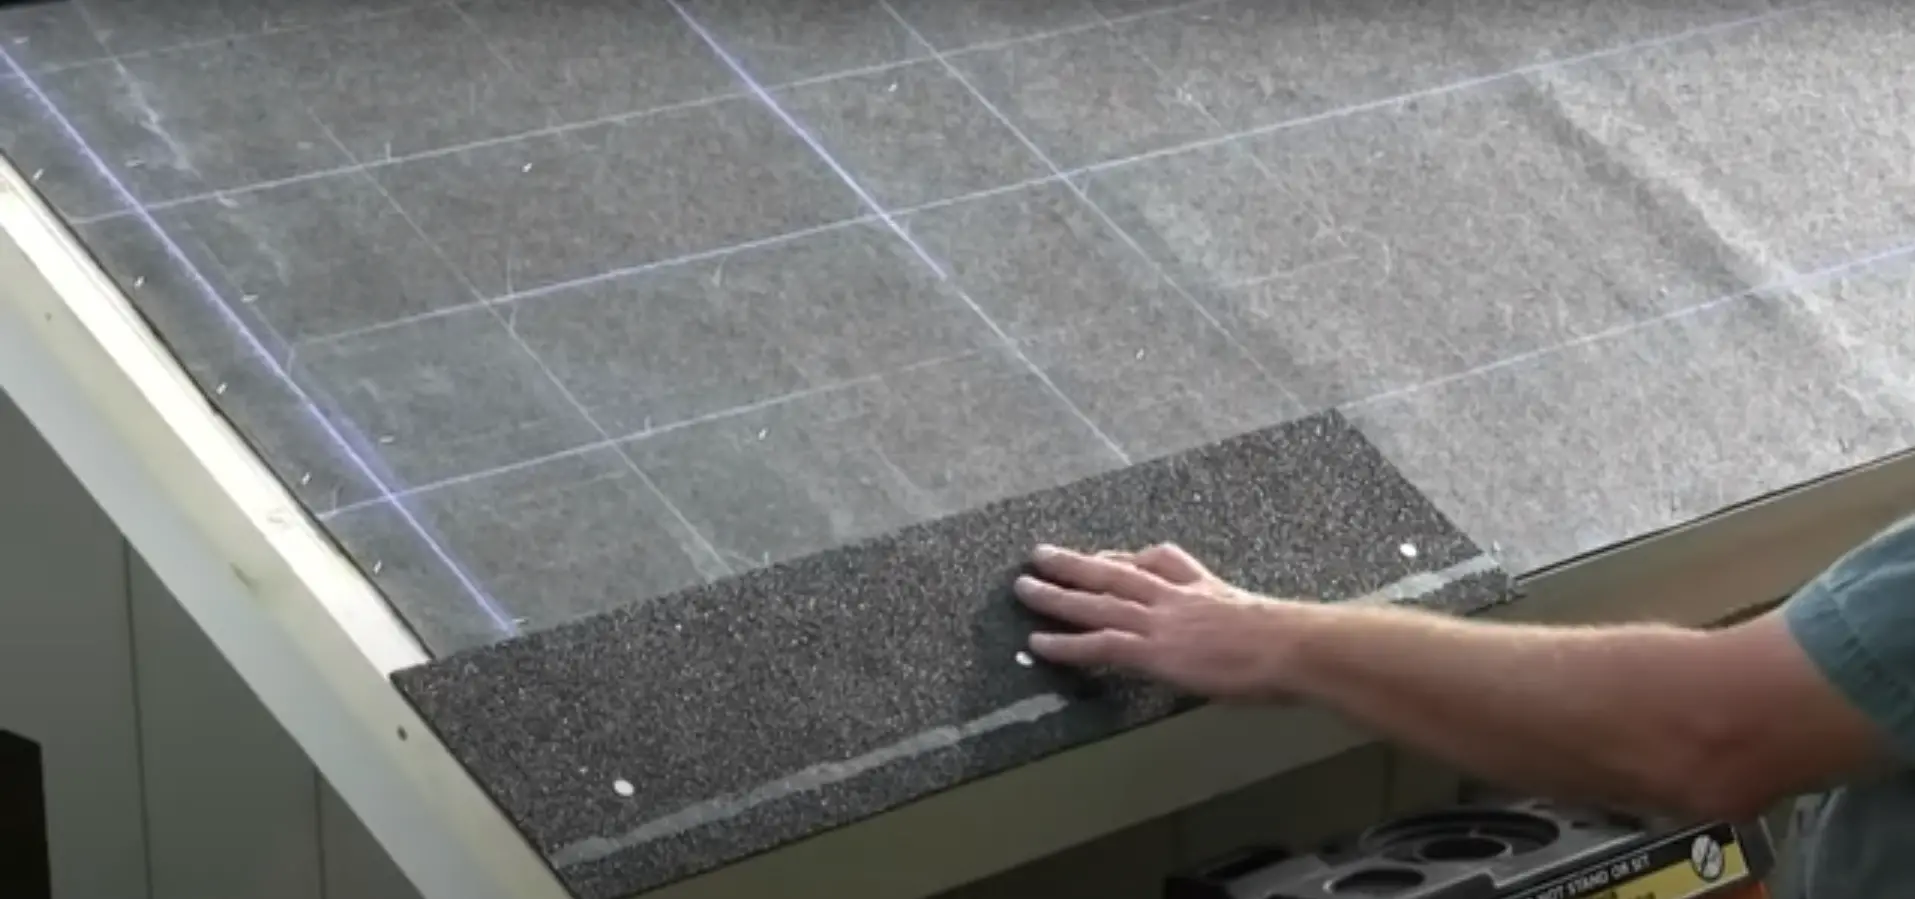
Begin Installing Shingles on Roof Peak
The next step is to begin installing shingles on the roof peak. Begin by measuring and cutting a piece of felt that is slightly bigger than the shingling area. Cut enough pieces to cover about 20 inches down from the peak. Secure these pieces with galvanized nails on all sides.
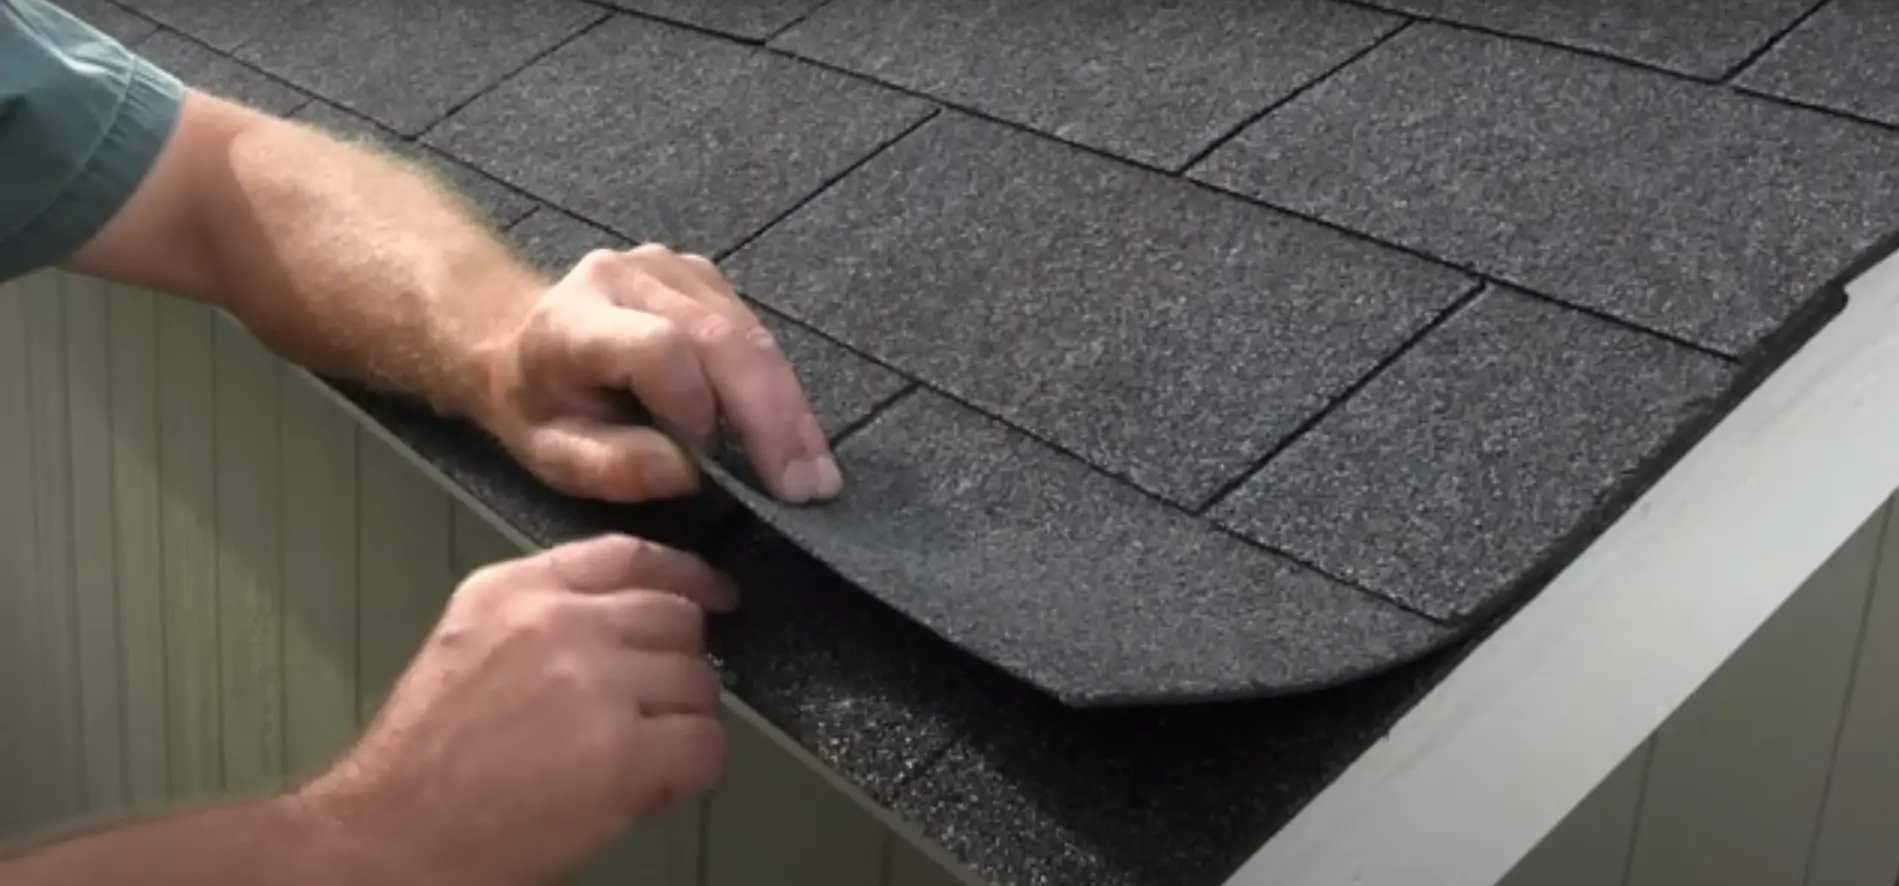
Start at the Bottom and Work Upwards
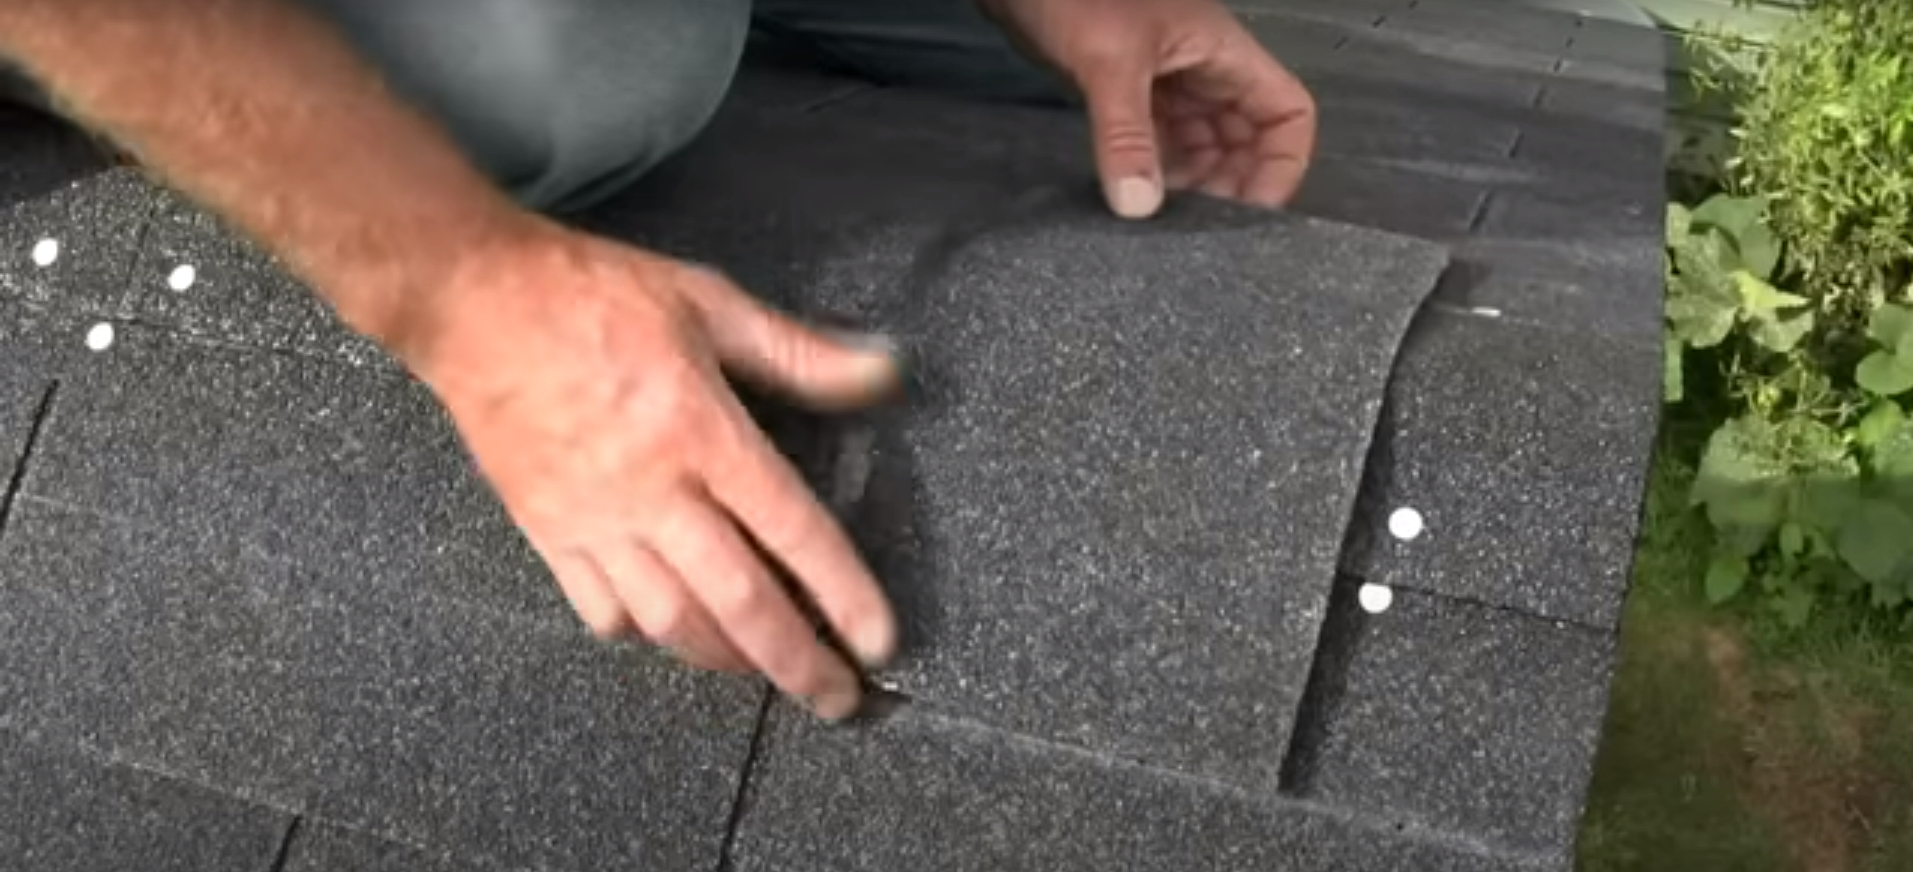
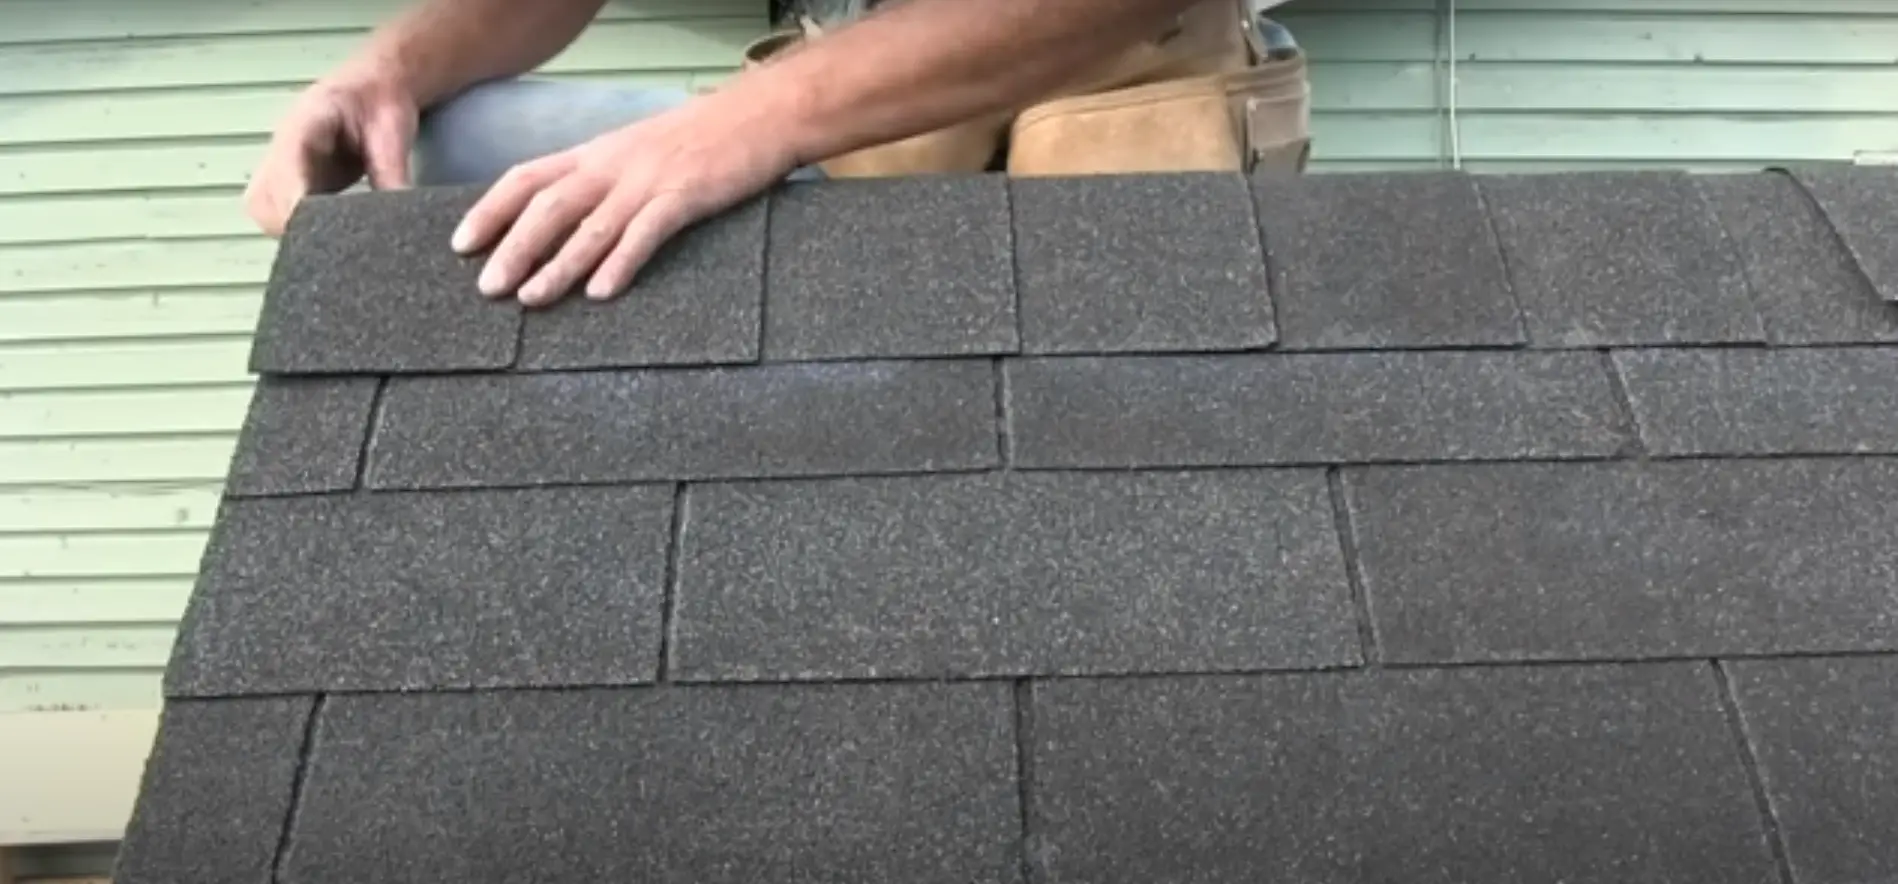
Once the felt has been installed, begin laying out your rows of shingles starting from the bottom and working up to the top. Start each row with a full-length shingle and then cut additional pieces as needed to complete each row without leaving any gaps or overlapping too much. Make sure that each piece is securely fastened using four nails per shingle; two on either side of the tab slots.
Continue Installing Rows of Shingles
Keep installing shingles in rows on the roof until you reach the top. When reaching the peak, cut a piece of felt slightly larger than the area to be covered with shingles and secure it to the roof using nails or staples. Continue nailing down shingles from one side of the peak to the other, ensuring that each row overlaps by at least two inches.
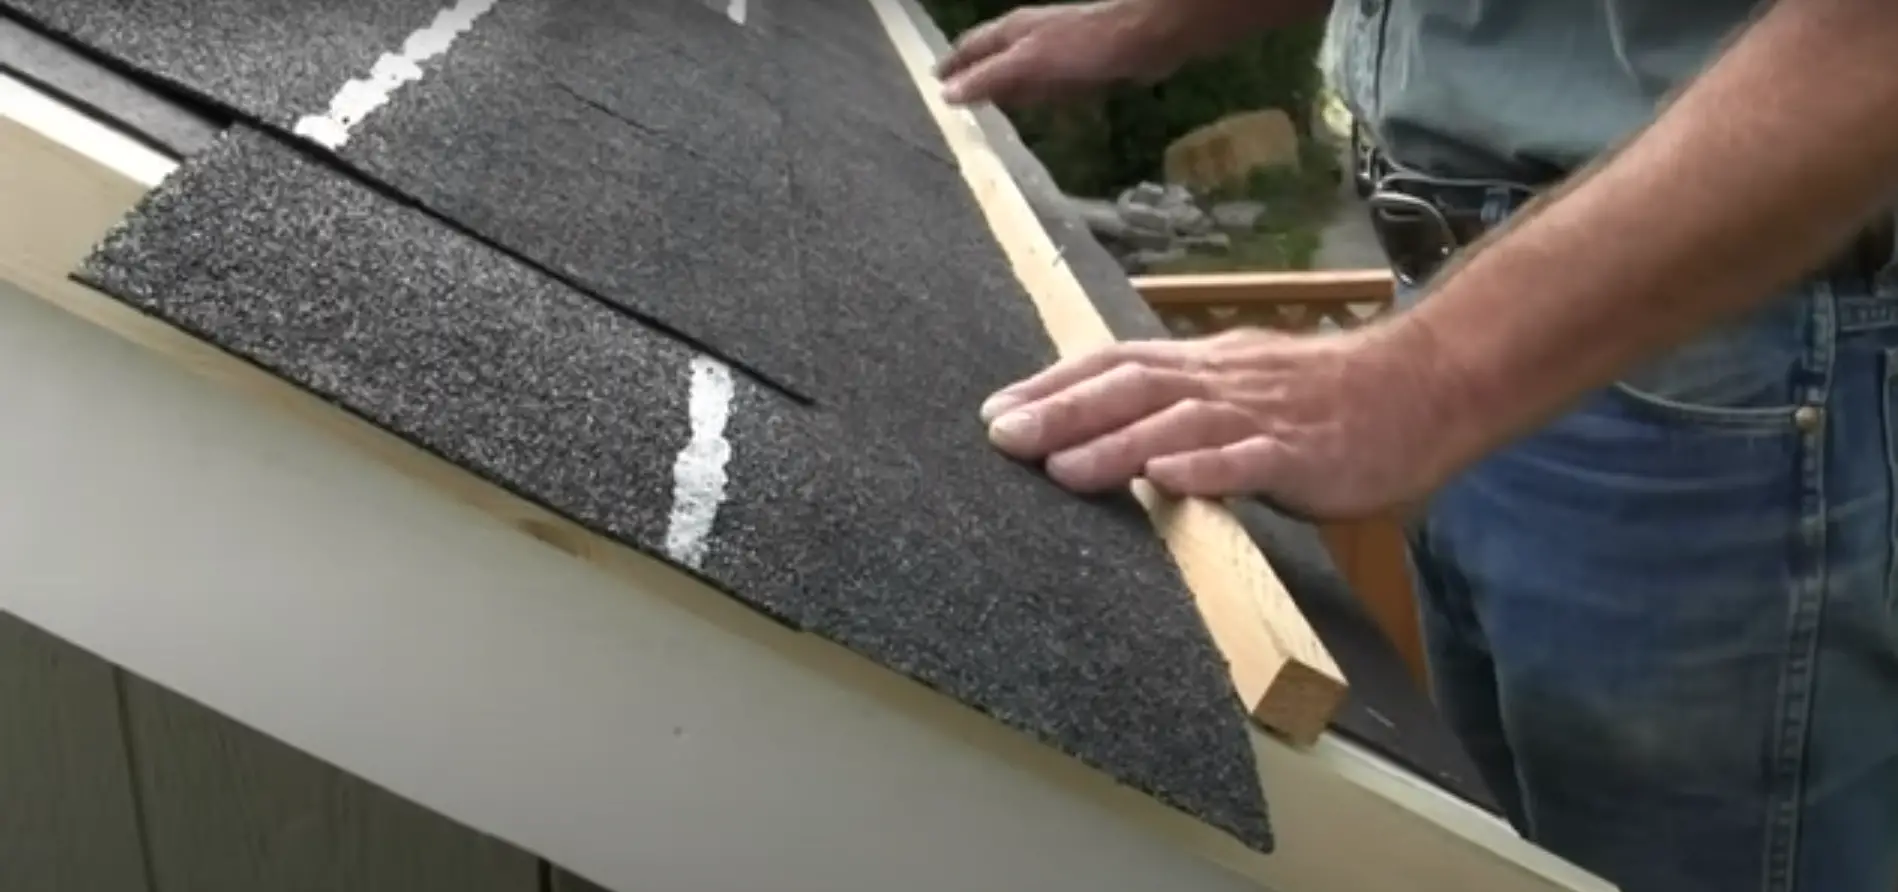
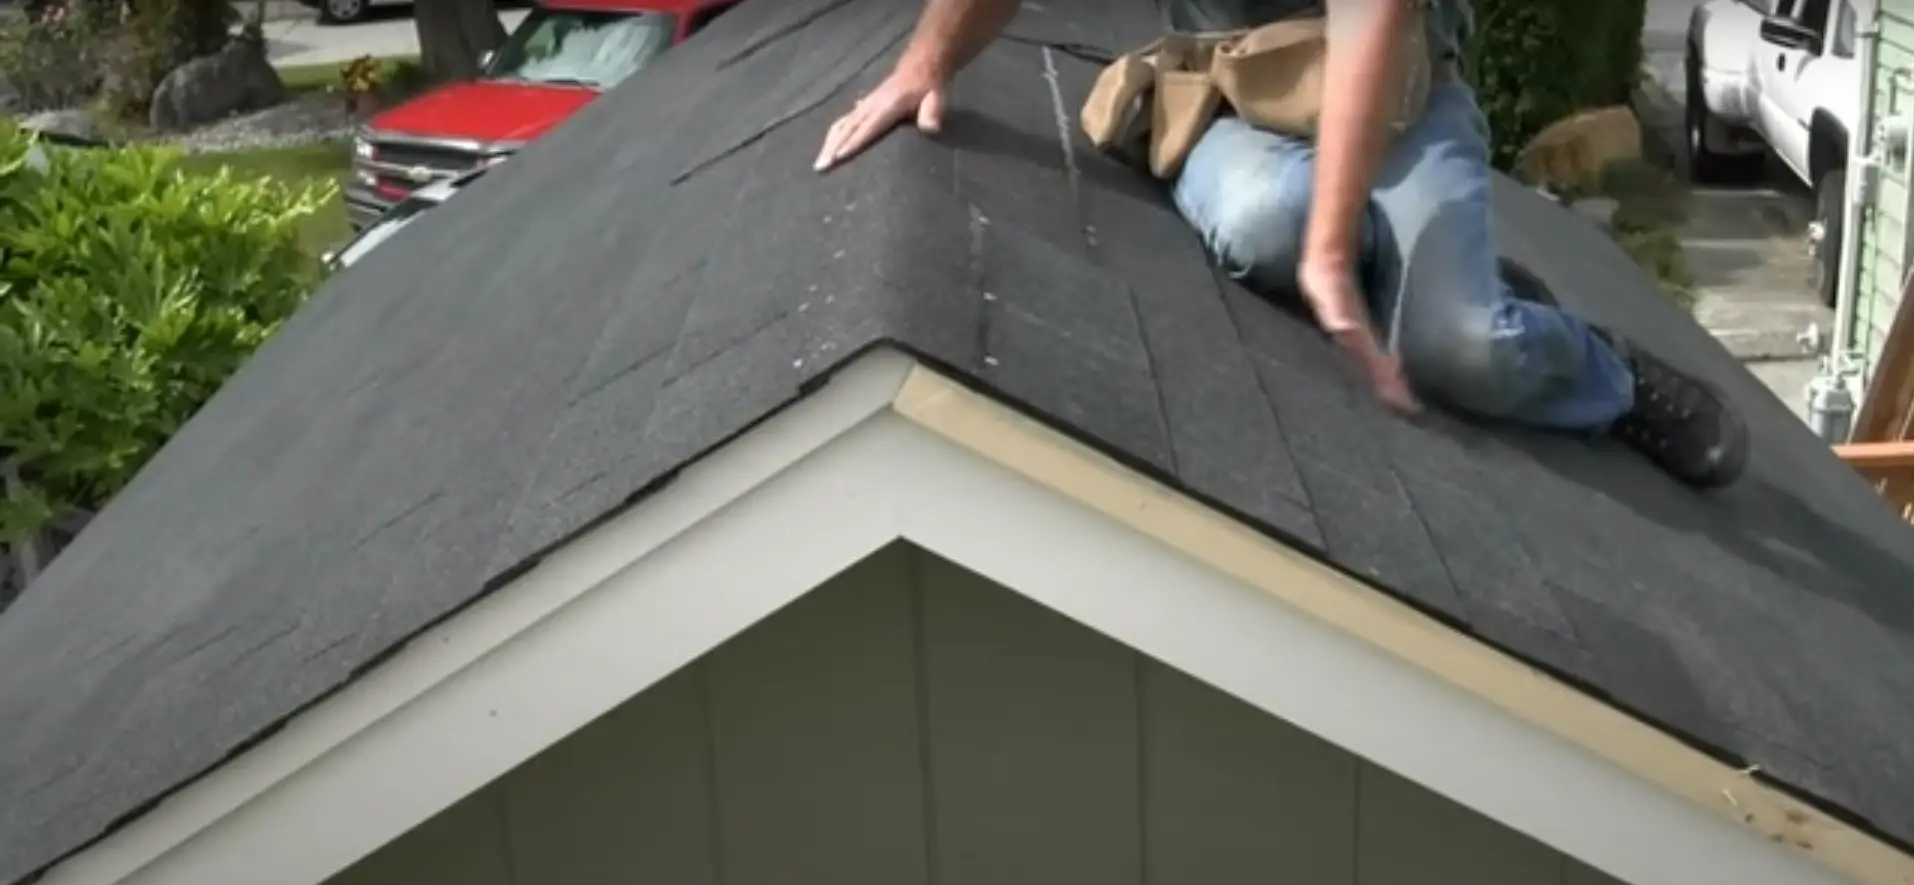
Finish Installing Shingles
Once all of your shingle rows are in place, finish off your project with ridge caps along the top edge where two sides meet. Ridge cap pieces should overlap each row by no more than 1/4 inch. Secure them to the roof using galvanized nails or screws. Finally, use roofing cement along any seams or exposed nails to seal everything in place. Your shed is now ready for the elements with shingles properly installed!
Be sure to inspect your roof from time to time and make repairs as needed. With proper maintenance, you can enjoy many years of protection from the weather with your new roof. [3]
Benefits of Installing Shingles on a Shed
Installing shingles on a shed can provide many benefits.
First, it adds an extra layer of weather protection to the structure. This can help reduce damage from rain, snow and other elements.
Secondly, it makes the shed more aesthetically pleasing and increases its overall value.
Finally, shingles can add insulation to the shed, helping to keep its contents at a comfortable temperature year-round. Installing shingles on your shed is not only beneficial for practical reasons but also for aesthetic purposes.
Not only does it look great but also helps protect what’s inside even better! With these advantages in mind, you should consider installing shingles on your next shed project!
Cons of Installing Shingles on a Shed
Installing shingles on a shed is an easy and cost-effective way to protect the structure from weather, pests, and other types of wear and tear. However, there are some potential drawbacks to installing shingles on a shed.
First, the materials used to make up the shingle can be quite expensive. They typically range in price from $20-$40 per square foot. This means that it may not be feasible for those with a tight budget. Additionally, if installed improperly, shingles can warp or crack over time and need replacing more often than expected.
Finally, shingles can add trapped heat during warm weather months, which increases the temperature inside of a shed significantly. This is especially true in areas with hot summers, as the additional heat can make it difficult to comfortably work or store items in the shed. It’s important to consider these potential drawbacks when deciding whether shingles are right for your structure. [4]

Things to Avoid When Installing Shingles on a Shed
- Avoid using the wrong type of shingles for your shed. Make sure you choose shingles that are durable and suitable for outdoor use, such as fiberglass or asphalt-based shingles.
- Avoid using nails that are too short or too long to install the shingles properly on the roof of your shed. The size of nails should be in accordance with the thickness of the shingle being installed.
- Avoid installing too many layers of shingles on top of each other as this can cause damage to not only the roof but also the structure underneath it due to excessive weight. When replacing an old layer, make sure you remove all existing layers before adding a new one.
- Avoid installing shingles on a roof that is not structurally sound or has any kind of damage, as this can cause the shingles to become loose and eventually fall off the roof. Make sure you inspect the roof for any defects before proceeding with the installation process.
- Avoid using sealants that are not suitable for outdoor use as they may not provide enough protection from UV rays and water damage, leading to premature deterioration of the shingles over time. Always make sure you choose a reliable sealant from a trusted brand when sealing your shed’s roof after installation.
By following these tips, you can ensure that your shed will have a long-lasting and durable shingle roof that will protect your stored items from the elements for many years to come. [5]
What Do You Stick Down Shingles With?
When installing shingles on a shed, you’ll need the proper adhesive material to ensure that your shingles stay in place. The most common choice is roofing nails or staples. These should be nailed along the top of each shingle in order to secure it firmly. You can also use roofing cement or tar and gravel to help keep the material in place and aid against water damage. Make sure you follow all instructions carefully when applying adhesive materials so that the installation is properly secured. Additionally, take extra care to apply adhesive evenly across each shingle and around its edges for optimal coverage.
Finally, make sure to inspect your work carefully before calling it finished. Check for any gaps or pockets of air between the adhesive materials and the shingle surface, as these might lead to leaks in inclement weather. Additionally, look for signs of wear and tear such as cracks or splits in the material itself. If all looks good, you have successfully installed shingles on your shed!
What Causes Shingles to Fall Off Roof?
Shingles on a shed roof can become loose for several reasons. Temperature changes and extreme weather, such as hail or high winds, can cause shingles to loosen and eventually fall off the roof. If the shed is located in an area that experiences heavy snowfall, then the weight of the snow may also be too much for shingles to bear, causing them to slip off. Additionally, aging shingles that have been exposed to sunlight and moisture over time are more likely to come loose than newer ones. Any of these factors can lead to shingle loss and should be addressed before installing new shingles on a shed.
If you notice any missing or damaged shingles on your shed’s roof it is important to take the necessary steps to protect your property. Replacing damaged shingles or repairing holes and cracks can help prevent further damage from occurring. In some cases, it may be necessary to replace entire sections of the roof in order to ensure that no further damage is done. Once the repairs are made and any loose shingles have been secured, you are ready to begin installing new shingles on your shed. [6]
Why Should You Build a Shed?
A shed is a great addition to any outdoor space and can provide extra storage, a workshop area and even an additional living space. Building your own shed can be an enjoyable experience that will allow you to customize the design, materials and features of the shed to suit your needs. Installing shingles on your shed adds protection against the elements, as well as beauty and value to the structure. With careful planning and preparation, installing shingles on a shed can be a relatively straightforward project that most DIYers can complete in just one weekend.
Here are some of the reasons why building a shed with shingles is beneficial:
- Increased Durability – Sheds without shingles are more susceptible to weather damage such as snow and rain. Shingles provide an extra layer of protection and can keep the interior of the shed dryer, thus increasing its lifespan.
- Increased Curb Appeal – Installing shingles on a shed creates an attractive look that will enhance your property’s curb appeal. The right type of shingle also adds texture, dimension and color to the structure, making it more visually appealing.
- Improved Efficiency – Shingles are designed to help regulate temperatures inside the shed, so even in hot climates you can enjoy a cool workspace or storage area year round. This can also reduce energy costs associated with cooling the shed during summer months.
- Added Safety – Shingles provide an extra layer of protection from the elements, reducing the risk of fire damage and other safety hazards.
Installing shingles on a shed is an easy way to increase its durability, enhance its curb appeal and make it more efficient and safe. Once you have chosen the right type of shingle for your shed, you will be ready to begin installation.
How Long Does It Take to Install Shingles on a Shed?
The amount of time it takes to install shingles on a shed will depend on the size and complexity of the structure, as well as the skill level of the installer. Generally speaking, it can take anywhere from one to several days to complete the task. If you are an experienced DIYer, you may be able to finish the job in one day; however, if this is your first time attempting such a project, then it could take longer.
Cost of Installing Shingles on a Shed
The cost of installing shingles on a shed varies depending on the size and complexity of your project. Generally, shingles for a standard 8×10 foot shed will cost between $200 and $250, including the materials and labor. The larger the area to be covered, the higher the cost. Additionally, if you choose to use premium or high-grade materials, such as architectural grade asphalt shingles or metal roof shingles, your costs might increase significantly. You may also need additional materials such as roof vents or flashing which can also add to the overall cost of installation.
In conclusion, installing shingles on a shed can be a fairly inexpensive project if you take into account all of the factors mentioned above. However, it is important to remember that price should not be your only consideration when selecting a contractor for this type of work – always make sure that they are qualified and have experience with working on sheds! [7]
FAQ
How do you lay shingles for beginners?
Laying shingles is a relatively straightforward process, but it does require some basic knowledge and preparation. Begin by preparing the surface of the shed by cleaning off any dirt or debris and ensuring that it is level. You should also measure out how much material you need before getting started. Once this is done, start laying down the starter course of shingles along the eaves of your shed, paying attention to ensure they are properly aligned. After this is completed, begin installing additional rows until you have covered the entire roof. Secure each row with nails as you go and make sure they are spaced evenly apart. When all of the shingles have been installed, apply a layer of asphalt cement on top for extra protection against weather damage.
Do I need tar paper under shingles on a shed?
Yes, tar paper is a necessary component when installing shingles on a shed. It serves as an additional layer of protection against moisture and helps secure the shingles in place. Tar paper should be laid first before beginning to install the shingles, paying special attention to cover any seams or exposed areas. To make sure it has been properly installed, you can use asphalt cement to seal overlapping edges.
What type of nails should I use for my roof?
When installing roofing material onto your shed, you should use corrosion resistant nails that are specifically designed for this purpose. Galvanized steel or aluminum nails are ideal for this application as they won’t rust over time and provide greater holding power than regular nails. Make sure you use the correct size and spacing when securing each row of shingles. Use a longer nail if you are attaching multiple layers, as this will ensure better security. Finally, always wear protective gear while working with roofing materials to avoid potential injuries.
Do shingles need to be glued down?
No, it is not necessary to glue down the shingles when installing them on a shed. Instead, you can use nails to securely attach each row of shingles and provide extra protection against wind or rain damage. However, if your shed is in an area that experiences extreme weather conditions, then gluing down the shingles may be beneficial for maximum security. Regardless of whether you choose to glue or nail, make sure all seams are covered with asphalt cement before finishing off with a layer of protective sealant.
Can I install metal roofing over existing shingles?
Yes, it is possible to install metal roofing over existing shingles on a shed as long as there is no warping or crumbling present. However, it is important to prepare the surface properly before installing the new material in order to ensure that it adheres securely. This may involve removing any existing shingles or asphalt sealant before starting and then laying down a layer of tar paper for extra protection against moisture damage. Once this is done, you can begin with the installation of metal roofing following all necessary safety guidelines.
Can I paint my roof after installation?
Yes, you can paint your roof after installation if desired. Before doing so, you should make sure that all nail heads have been driven flush into the shingles and use sandpaper to remove any loose debris or dirt from the surface. When it comes time to actually apply the paint, use a high-quality acrylic paint designed specifically for roofing materials and apply it in light, even coats. This will help ensure a longer lasting finish and protect the roof from any extreme weather conditions. For extra protection against the elements, you can also opt to apply a sealant after the paint has been dried completely. Make sure this is done following all manufacturer instructions for maximum effectiveness. Additionally, check with your local building regulations to make sure that painting is allowed in your area as some jurisdictions may require approval prior to doing so.
Is it OK to nail into shingles?
Yes, in certain cases it is OK to nail into shingles. When installing asphalt shingles on a shed, you should use two nails per shingle. The nails should be installed along the upper part of the shingle’s nailing line and driven through the top portion of each tab. Make sure to leave enough space between the nail and the edge of the shingle so that water can flow freely above and around them. Also, make sure that you are using galvanized roofing nails as these offer extra corrosion resistance against harsh weather conditions. It is important to note however that nailing into some specialty types of roofing materials, such as metal or cedar shakes, can be dangerous and could lead to premature failure. In those cases, it is best to consult with an expert in order to ensure the job is done properly. Finally, make sure that all nails are driven flush and straight, not crooked or bent. This will help to ensure a proper seal at each nail location and reduce the risk of water infiltration down the road.
Do you need roofing cement for shingles?
Yes, roofing cement is necessary when installing shingles on a shed. It helps to create a better seal and ensure that the shingles stay in place. Before you begin the installation, be sure to check with your local code enforcement office for any special requirements. Before you start installing shingles, it is important to prepare the roof surface properly. Start by cleaning off any debris or dirt from the top of the shed. You should also make sure there are no loose nails sticking out from the surface that could puncture your new shingles. Then use a good quality roofing felt paper over the entire surface as an underlying barrier against wind and rain damage.
Once you have prepared the roof and have all the necessary supplies, you are ready to start installing your shingles. Start with one of the side walls and work your way up. As you apply each shingle, use roofing cement underneath it to create a better seal. Work in straight lines across the shed until all of the shingles are installed. Avoid overlapping or cutting any of the edges as this could cause problems in future years. Once all of the shingles are installed, check them again for proper fit and seal. If they seem loose, add some more roofing cement to provide an extra layer of protection against water damage and other elements.
Useful Video: How To Install Asphalt Roofing Shingles on a Shed or Cabin – Shed Building Video 13 of 15
Conclusion
In conclusion, installing shingles on a shed is a relatively straightforward process that can be done in a few hours. Before beginning the project, it is important to make sure that the roof deck is prepared properly and that all components are installed securely. With careful planning and attention to detail, you will soon have a shed with beautiful new roof shingles that will protect your structure from rain and other elements for many years to come.
Thanks for reading!
References:
- https://www.thisoldhouse.com/roofing/22763596/how-to-install-shingles-on-a-shed-roof
- https://www.wikihow.com/Shingle-a-Shed-Roof
- https://www.waltons.co.uk/blogs/blog/how-to-shingle-shed-roof
- https://atimprovements.com/how-to-install-asphalt-shingles-on-a-shed-roof-diy-step-by-step-shingle-installation-guide/
- https://www.homedepot.ca/en/home/ideas-how-to/outdoors/outdoor-living/how-to-shingle-a-shed-roof.html
- https://www.secrets-of-shed-building.com/installing-roof-shingles.html
- https://www.icreatables.com/how-to-build-shed/shed-build-roofing-install