Summer is in full swing and patriotic holidays like the 4th of July are right around the corner. Why not show your American pride with a handmade garden flag? This project is easy to do using a Cricut machine and some basic supplies from your local craft store. In just a few simple steps, you can have a festive flag to hang in your yard or garden!
Why Do You Need Your Own Garden Flag?
Plus, it’s a fun and easy project that you can do with your Cricut cutting machine. In this post, we’ll show you how to make a garden flag using Cricut, step-by-step. [1]
Materials and Tools Needed For Creating A Garden Flag With Cricut
- A piece of fabric or burlap measuring 18″ x 22″
- Cricut cutting machine and mat
- Iron-on vinyl in your desired colors
- Scissors
- Ruler or tape measure
- Pencil or pen. [2]
Tutorial
Step One: Choose a design and size for your garden flag. I used the “Spring is in the Air” design from Cricut Access. For my flag, I wanted it to be 12 inches wide by 18 inches tall.
Step Two: Cut out your design on contact paper. Make sure to mirror your image before cutting!
Step Three: Weeding time! This is probably the most tedious part, but it’s so satisfying to see your final product taking shape.
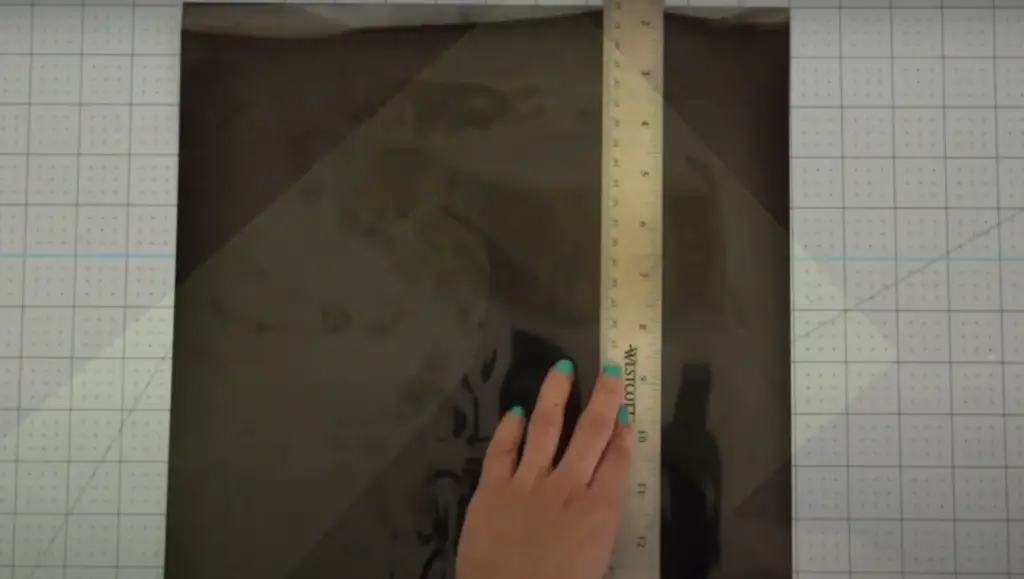
Start by peeling off the excess vinyl around your design. Then, use a weeding tool to remove any small pieces that are left behind.
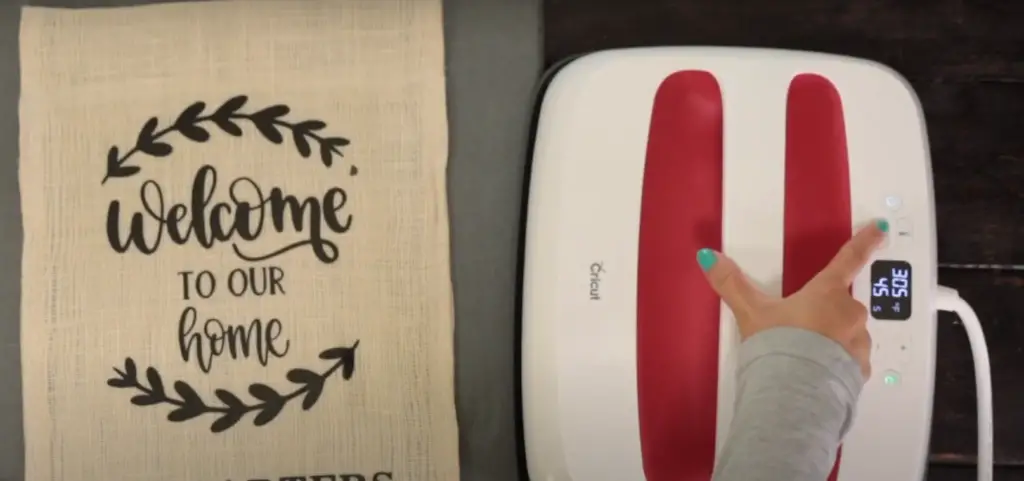
Step Four: Now it’s time to transfer your design to your garden flag. I like to use a piece of transfer tape for this part, but you can also just use your fingers.
Start by peeling off the backing of your vinyl design. Then, place the vinyl on your flag and rub it down with a credit card or other firm object.
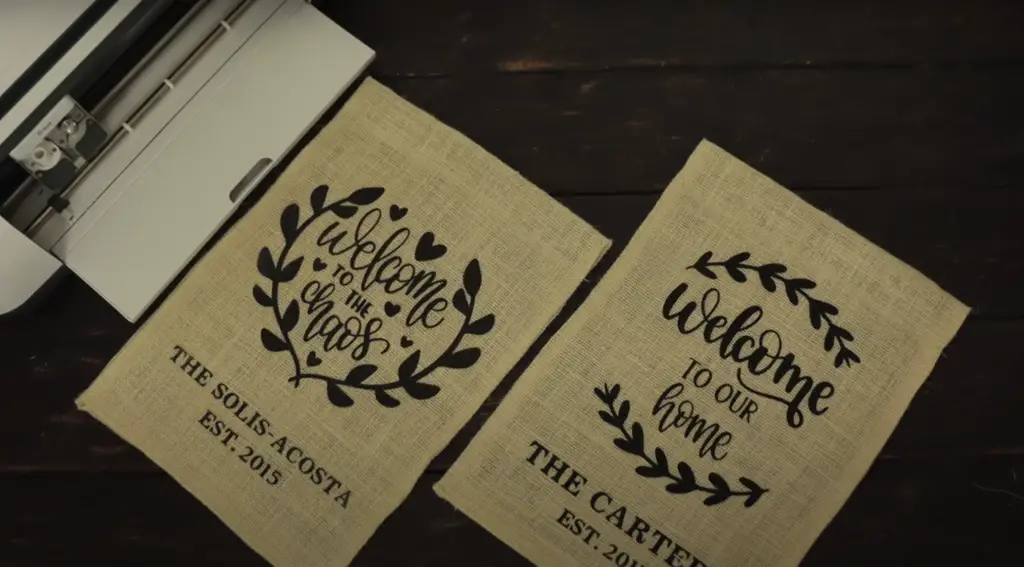
Finally, slowly peel away the transfer tape (or fingers), and voila! You’ve got yourself a beautiful garden flag.
Display your new flag with pride! Whether you stick it in a potted plant or prop it up on a stake in your yard, enjoy showing off your handiwork to everyone who passes by. [3]
Handy Tips to Follow While Working on the Project
When working on the project, it is important to follow some handy tips so that you can create a beautiful garden flag.
Firstly, choose a design that you like and then cut it out using the Cricut machine. Next, use an adhesive to attach the design to the fabric.
Finally, sew around the edges of the flag to secure it in place.
By following these simple steps, you will be able to create a gorgeous garden flag that will add charm to your home. So, what are you waiting for? Get started on this fun and easy project today! [4]
Fun Ideas for Your Outdoor Flag
Once you’ve made your garden flag, it’s time to start thinking about how you want to decorate it.
One idea is to add a border around the edge of the flag using different colors of fabric. Another option is to applique a design or phrase onto the flag.
If you’re feeling really creative, you could even make a double-sided flag by attaching two pieces of fabric together. The possibilities are endless!
Get started on your garden flag project today and enjoy showing off your handiwork all season long.
DIY Flag vs Purchasing One
When it comes to garden flags, you have the option of either purchasing one or making your own.
If you’re looking for a simple project that won’t take up too much time, then buying a flag is probably the way to go. However, if you want something unique that will reflect your personal style, then making your own flag is the way to go.
No matter which route you decide to take, enjoy adding a little bit of personality to your outdoor space! [5]
Comparison of Materials and Costs for Making a Garden Flag With Cricut
When making a garden flag with Cricut, there are various materials and costs to consider. This table compares the most common materials and their costs, as well as the amount of each material needed to make a standard size garden flag.
| Material | Cost per unit | Amount needed for one flag |
|---|---|---|
| Iron-On Vinyl | $9.99 for a 12×24 inch sheet | 1 sheet |
| Fabric | $8.99 per yard | 1/4 yard |
| Iron-On Transfer Tape | $7.99 for a 12×48 inch roll | 1 foot |
| Grommets | $6.99 for a 12 pack | 2 grommets |
The table compares four common materials used to make a garden flag with Cricut: iron-on vinyl, fabric, iron-on transfer tape, and grommets. The cost per unit and amount needed for one flag are provided for each material. Iron-on vinyl is the most expensive material, but only one sheet is needed per flag. Fabric is the cheapest material, but a quarter yard is needed for each flag. Iron-on transfer tape and grommets are moderately priced, and only one foot and two grommets are needed for each flag, respectively. By considering these costs and amounts, you can determine the most cost-effective option for making your garden flag with Cricut.
FAQ
Is it possible to apply vinyl decals on a flag?
Yes, you can apply vinyl decals on a garden flag! You will need to purchase a special type of vinyl that is made for outdoor use and has an adhesive backing. Apply the vinyl decals according to the manufacturer’s instructions. Be sure to seal the edges of the vinyl with clear silicone caulk to prevent peeling.
What is the best way to make a backyard flag?
One that will flutter in the slightest breeze and make your neighbors jealous? Cricut to the rescue! This easy project can be completed in an afternoon, using materials you likely already have on hand.
You will need:
- a blank flag (I used a 12″x18″ garden flag from the dollar store)
- Cricut cutting machine & design space software
- outdoor vinyl (I used Oracal651 in black)
- transfer tape
- scissors or weeding tool
If you don’t have a Cricut, no worries! You can easily create a stencil with contact paper and a sharp knife. Just be sure to use outdoor paint that won’t fade in the sun.
Creating your design in Cricut Design Space is simple. Just choose the “upload” function and browse for the image you’d like to use. I found this great free SVG of a sunflower online. Once your image is uploaded, select “insert images” and then resize it to fit your flag. Be sure to mirror your image before cutting, so that it will be facing the correct direction when applied to your flag!
Next, cut out your design using outdoor vinyl and transfer tape. If you’ve never worked with vinyl before, don’t worry- it’s easy! Just load your mat into the machine with the vinyl side down, and follow the prompts in Design Space. For this project, you’ll want to use the “weeding” tool to remove the excess vinyl from around your design. This just means that you’ll use a small hook to peel away the vinyl that you don’t want on your final product.
Once your design is cut and weeded, it’s time to apply it to your flag. Remove the backing from your transfer tape, being careful not to lose any of your tiny sunflower pieces! Place the transfer tape (sticky side down) onto your flag, and then slowly peel away the paper backing. You may need to use a credit card or other flat object to smooth out any air bubbles as you go.
And there you have it- a beautiful garden flag for your home! Be sure to display it with pride and enjoy all the compliments you’ll be sure to receive.
What is the material that garden flags are made of?
Garden flags are usually made of lightweight fabric so that they can wave easily in the breeze. The most popular fabrics for garden flags are nylon and polyester.
What is the size of a garden flag?
The standard size for a garden flag is 12 inches by 18 inches, but you can find them in other sizes as well.
What’s the best way to hang a garden flag?
There are a few different ways to hang garden flags. You can use flag poles, dowels, or even a fishing line. If you’re using a Cricut machine, you can easily make a garden flag using some fabric and heat transfer vinyl.
How can you make a fabric flag at home?
You guessed it, with a Cricut! This fun and easy project is perfect for adding a personal touch to your outdoor space.
You will need:
- Cricut machine
- Outdoor fabric
- Iron-on vinyl
- Garden flag stand (optional)
Step One: gather your materials. You can find all of these items at your local craft store.
Step Two: Cut your fabric to size. I used an 18”x24” piece of fabric.
Step Three: Iron on your design. I used a pre-made design, but you can also create your own using the Cricut Design Space software.
Step Four: Attach to garden flag stand using hot glue or sewing. And that’s it! You now have a beautiful, custom garden flag to enjoy.
What do you need to make a garden flag with a Cricut?
To make a garden flag with a Cricut, you’ll need the following supplies:
- Cricut cutting machine
- Garden flag template
- Iron-on vinyl in your desired colors
- Weeding tools
- Ruler or measuring tape
- Scissors
Then start by following these steps:
Cut your garden flag template out of iron-on vinyl. Weeding away the excess vinyl from your design. Place the weeded design on your flag. Iron on the design according to the instructions on your vinyl packaging. Hang up your new garden flag and enjoy!
What designs can you make with a Cricut for a garden flag?
The options are really endless when it comes to designing your garden flag with Cricut. You can choose from a variety of pre-made designs or create your own custom design. Some popular garden flag designs include:
- Flowers
- Butterflies
- Birds
- Personalized monograms
- Seasonal and holiday themes (e.g., pumpkin for Fall, Santa for Christmas)
If you need some inspiration, you can check out Cricut’s Design Space library which has thousands of different images, fonts, and projects to choose from.
How durable is a garden flag made with a Cricut?
The durability of your garden flag will depend on the type of fabric you use. If you use a high-quality, durable fabric, then your flag should last for several seasons. However, if you use a cheaper, less durable fabric, then your flag may only last for one season.
To prolong the life of your garden flag, we recommend storing it in a cool, dry place when it’s not in use. This will help to prevent fading and damage from the elements.
What are some tips for making a garden flag with a Cricut?
If you’re looking to make a garden flag with a Cricut, there are a few things you’ll want to keep in mind. First, you’ll need to choose the right design. There are a ton of great Cricut designs out there, so take your time and find one that matches your style.
Once you’ve found the perfect design, it’s time to start cutting! When cutting your garden flag, be sure to use the correct settings on your Cricut machine. If you’re not sure what settings to use, consult the manual or ask a friend who is familiar with Cricuts.
After your flag is cut out, it’s time to add some embellishments. This is where you can really let your creativity shine. Consider adding some ribbon, buttons, or even fabric paint to really make your garden flag stand out.
Once you’re finished embellishing, it’s time to proudly display your flag! Hang it from a pole or post in your garden and enjoy the fruits of your labor.
What kind of materials do you need to make a garden flag?
To make a garden flag, you’ll need:
- A Cricut cutting machine
- Fabric in your desired pattern or color
- Garden flagpole kit
- Iron-on vinyl in your desired color
- Scissors
- Ruler or measuring tape
Next, you’ll want to measure and cut your fabric to the correct size. Garden flags are typically 12 inches wide by 18 inches tall. Once you have your fabric cut to size, it’s time to move on to cutting the vinyl.
Cut a piece of vinyl that is slightly larger than your fabric. This will give you some room to work with when applying the vinyl to the fabric.
Now it’s time to apply the vinyl to the fabric. Start by peeling off the backing of the vinyl and placing it on the fabric. Use a ruler or something similar to smooth out any wrinkles or bubbles.
Once the vinyl is applied, you can trim off any excess material. Now you’re ready to add your garden flagpole kit and display your beautiful new flag!
Is it difficult to make a garden flag using a Cricut?
It’s actually not difficult at all! With Cricut, you can easily design and cut out a flag using any image or design you want. Plus, Cricut makes it easy to change the size of your flag so it’s perfect for any garden.
Here are the steps you need to take:
- First, gather your supplies. You’ll need a piece of fabric (I like to use burlap), scissors, and a Cricut machine.
- Next, open up the Cricut Design Space software and choose the “Create New Project” button.
- Then, select the “Upload Images” button and upload the image or design you want to use for your flag.
- Once the image is uploaded, select the “Use as Pattern” button. This will make it easy to resize and cut out your flag.
- Finally, select the “Cut” button and choose the fabric setting. Then, just follow the prompts to cut out your flag!
How can I make my garden flag look more professional?
There are a few things to do to make the garden flag look more professional:
- Use high quality materials. This will make a big difference in the overall look of your flag.
- Take your time with the design. A rushed or sloppy design will be immediately apparent.
- Be careful with the finishing touches. Make sure all the edges are clean and straight, and that any appliqués or embellishments are firmly attached.
With a little care and attention to detail, you can create a beautiful garden flag that will be the envy of your neighbors!
Can I use other materials to make my garden flag besides vinyl?
Yes! You can use other materials like polyester, cotton, iron-on, or even paper. However, we recommend using vinyl because it’s more durable and will last longer outdoors.
To make a garden flag with Cricut, you’ll need:
- A Cricut cutting machine
- Vinyl (we recommend outdoor vinyl)
- Transfer tape
- Flagpole (you can find these at most hardware stores)
- Scissors or a weeding tool
If you’re using iron-on, you’ll also need an EasyPress or heat press. We don’t recommend using a household iron because it likely won’t get hot enough to properly adhere the material to your flag.
Once you have all of your supplies, you’re ready to get started!
If you’re using paper, we recommend using cardstock so it’s more durable. However, regular printer paper will work in a pinch. Just keep in mind that it might not last as long outdoors.
What is the longest lasting flag material?
The longest lasting flag material is polyester. Polyester flags are more durable than nylon flags and can withstand harsh weather conditions better. They are also less likely to fade in the sun.
If you want a garden flag that will last for years, choose one made from polyester. The next most durable is nylon, but it will not last as long as polyester.
Which is better a nylon or polyester garden flag?
Nylon is going to be the best choice for most people. Polyester is almost always the most expensive, yet it’s also the heaviest and usually the most durable. Polyester flags will fade more quickly in direct sunlight and they are not as strong so they are more likely to tear.
If you live in an area with high winds, you might want to consider a heavier material like polyester so your flag doesn’t blow away. Overall, nylon is the better choice for most people.
Useful Video: Cricut – DIY Burlap Garden Flags – How to apply Iron-On (HTV) on Burlap
Conclusion
In conclusion, making a garden flag with your Cricut machine is a fun and easy project that you can do in the comfort of your own home. With just a few simple supplies and some easy-to-follow instructions, you can create a beautiful garden flag that will add some personality and charm to your outdoor space. So grab your Cricut machine and get started on this fun project today!
Thanks for reading!
References:
- https://blog.gardeningknowhow.com/trends/how-to-use-garden-flags-for-seasonal-interest/
- https://specialheartstudio.com/how-to-use-your-cricut-to-make-a-personalized-garden-flag/
- https://diydanielle.com/diy-garden-flag/
- https://www.craft-e-corner.com/blogs/project-inspiration/delightful-spring-garden-flags-using-cricut-iron-on
- https://www.prettyhandygirl.com/diy-garden-flags-season/